2022
Page History
...
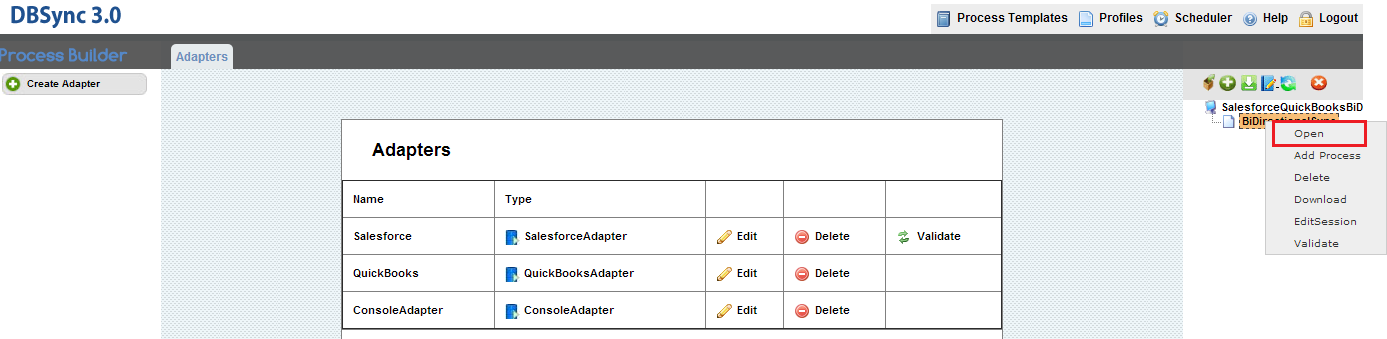
2. After naming the new process, right click on the process name under the Navigation bar and select the “open” option as shown in the screenshot below:

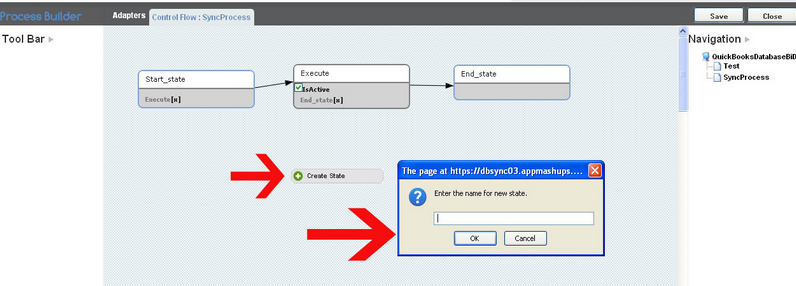
3. Upon opening the process flow map, click on the “Create State” icon on the left side of the application under the “Toolbar” menu as indicated by the red arrow in screen shot (below):


4. Next, Drag and Drop the “Create State” icon anywhere on the canvas (the canvas is the area known as the “Control Flow”) to create a new action as illustrated in the screen shot(below). A dialog box will also appear with the message “Enter the name for new state” Enter a name for the action that fits your business process.

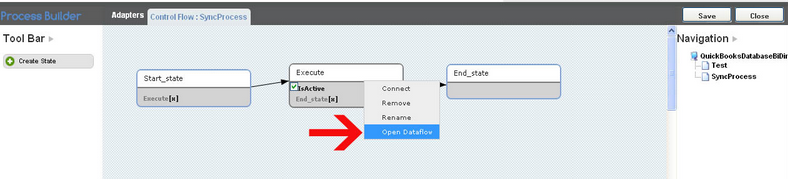
5. After naming the State that you created, the administrator or user can map their data flow by double clicking on the Action (aka state) that they created or by right clicking on the Action and selecting the “open data flow” option as shown in the screen shot below:

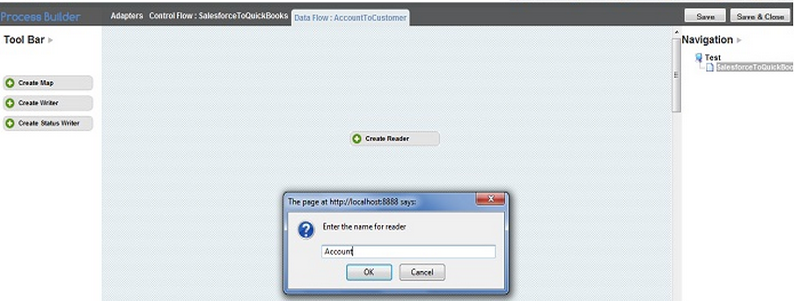
6. Drag and Drop on the canvas “Create Reader”, “Create Map”, “Create Writer”, or “Create Status” to specify the task.
Note: The moment you try to drop the reader, map, writer or status on to your canvas you will be prompted to 'Enter the Name'. Until you enter a name, the user or administrator cannot proceed further.

7. You can read the data once and create multiple mappings for it. The user or administrator needs to provide the settings for the “writer” and then perform the “mappings”. Only when the “reader” and “writer” is configured will the “Mapping” screen shows you the metadata of the reader and writer objects specified.
...
Overview
Content Tools