2022
Page History
...
Microsoft Dynamics CRM Online to QuickBooks Bidirectional template provides integration between QuickBooks and Microsoft Dynamics CRM Online. The integration solution is defined as a process within the DBSync profile as follows.
Microsoft CRM | QuickBooks |
Accounts and Contacts as | Customer |
Products as | Items |
Opportunity as | Jobs |
Invoice as | Invoice |
Order as | Sales Order |
...
The data flow from MS CRM to QuickBooks is as shown in the below table.
Microsoft CRM | QuickBooks |
Account/Contact | Customer |
Opportunity | Jobs |
Product | ItemService,ItemInventory,ItemNonInventory |
Invoice | Invoice |
Order | Sales Order |
The data flow from QuickBooks to MS CRM is as shown in the below table.
QuickBooks | Microsoft CRM |
Customer | Accounts |
Customer | Contacts |
Jobs | Opportunity |
ItemInventory | Products |
ItemNonInventory | Products |
Invoice | Invoice |
Sales Order | Order |
...
- Download the DBSync Microsoft CRM-Quickbooks solution package from the following URL.
https://dbsync01.appmashups.com/appmanager/library/DBMSQB_1_0.zip
...
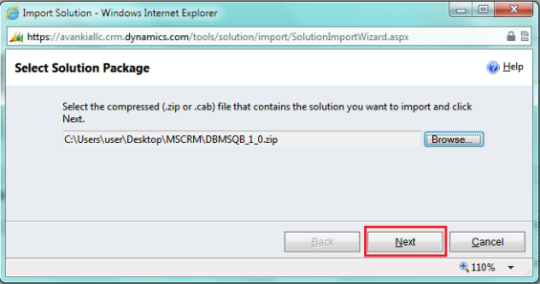
- Upload the zipped "DBMSQB_X.zip" solution package to your Microsoft CRM Online instance as shown.
- Settings* — Customizations — Solutions — Import.
- Browse for the location on your hard drive where "DBMSQB_X.zip" was downloaded and click on Next as shown.
- Once the Solution Package is uploaded to your MS Dynamics CRM Online instance, you should be able to see the same in the Solutions list as shown below. Click on Publish All Customizations button to commit all the changes done to your MS CRM instance.

- After a successful import of the solution package, you will find a section called "DBSync" within Account, Contact, Opportunity, Invoice and Order objects with custom fields that are essential for the Integration process.
Note:
Out of the box DBSync supports Products/Items in a flat structure and not in Hierarchy as Products in Microsoft CRM does not support a Hierarchical structure. Please look at our Knowledge base for steps for handling hierarchies in Items from QuickBooks.
DBSync Setup
- Login into into www.mydbsync.com and and click on on Customer Login.
- Enter your DBSync DBSync User Name and and Password and and click on Login.
- Once logged in, click on on "My home" tab tab from the menu and click on on Launch button button.
- You will be re-directed to DBSync profile page.
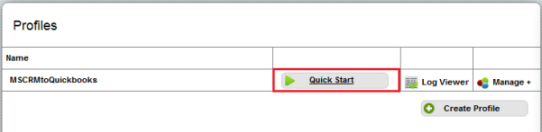
- Click on Quick Start button to navigate to the configuration window as shown.
...
- Select MSCRM adapter from the top left hand column of the Quickstart window.
- Enter your Microsoft CRM username and password. Make sure you modify the "endpoint" url according the Project MSCRM Online & Intacct, click on the Connectors button on the left panel.
- You will see connectors MSCRM & Intacct.
- Click on MSCRM Connector, enter your Microsoft CRM username and password. Make sure you modify the "MSCRM Soap URL" according to the domain name provided to you by Microsoft at the time of registration for Microsoft Dynamics CRM Online application. A sample example is shown below.
Endpoint : https MSCRM Soap URL : https:// (https://**)<Your Microsoft CRM URL>%2A%2A/)<<server_name>/XRMServices/2011/Organization.svc
- In the above example, your Microsoft CRM URL server_name should be prefixed in place of the default value.
- If you are using proxy server enter the other details Proxy Port URL, Proxy Username, Proxy Password & Domain.
- Scroll down to the bottom of the section and click on on Validate button Connection button to validate your Microsoft CRM credentials & click on Save.
Intacct Setup:
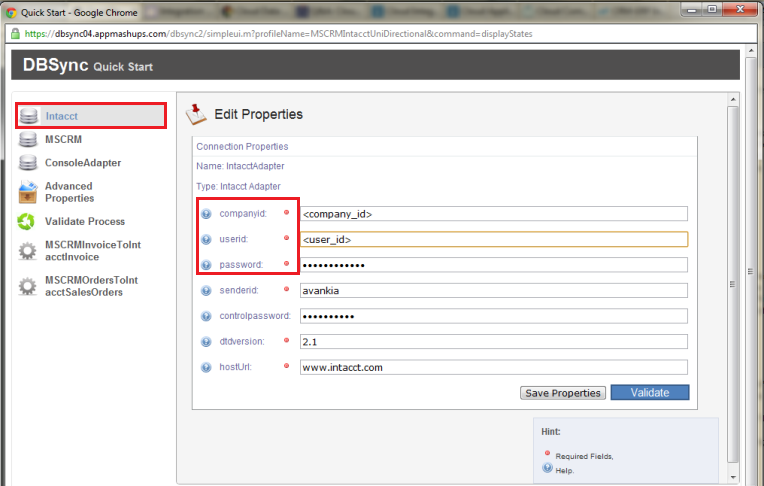
- Navigate to Quickstart window as described in the above section. Click on Quickbooks adapter on the top left hand side of the Quickstart window.
- Under Intacct adapter section, fill up companyid,userid and password sections.
- Click on Save Properties first Login into www.mydbsync.com and click on Customer Login.
- Enter your DBSync User Name and Password and click on Login.
- Once logged in, click on "My home" tab from the menu and click on Launch button.
- Click on the Project MSCRM Online & Intacct, click on the Connectors button on the left panel.
- You will see connectors MSCRM & Intacct.
- Click on Intacct Connector, enter all the required details like companyid,userid, password, Sender Id (default value: avankia), Location Id, Client Id, Control Password, DTD version (default value: 2.1), Host URL (default value: www.intacct.com).
- Click on Save and Validate button to save and validate your Intacct credentials.
- At this point, you have configured your DBSync profile to connect with your MSCRM Online instance and Intacct account.
Running the Integration:
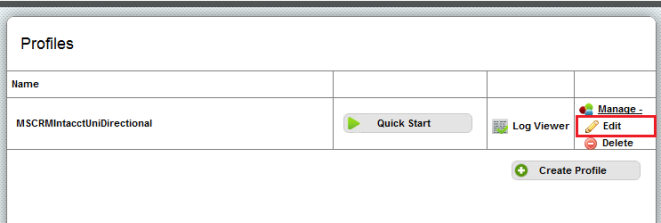
- Navigate to DBSync profile page by clicking on the Profiles from the menu.
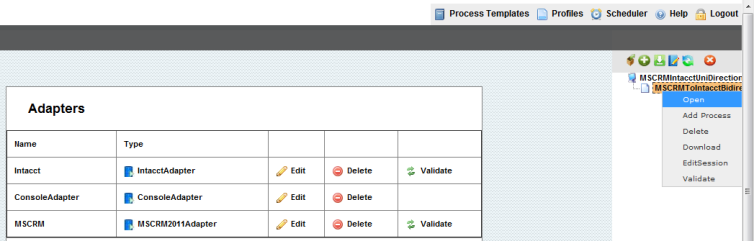
- Click on Manage --> Edit as shown below.
- Open the MSCRMtoIntacctBiDirectional process by either double-clicking on it or by right-clicking on the process and selecting Open as shown below.
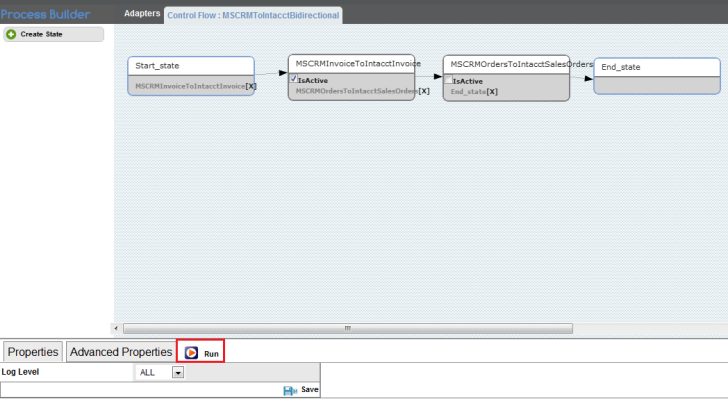
- Once you navigate to Process-Builder page, initiate the integration process by clicking on Run button as shown below.
- Login into www.mydbsync.com and click on Customer Login.
- Enter your DBSync User Name and Password and click on Login.
- Once logged in, click on "My home" tab from the menu and click on Launch button.
- Click on the Project MSCRM Online & Intacct.
- Click on the button Run Now to run the integration.
- You can also run the integration by clicking on the Run Now button in the specified process.
- Schedule button can also be used to schedule the integration.
Profile Setup
Microsoft CRM
Configuration | Instructions |
Process Name | Name of the process definition file used for the integration |
Select Process File | Uploading a process file from an appropriate location on your local drive. |
Configuration | Instructions |
Username | <<Username>> |
Password | <<Password>> EndPoint |
MSCRM Soap URL | https:// (https://**)<Your Microsoft CRM URL>*/*<<server_name>>/XRMServices/2011/Organization.svc |
Transport.compression | True/False |
sid | As Applicable |
svc | |
Auth Type | Live ID |
ProxyHost | If you use a proxy server then enter the <<proxy ip or host>> |
ProxyPort | If you use a proxy server then enter the <<proxy port>> |
ProxyUserName | If you use a proxy server then enter the <<proxy username>> |
ProxyPassword | If you use a proxy server then ether the <<proxy password>> |
acceptGzip Domain | As Applicable |
sendGzip | As Applicable |
...
Configuration | Instructions |
Log Level | ALL (It is recommended to set the Log Level as "All") |
...
|
Overview
Content Tools