Importing Data
Data import can be done either by using Data Loader or Import Wizard. For most situations, Import Wizard works in case you don't have hierarchies in GL Account or Item list.
When to use Data Loader
Only when you want to import data with Hierarchy.
Data Import using Import Wizard
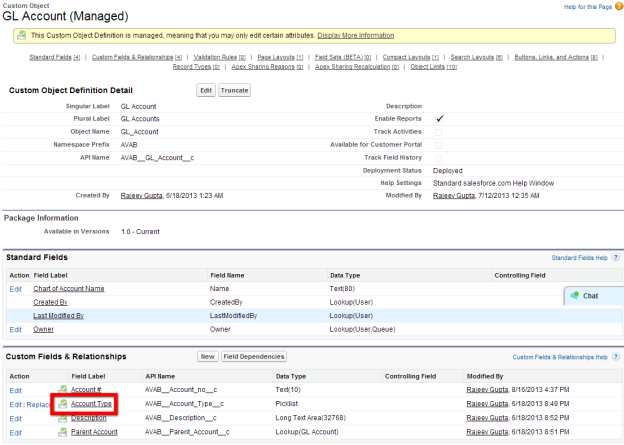
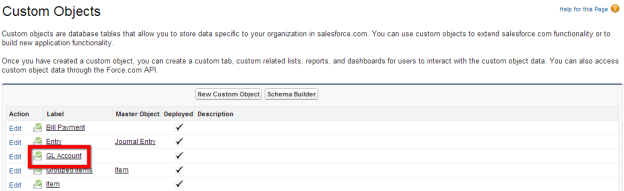
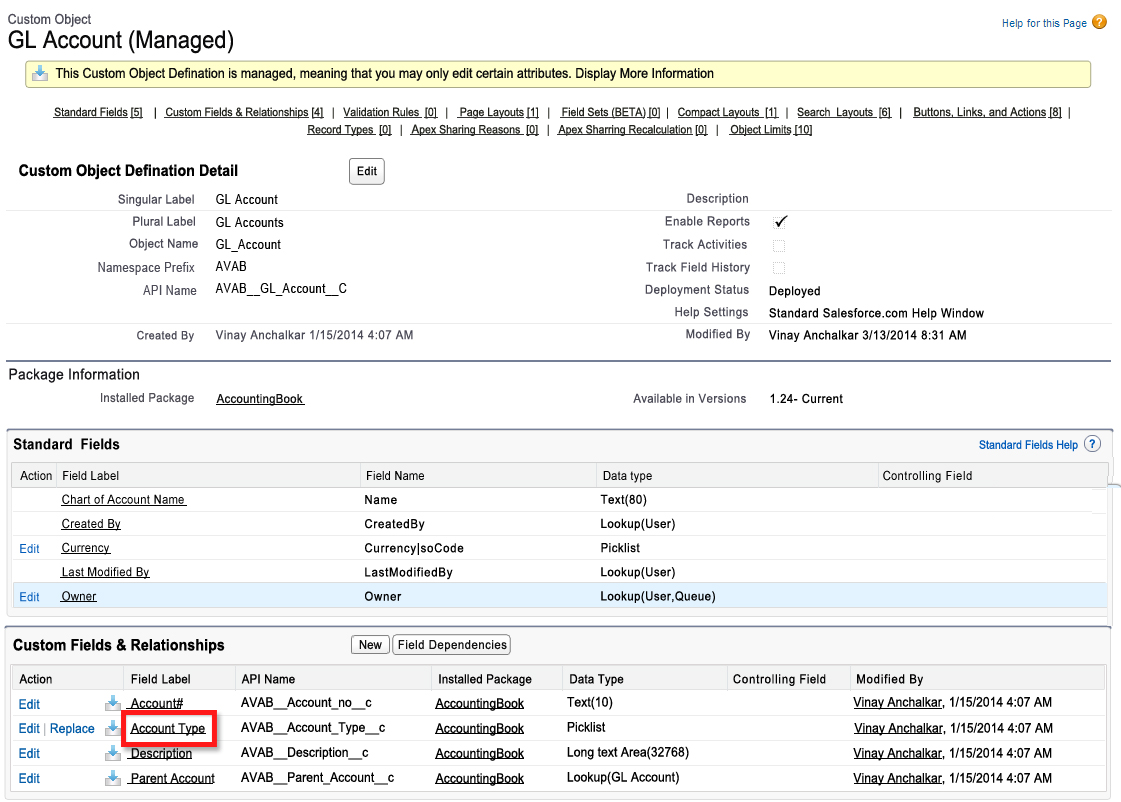
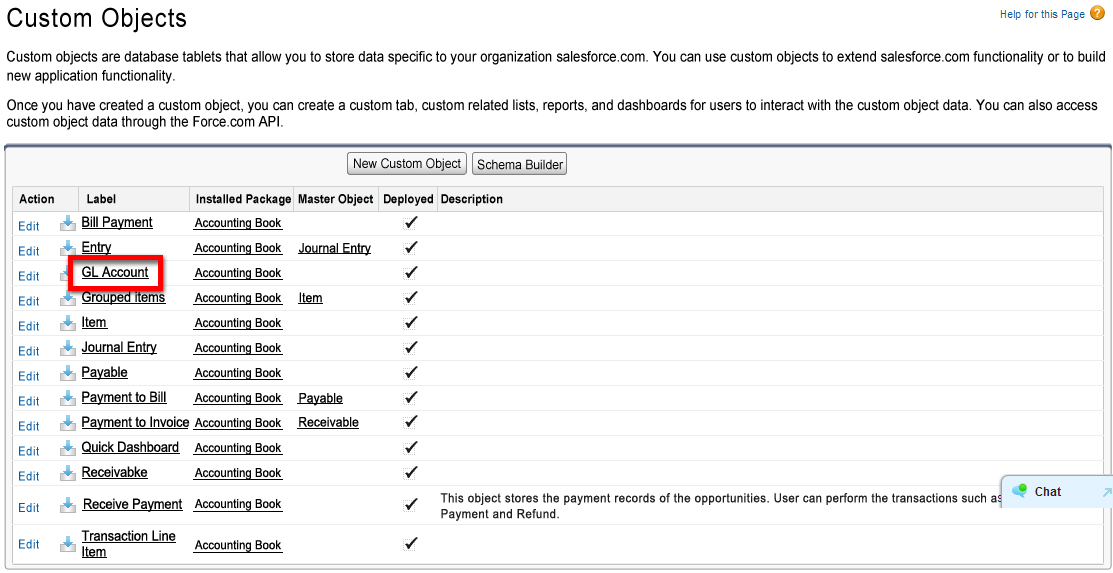
GL Account
Prepare your file
- Create a CSV file with the following fields
- Account Name
- Account Number
- Type
- Balance
- Description
- Fill each columns with the related data
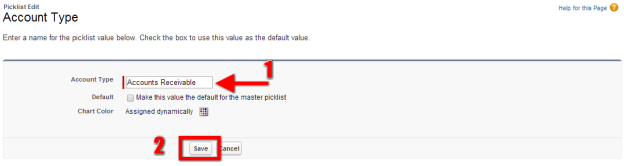
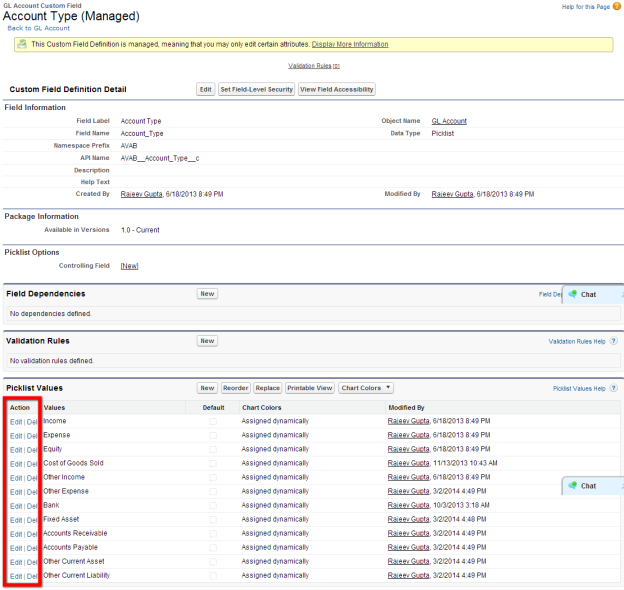
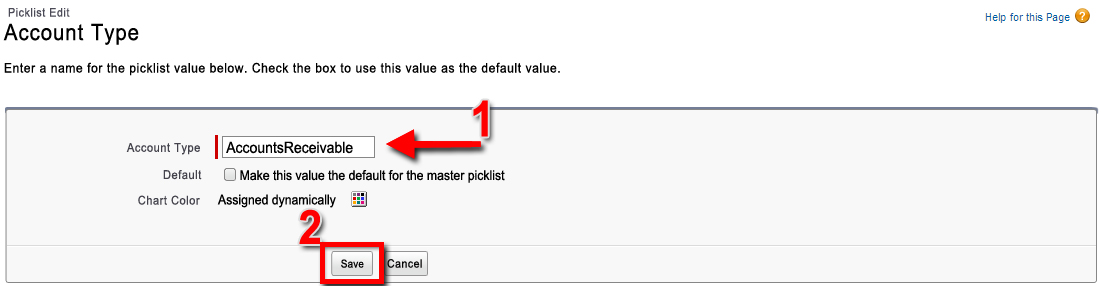
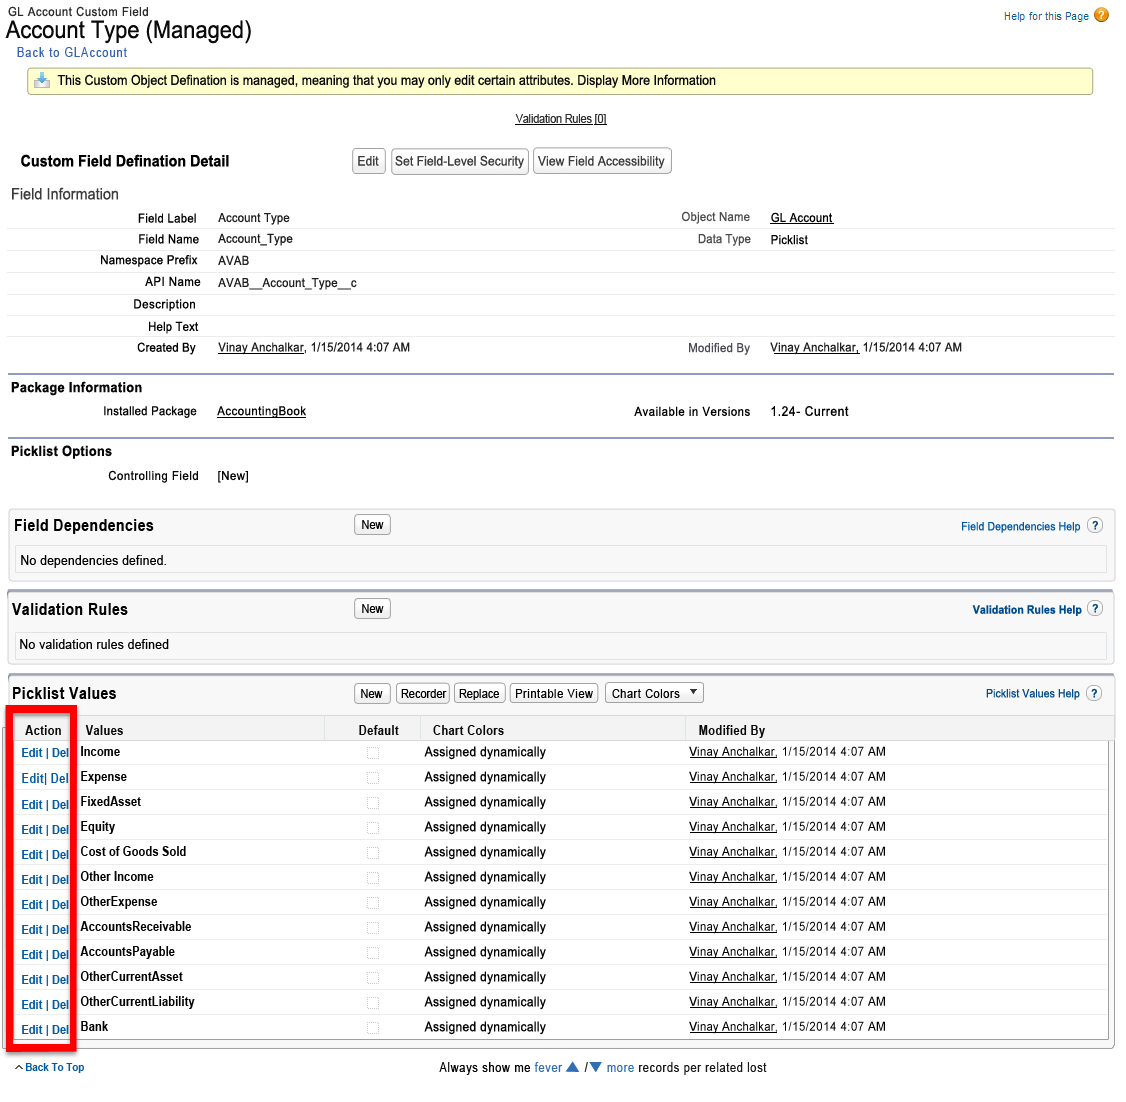
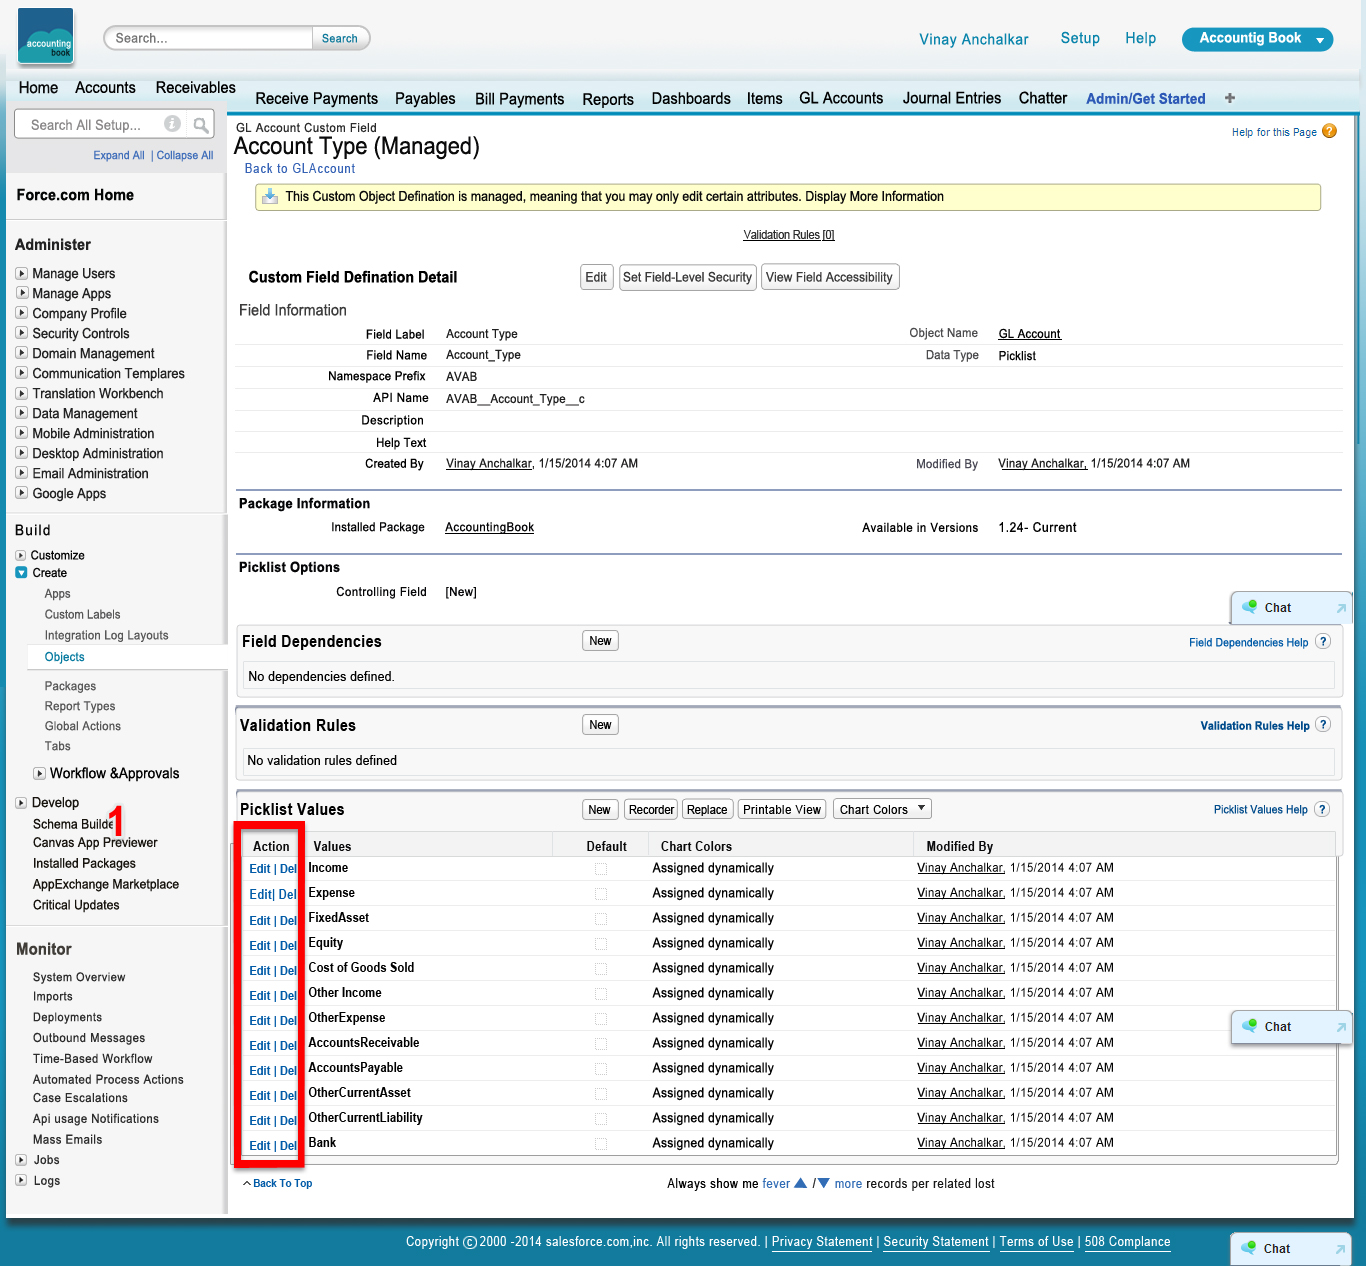
Make sure the Type field matches to the Picklist Value of "Account Type" is AccountingBook. The values are:
Account Type Values
Income
Expense
Equity
Cost of Goods Sold
Other Income
Other Expense
Bank
Fixed Asset
Accounts Receivable
Accounts Payable
Other Current Asset
Other Current Liability
Import data
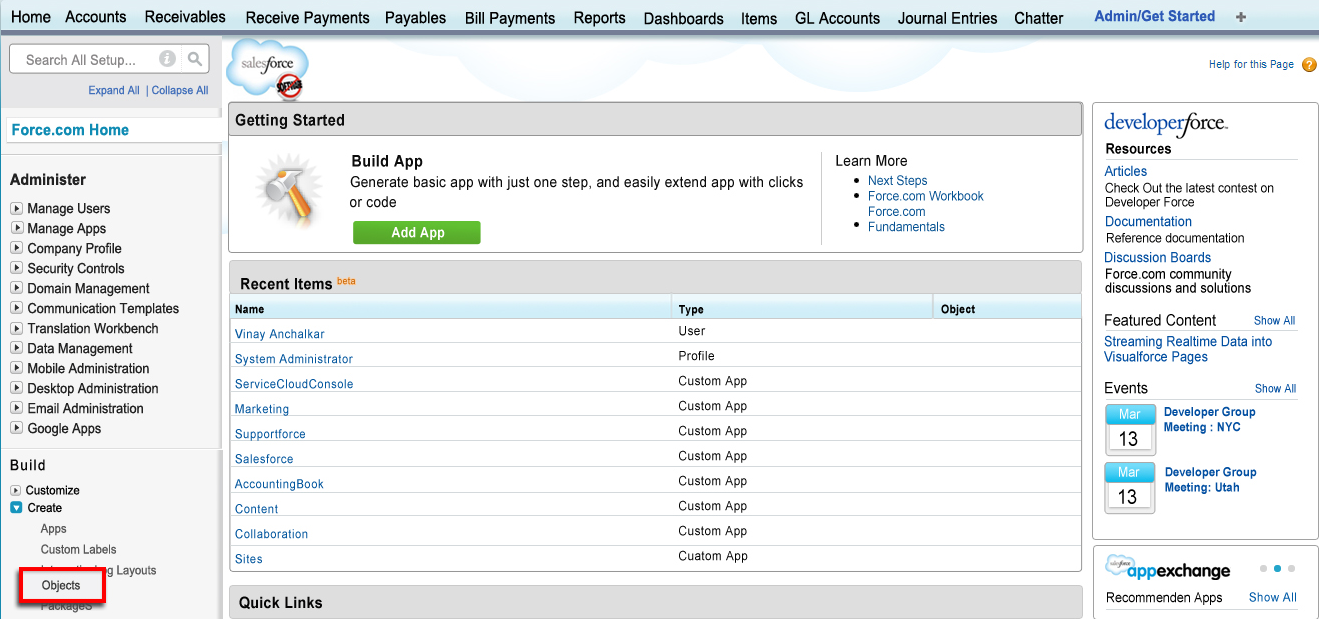
- Go to Setup -> Data Management (Left nav) -> Import Custom Object -> Start Import Wizard
- Follow steps to map your CSV fields to the GL Account Fields
- Import all data
In case there are hierarchy involved, you can use Apex Data Loader to import the date. See Importing GL Account using Data Loader for more details.
The steps for importing hierarchical data is as follows -
- Add all Parent GL Accounts
- Export all GL Accounts with Parent Salesforce Ids
- Update your CSV import files and add a column "ParentAccountId". Update the ParentAccountId field with the related Ids. In Excel, you can use VLOOKUP to relate parent accounts
- Use data loader to upload all records, make sure you have added the ParentAccountId to point to the Parent GL Account field
- Repeat for each level of GL Accounts
Items (Products)
Prepare file
- Create a CSV file with fields in Item Custom Object
- Name
- Type as
- Service
- Inventory
- Payment
Discount
Group
Sales Tax Item
Sales Tax Group
Other Charge
Expense
Non-Inventory
Income Account
- Sales Price
- Sales Tax (Note remove any % sign in this field)
- Chart of Account (GL Account associated with the above Sales Tax) ** Required if this item is Sales Tax
- Purchase Price
- Vendor (Preferred Vendor) ** Required if its purchased through another vendor
- COGS Account ** Required if ts purchased through another vendor
- Asset Account ** Required if its Inventory Item
Import data
- Go to Setup -> Data Management (Left nav) -> Import Custom Object -> Start Import Wizard
- Follow steps to map your CSV fields to the GL Account Fields
- Import all data
Data Import using Data Loader (use when Hierarchy import is needed)
Item List
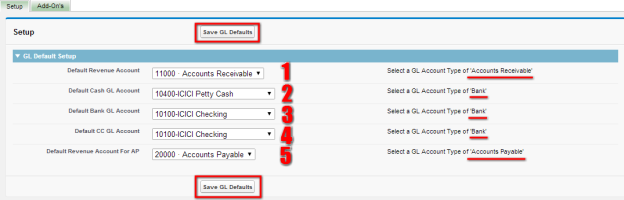
Configuration
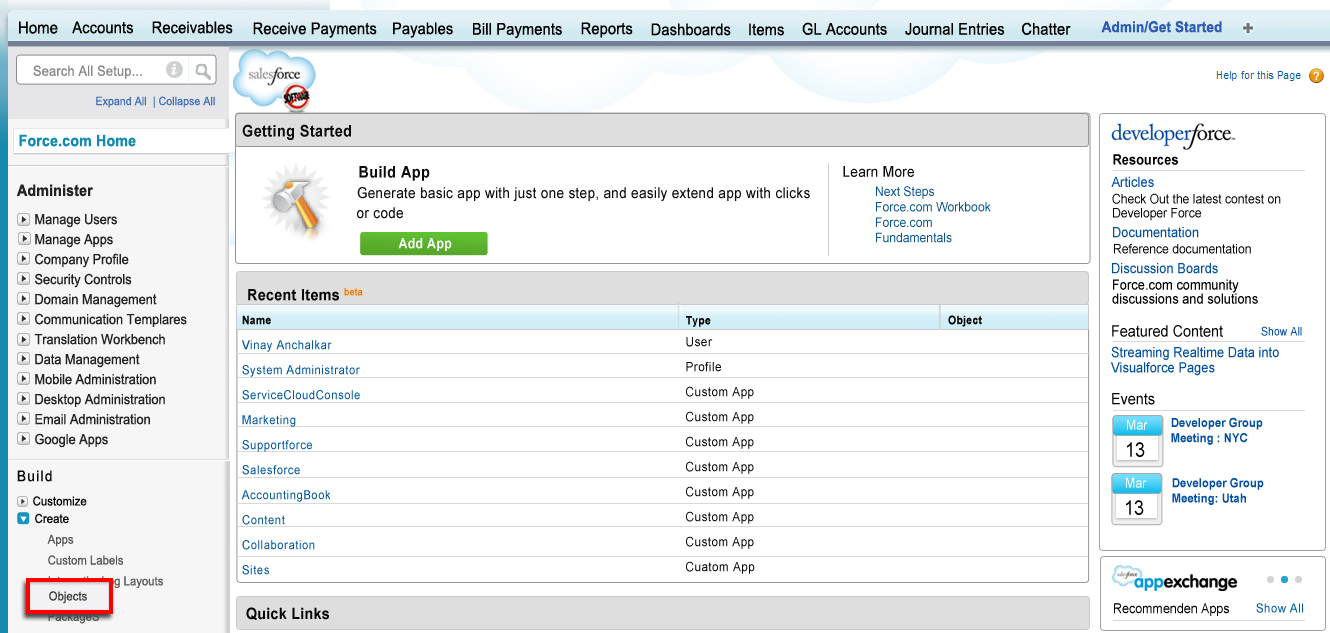
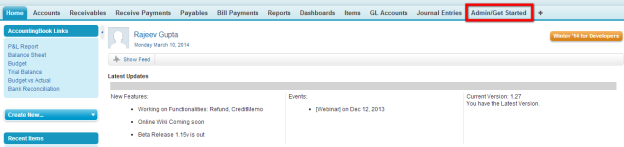
Click on Admin/Get Started object
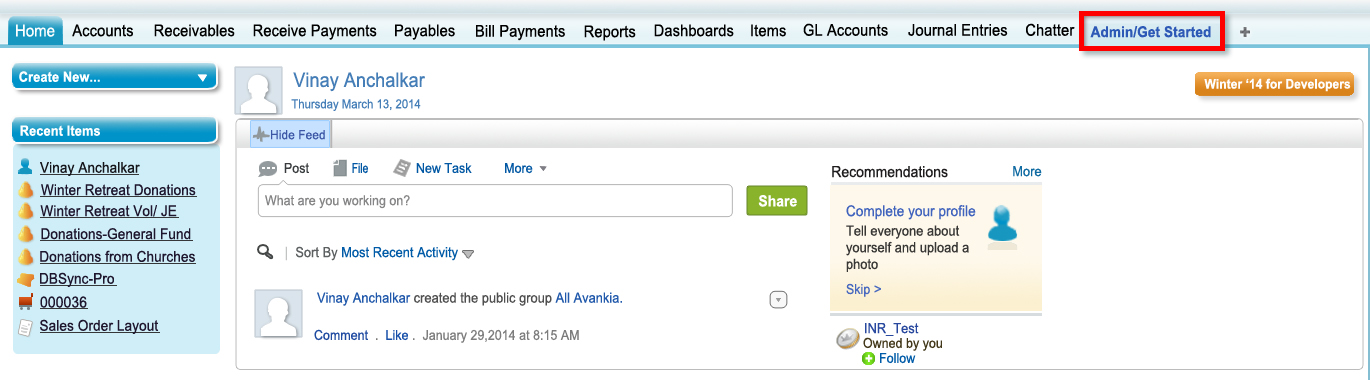
Select the appropriate accounts from the dropdown menu
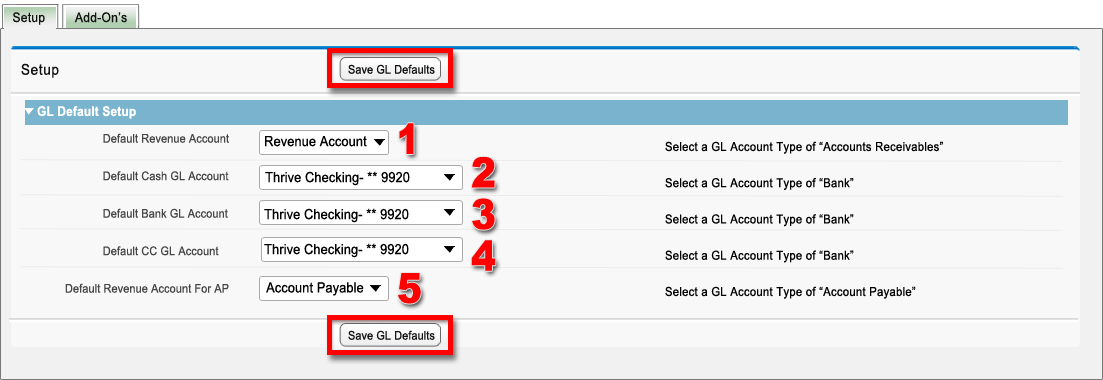
From the dropdown menu select the Default Revenue Account
From the dropdown menu select the Default Cash GL Account
From the dropdown menu select the Default Bank GL Account
From the dropdown menu select the Default CC Account
From the dropdown menu select the Default Revenue Account for Accounts Payable
Once you have Setup the defaults, click on the Save GL Defaults button.
Common Issues Found
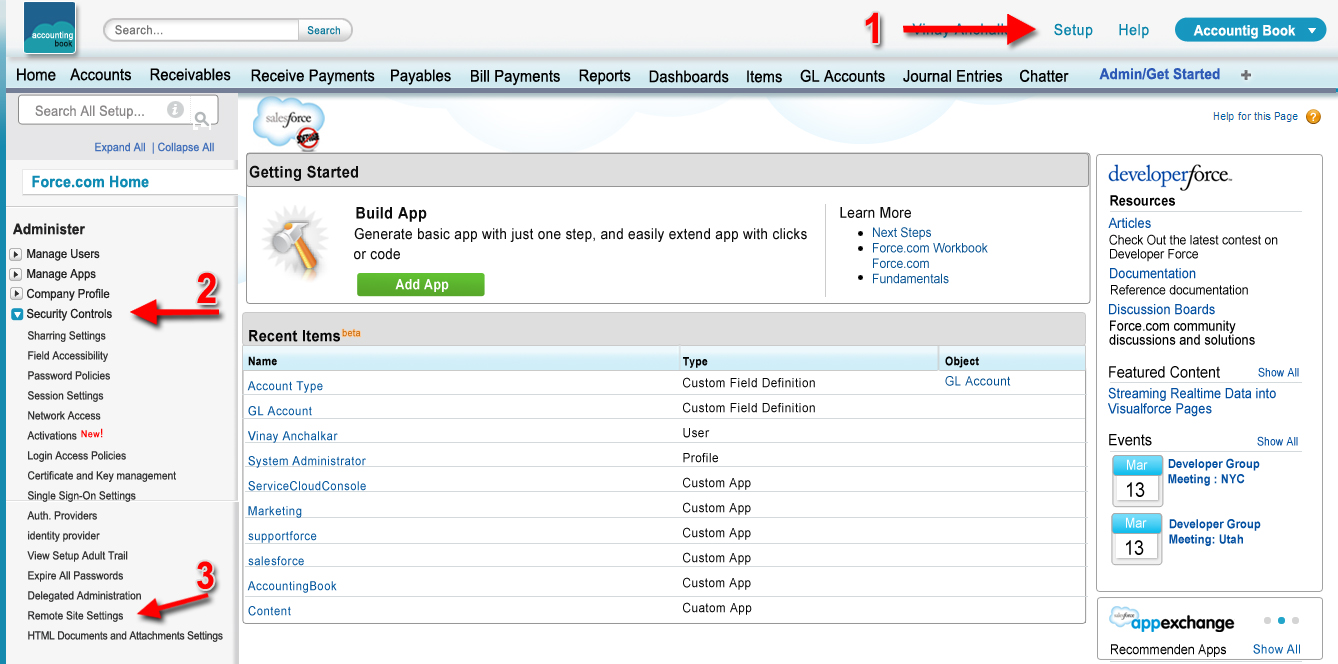
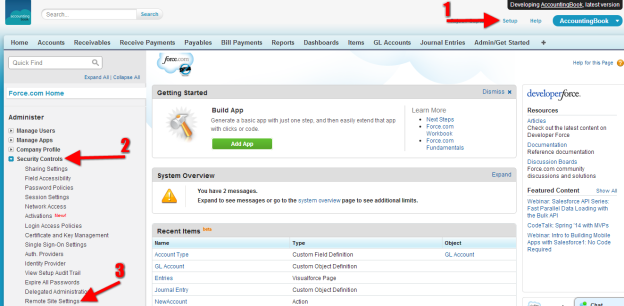
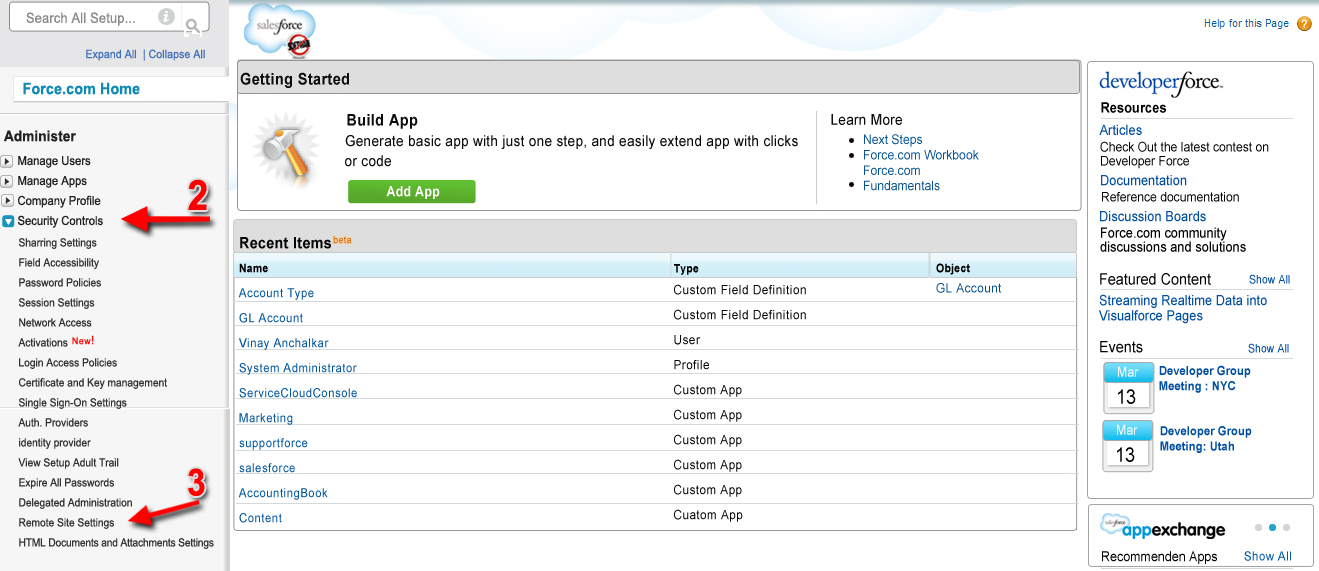
Remote Site Security Setting
What is "Remote Site Settings" ?
Goto Setup> under Security Controls Tab> Click Remote Site Setting.
In the new page click on the New Remote Site button
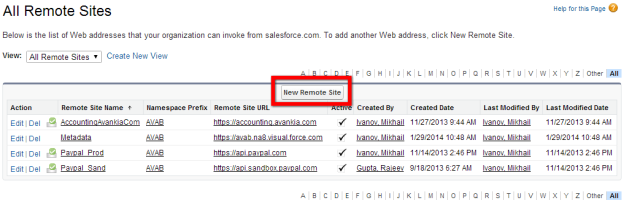
In the new page save the remote site settings by clicking Save button
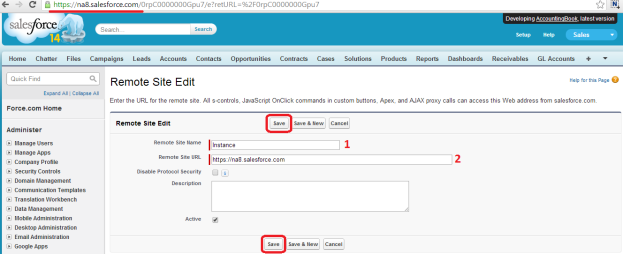
- Add that in Remote Security setting with name – "Instance"
- Copy the first part of the URL address to the Remote Site URL. Refer the underlined URL in the picture
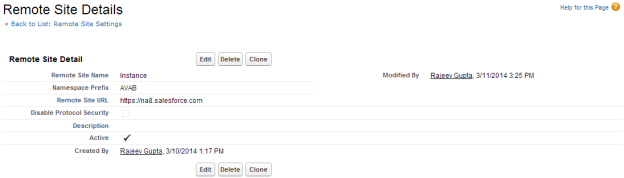
- Click on Save button, it looks as below once saved
Update Dynamics Page Layouts for Enhanced Data Entry Screens
Page Layout for Enhanced Entry Screens
One of the most requested features that we have in is a much better data entry screen for Receivable, Payable and Journal Entries. The data entry for standard force.com requires a lot of clicks and so we have created a module that makes it simpler for users to enter these documents.
Once the Remote site is added in the settings, the page layout needs to be retrieved. To do this, follow the below steps
- Click on the Admin/Get Started object, scroll down to Retrieve Page Layouts related detail and click on the button Retrieve Page Layouts
- Update Configurable Page Layouts
The module is a Visualforce component and the component can be re-configured or updated by clicking the "Retrieve Page Layout" button on Admin Setup. This retrieve all the Page layout and re-configures the Visualforce component.

On Clicking the button Retrieve Page Layouts the following page pops up and takes you back to the same page

Retrieve page layout updates page layouts for edit screens for Receivables and Payables objects to organize all the controls(Field) in one layout. Which enables to either add or remove the fields from the page layout.
QuickLinks to Accounting Functionality
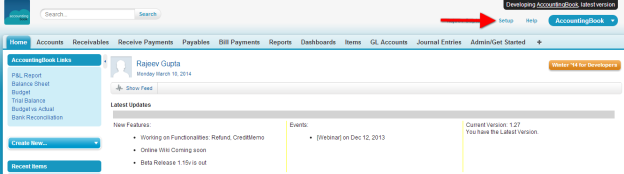
Enable Left side AccountingBook Links

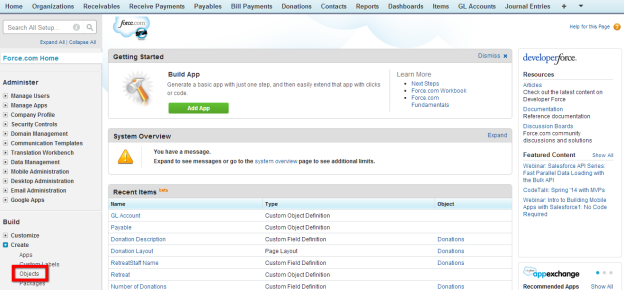
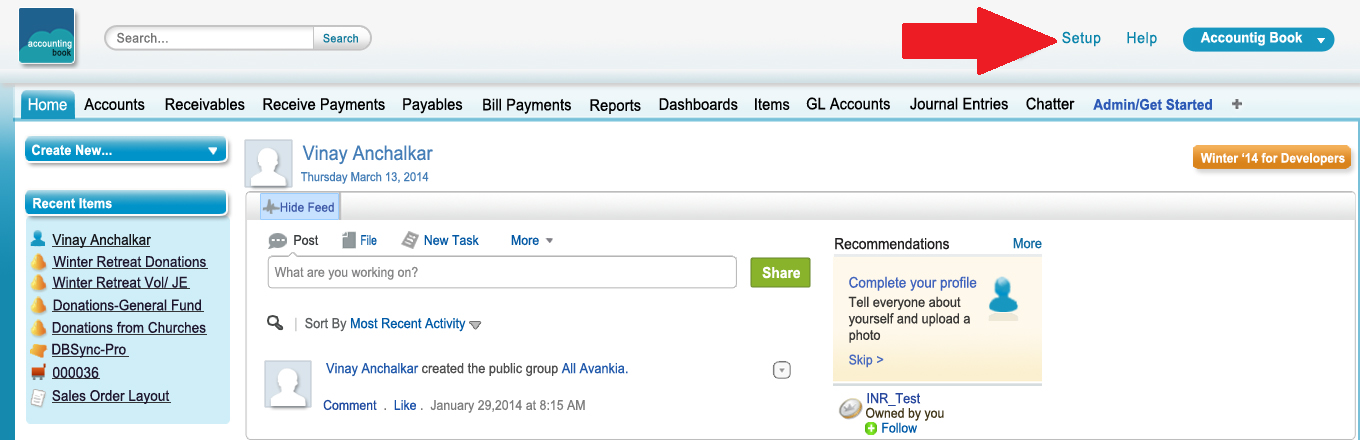
- Go to Setup menu
- Click on Customize
- Click on Home
- Click on Home Page Layouts, a new page opens
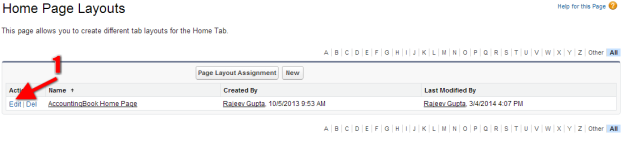
- Click on the Edit link to open a new page
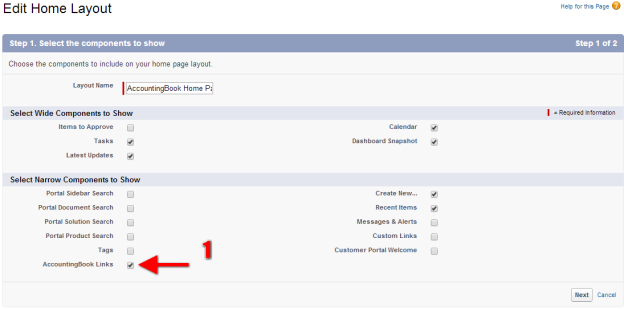
- Tick the check box and close the page. This will create a short cut in the AccountingBook home page. The links will take you to the statement of accounts. Refer picture below, each one is the link which will open up as described
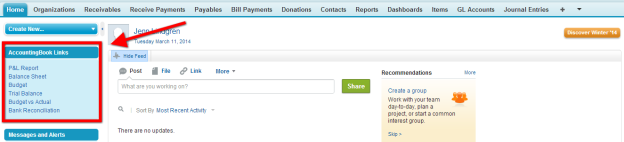
Congratulations, You have completed AccountingBook Setup !!!
Note: If you have any difficulty in creating new records, follow these steps:
- Enable the API Access to Third Party Users-
How do I enable API access in Salesforce?
API access must be enabled for your user(s) in Ebsta to connect to your Salesforce org.
Your Salesforce administrator controls your profile and permission sets.
Enable API Access in Salesforce by Profile
1. If you are the Salesforce administrator, go to Setup.

2. Go to Manage Users and click Profiles.

3. Click Edit against the specific Profile.

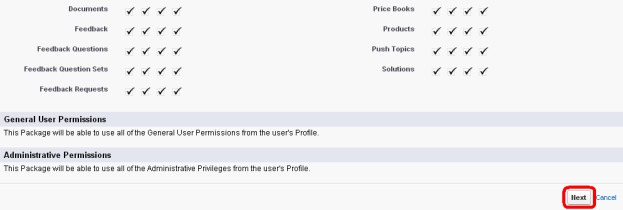
4. Scroll down to Administrative Permissions and check the API Enabled box.

5. Click Save.
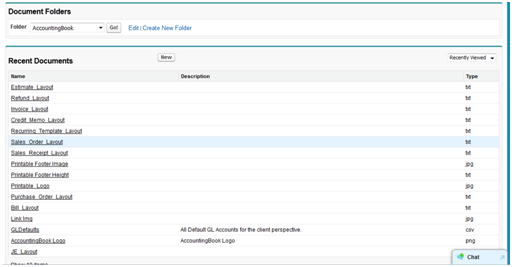
Do not change any AccountingBook related documents- In Document Object, you can see AccountingBook Folder. Do not change name of any AccountingBook Document.