2022
DBSync Replication tool facilitates Salesforce to Database Replication in three different modes as shown below. This section explains the steps involved in Salesforce to Database Replication
Run Process | Actions Performed |
Update Database Schema | Creates Salesforce schema into Database for the selected Salesforce objects. |
Salesforce to Database | Inserts a clean copy of selected Salesforce object records into respective Database Tables & Columns. |
Salesforce to Database | Performs an incremental sync from Salesforce to Database based on the changes / edits made in Salesforce. |
- DBSync Replication tool must be installed in your system. Step by step procedure for installation is shown in the topic Installation.
- DBSync Replication Console must be started. Step by step procedure to start the console is shown in the topic Start DBSync Replication Console.
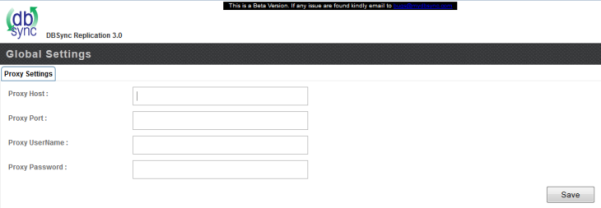
- Once you are into the Replication UI Console, you can configure the Proxy settings by clicking on Global Setting from the menu. Once all the Proxy credentials are entered, click on Save button to save the Proxy Settings.
- Once the Proxy settings are configured, you can use the default Replication Profile config and configure Salesforce and Database credentials accordingly. The screenshot below shows navigating to the default replication profile.

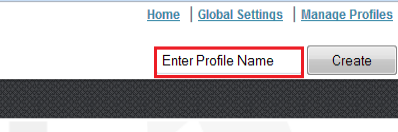
- If you want to create a new Profile, navigate to the Home page to create a new Replication profile. Enter the desired Name for your new Replication profile under Profile Name section and click on Create button to create a new Replication Profile.
- Click Manage Profiles from the home page to configure your Salesforce and Database credentials.
- On the Salesforce Details tab, enter your Salesforce login details as shown below. Click on Test Connection button to validate your Salesforce login details. Upon getting a success pop-up window, click on Save button to save your Salesforce login details.
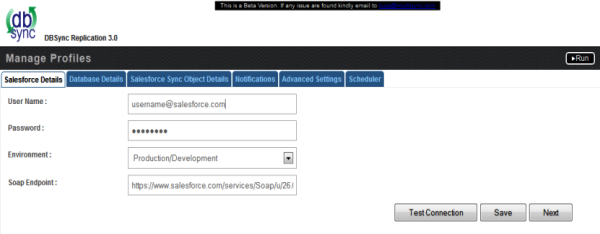
- Click on the next button to navigate to Database Details tab once all the Salesforce login details are validated and saved.
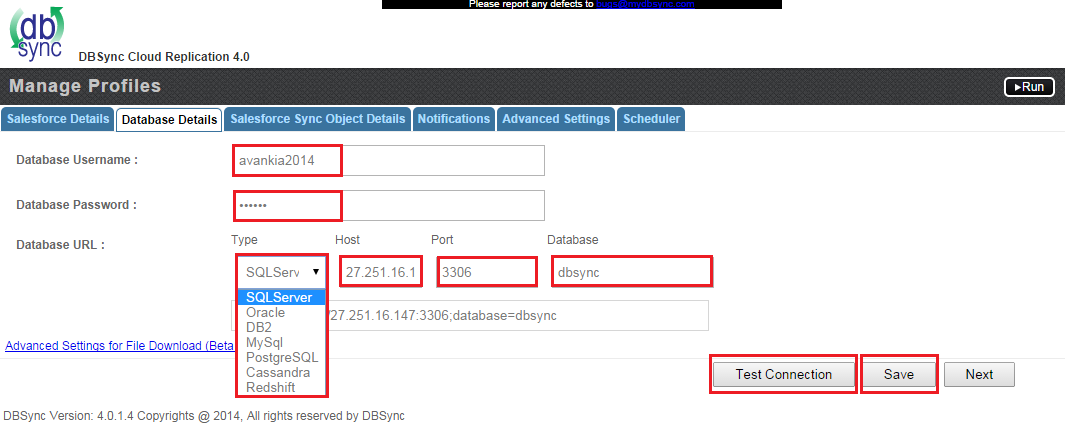
- On the Database Details tab, fill in all the necessary details and follow the same procedure for testing and validating your Database credentials.
Note: The database URL can also be entered manually if you know your database Connection string.
- While replicating with Cassandra, please refer the following wiki link for specific details on Replication with Cassandra. http://help.mydbsync.com/docs/display/CloudReplication/3+-+Big+Data+Support
- While replicating with Amazon Redshift database, please refer the following wiki link for specific details on Replication with Amazon Redshift. http://help.mydbsync.com/docs/display/CloudReplication/Amazon+Redshift
- At this point, both Salesforce and Database credentials are configured and saved for your Replication profile. You can navigate to the Salesforce Sync Object Details tab by clicking on Next button.
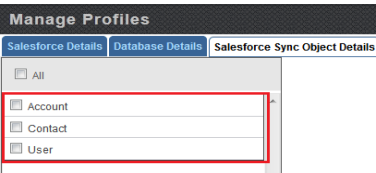
- In Salesforce Sync Details section, you can select the Salesforce objects you want to sync into Database from the left Objects section as shown below.
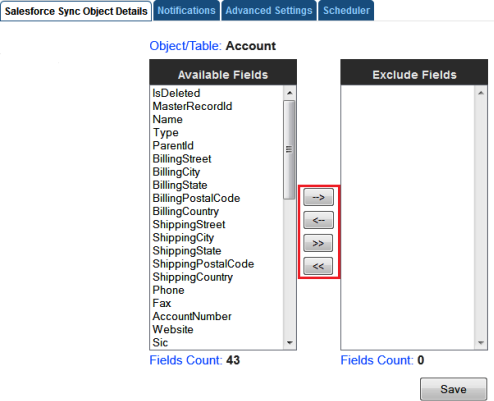
- Select a Salesforce Object from Objects section, select the object fields you want to sync into Database from the Available Fields section and use Exclude Fields section to filter out fields you don't want to sync into Database. Once completed, click on the Save button to save the configuration for the Salesforce object. Field selection is explained with the example in the topic Salesforce Field Selection.
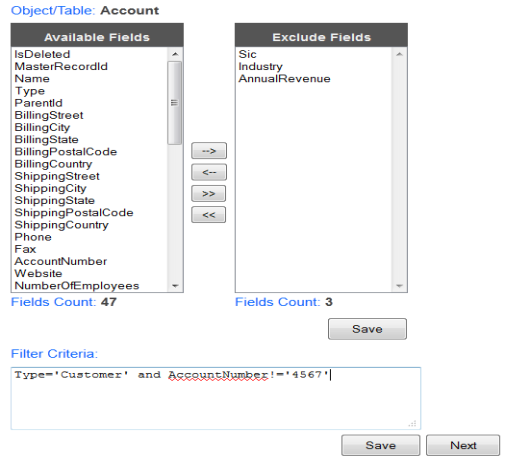
- You can also use Filter Criteria for adding filters to specific fields using basic SOQL operators. Once completed, click on the Save button to save the filter criteria and click on Next button to proceed to Notifications tab.
- In the Notifications tab, you can configure the tool to send sync notifications to the recipient email address and also use the Database for logging in Sync logs upon every sync.
- Enable the checkbox Enable Database Logging which will create a SFLOG__C table in your Database.
- Provide Recipient and Sender email address details under Email Recipients and Email Sender section respectively.
- Once completed, click on Next button to proceed to Advanced Settings tab.
- The Advanced Settings tab provides you an option to sync non-replicable Salesforce objects into Database. Mark the check-box as checked to sync non-replicable objects and click on Save & Next buttons to proceed further.
- At this point your Replication profile is ready to sync your Salesforce and Database applications as per configurations. Initiate the sync using the Run menu to select the required process to execute.

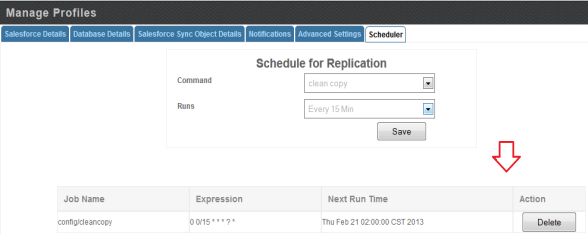
- You can also schedule the sync using the Scheduler Tab. Select the required Process from the Command dropdown and configure the frequency of the sync by selecting a desired duration from the Runs dropdown. The below screenshot illustrates configuring scheduler functionality.
Overview
Content Tools