2022
Page History
| Panel |
|---|
Upgrading to DBSync 4.23.91 ( On-Premise Version) |
Download the application
- Go to www.mydbsync.com, click on Customer Login. Enter your DBSync User ID and Password and click on Login button.
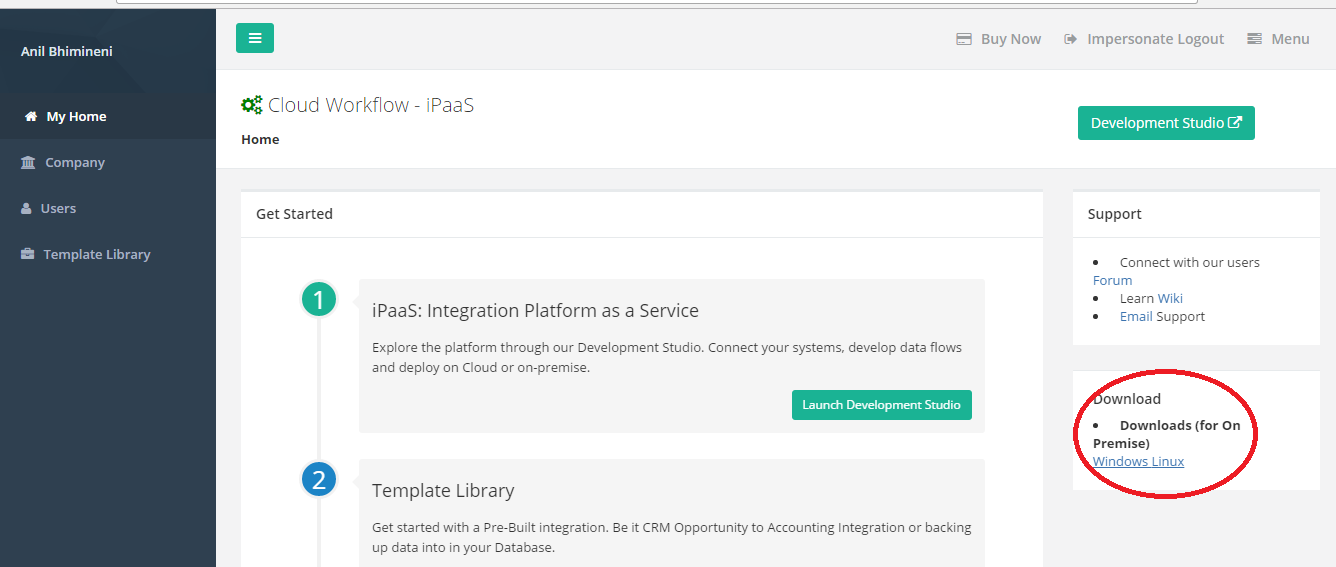
- Download The DBSync application from Download link on the right-hand side of the My Home page as shown below.
- Download the desired version of DBSync based on the Operating system, either Linux or Windows platform.
Backing up Your Current Projects
...
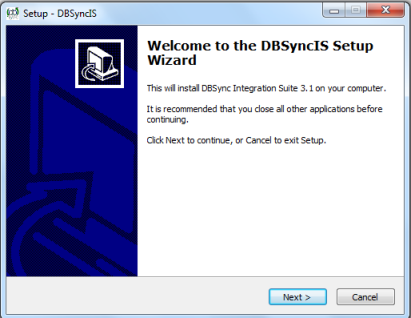
- Click on Next on the "Welcome to the DBSync Setup Wizard" window.
- Accept the License Agreement by selecting the option "I accept the agreement" and click on Next.

- The default windows path for DBSync installation is C:\ DBSyncIS31. If you want to use a different folder, click on the Browse button and select the desired location to install DBSync.

- Select the desired Start menu folder name or leave it unchanged to use the default folder and click on Next button. You can un-check the option below if you don't wish to create a Start menu folder.

- On the next window, select the check-boxes for Create Desktop Icon and Create a Quick Launch icon if you wish to have DBSync shortcuts on your desktop and click on Next button.

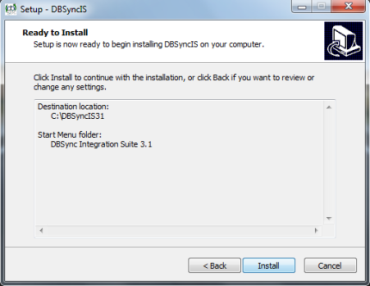
- Click on Install button to proceed with the installation. After clicking next you will be presented with installation progress window as shown below.

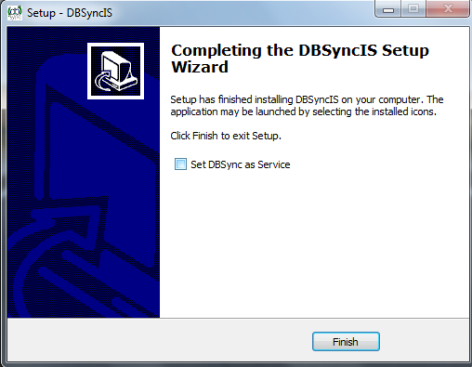
- Once the installation process is done you will be presented with a window with an option to set DBSync as service. If you wish to set it as a service, check the Check box "Set DBSync as Service" and click on Finish button as illustrated below.
- Once done with Installation, copy the backed-up "db" folder to your new DBSync installation to the folder "C:\DBSyncIS31\dbsync2\WEB-INF\conf\db". At this point, you have successfully completed your DBSync Upgrade on your Desktop.
...
- http://people.apache.org/~mturk/docs/article/ftwai.htmlhttp://people.apache.org/~mturk/docs/article/ftwai.html
| Panel |
|---|
Upgrading to DBSync 4.3.1 ( On Demand Version) |
Login with the valid DBSync credentials
...
Overview
Content Tools