2022
Page History
DBSync – This tutorial deals with implementing Database to Database Integration
integration using DBSync. The tutorial shows how data exchange can happen between 2 MYSQL databases.
Environment -
- Source : MYSQL Database.
- Target : MYSQL Database.
- DBSync : DBSync Enterprise OnPremise Edition.
- Setup your Database for Integration. For this Tutorial I will
...
- use MySQL Database Named "salesforce".
- Create tables "dbAccount" and "dbAccountNew" in Database with following script.
| Code Block | ||||||
|---|---|---|---|---|---|---|
| ||||||
create table `salesforce`.`dbAccount` |
...
( `AccountID` varchar(100) NOT NULL , |
...
`AccountName` text NOT NULL , |
...
`BillingStreet` text , |
...
`BillingPostalCode` numeric(20) , |
...
`AnnualRevenue` decimal(30,2) , |
...
`CreatedDate` date , |
...
`LastModifiedDate` datetime , |
...
`NumberOfOfficeLocations` int , |
...
PRIMARY KEY (`AccountID`) |
...
); |
...
create table `salesforce`.`dbaccountnew` |
...
(`AccountID` varchar (100) NOT NULL, |
...
`AccountName` varchar (300) NOT NULL, |
...
`BillingAddress` varchar (500), |
...
`AnnualRevenue` Decimal (50,2), |
...
`CreatedDate` datetime , |
...
`LastModifiedDate` datetime , |
...
`NumberOfOfficeLocations` int, |
...
PRIMARY KEY (`AccountID`) |
...
); |
...
- Enter some test data in "dbAccount" table. Go To www.mydbsync.com.
- Select Customer Login. Enter your
...
- Username and Password
...
(Note: If you are using hosted version of DBSync then after login Go to My Home and click on Launch Button in Console Area).
- In DBSync console click on Create profile Button, Enter Profile Name and click on Save Button.
...
- A new Profile will be created by given Name. In this tutorial I have used name Database2Database. The Profile will be listed in the profile area as shown below:
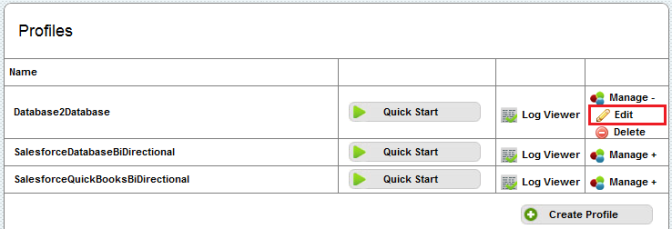
- Click on the Edit link on the right side of the profile Name. You will be redirected to the Process Builder window in the DBSync Console. Click the Create Adapter Button on the left hand side.
...
- Enter the Adapter Name, from AdapterType Drop Down Select Database Adapter and Click on Save Button.
...
- Adapter will be created and will be listed in the Adapter section of the Process Builder. Click on Edit link in front of the adapter name and you will be presented with properties for the Adapter at the bottom left of the window. Enter values for all the properties and click on Save Properties. Both the sections of the window are shown below sequentially.
...
- Click on Validate Link Next to Adapter Name. A message box is displayed; if the message says "Connection Settings are valid" you are good to go. Else Click on Edit and enter correct values for Adapter properties and repeat the steps. Click OK.
...
- Click on Add Process Icon on the Right side of the screen. Enter Process Name and Click on Ok. A new process will be created and listed under profile name on the right side of the screen.
...
- Double Click on the Process Name "DatabaseSync" to open the process in the Control flow for DatabaseSync States. The process will contain 2 States by default:
...
Wiki Markup Click on *\[X\]* icon on *Start_state* to delete the default control flow from *Start_State* to *End_state.*- Right Click\connect on Start_state followed by left click on Execute will create a control flow from Start_state to Execute. Right Click\connect on Execute followed by left click on End_state will create a control flow from Execute to End_state. All the control flows are displayed using arrows from one state to other state. Below you will find 2 screenshots one containing no control flow and second containing control flow as Start_state to Execute to End_state. Once done click on Save button at the top right corner of the window.
...
- Double click on Execute state to open data flow for Execute state. Drag the Reader button onto the data flow area and enter the Name for reader and click on OK Button. In this tutorial I am using "DBReader" as the reader name.
...
- Follow the same step for Create Map and Create Writer button. And you will get a data flow area as shown below in the screenshot. In this tutorial I have used "DBMap" for Create Map and "DBWriter" for Create Writer components.
- Reader: Reader is a process component that reads data from source "data source". Reading the data is also known as "Extracting" the data. Note one state can have only one Reader.
- Map: Map component converts data into the format that could be understood by writer and target data source. Converting the data so that it could be understood by target data source is also known as "Transforming" the data. Note One state can have more than one Map.
- Writer: Writer component writes the data to target "data source". Writing the data into a data source is also known as "Loading" the data. Note One State can have more than one writer.
...
- Right Click\Connect on DBReader followed by left click on DBMap will create a control flow from DBReader to DBMap. Right Click\Connect on DBMap followed by left click on DBWriter will create control flow from DBMap to DBWriter. All control flows will be displayed using arrows. A screenshot is shown below displaying the control flow after following the above process.
...
- Right Click\Properties on DBReader. The properties will be displayed in the bottom left area of DBSync Console. Select Database from Adapter Drop Down.
...
- Once Database Adapter is selected, a query builder section will appear in properties area and a lookup icon on the right side of query builder section. Click on lookup icon and you will presented with a query section will appear on the right of lookup icon. Query section will contain all the table listing from the database. Select the table and fields from the table to auto generate the query in query builder section. You can also write your own query. In this tutorial I will be selecting all the fields from "dbAccount" table. Click on save button once done. The screen shot is shown below:
...
- . Click Sign in. Then, click on Launch to access DBSync Project page.
- Click on Projects on the left panel. Then, click on Create New Project. Enter Project Name DatabasetoDatabase & Save.
- Click on the project DatabasetoDatabase. Then, click on Create New Process. Enter Process Name Database2Database & Save.
- Click on Connectors on the left panel. Then click on Create New Connector. Enter Connector Name Database1. Then, select Connector type* Database Connector* & Save.
- Click on the new Connector Database. Enter your Database details in Connector settings.
- Username, Password, Type, Host, Port fields should all be updated with your Database details - Note: Database URL will get updated automatically.
- Click Save. Then Validate Connection to confirm connection.
- Click on the process Database2Database. Then, click on Create New Workflow. Enter Workflow Name Execute & Save.
- Click on the workflow Execute. Here, you will see two sections: Trigger and Rules.
- In the Trigger section, you will see Query Builder, Advanced Query Builder and Properties. In Rules section, you will see a button to add a new rule.
- In this example, Advanced Query Builder is used to query. Click on Advanced Query Builder. Then, select the datasource as Database.
- Click on Switch to Advanced View. In Query Builder section type the following query and click on Save and Close.
Code Block Select AccountID, AccountName, BillingStreet, BillingPostalCode, AnnualRevenue, CreatedDate from dbaccount
- Go to the Rules section. Click on Add New Rule. Select target Connector, Operation, Target object and map - as per the requirement.
- In this example, Target Connector is database, Operation is Insert, target object is dbaccountnew.
- Operation can be insert, update or upsert. Insert: If this option is selected then, only new records from the source table will be pushed to target data source.
- Update: If this option is selected, it will update the target data source records with updated values in the source.
- Upsert: Upsert is a combination
...
- of insert
...
- and update.
...
- If this option is selected then, new data will be inserted in target data and old data will be updated with changed data.
...
- Click on
...
- Map. You will see a list of column names of target object dbaccountnew. You can map these columns to the required columns of source object dbaccount. You just have to drag the required column name from Schema and drop it in front of the required column name of source. In Schema, you will see the list of columns of source object.
- Validate Row remains "true". AccountID, AccountName and AnnualRevenue from target is mapped with the value of source columns AccountID, AccountName and AnnualRevenue respectively.
- Click Save and close.
- Go to process Database2Database. Make sure that status of workflow Execute is ON. Click 'Run Now' to run the integration.
- You will see the logs at the bottom in console section.
- If you go to target object dbaccountnew, you will see a list of records inserted from the source object dbaccount.
Overview
Content Tools