2022
Page History
...
Download the DBSync Linux zip file from the following URL
- httpDownload latest build
Command-
#wgethttps://
...
...
...
...

- The event manager of the Replication tool can be pointed to a specific directory with the following steps. The below command takes you to the directory path of the event manager of the DBSync Cloud Replication tool.

- The directory path of the event manager is shown below.

- Directory DBSync must be replaced by the required directory name to point the event manager to that directory.

dbsync-downloads/dbsyncdownload/cloudcdm/DBSync_CloudCDM_Vx.x.x.zip
step: Once the file is downloaded, make a list of files using the below command
# ls -l
You can see the DBSync_CloudCDM_Vx.x.x.zip file
- Install/Unzip
Step: Now unzip the above-downloaded file
# unzip DBSync_CloudCDM_Vx.x.x.zip
- After unzipping you can see the apache-tomcat-9.0.33 file
# cd apache-tomcat-9.0.33
# ls -l
- NOTE: Make sure that logs directory exists in apache-tomcat-9.0.33, if it is not there, please create a directory as logs
# mkdir logs
- Step : Once after creating the logs directory, now go to bin directory
# cd bin
Change the permission for the scripts by getting into the bin folder and provide executive permission for all the shell scripts using the command Chmod 750 *.sh.
Check for necessary directory and file permissions
# cd bin
- Change the permission for the scripts by getting into the
- bin
- folder and provide executive permission for all the shell scripts using the command
- Chmod 755
- 750 *.sh.
...
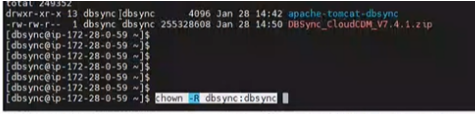
- Giving ownership of dbsync to tomcat
- Command:
#chown -R dbsync:dbsync directory name
- Giving permissions to files
- command:
#chmod -R 754 directory/filename - Step: Starting The Tomcat
- At this point, the DBSync Cloud Replication tool is installed on your Linux server. You can start the DBSync Cloud Replication tool by navigating to the bin folder and running the command from the terminal window ./
- Command :
#sh catalina.sh start.


Installing java files (JDK/JRE files )
Command
#yum install java-1.8
- Commands to copy backed up directory or files to new destinations
Step: Create a Directory
Command :
mkdir directory-name
Moving files from one directory to other
Command:
# mv source directory/* destination directory/

Copying from one dir to other
Command :
# Cp -r source directory /~/ destination directory
Stopping tomcat
# ps -ef | grep java
- Step : To check the logs you can run the command tail --f logs/ catalina.out as illustrated in the below screenshot

...
# cd /home/dbsync/apache-tomcat-9.0.33/logs
# ls -l
Now Tail the logs
# tail -f catalina.out
The above screenshot shows that the tomcat was running
Step : To access DBSync Cloud Replication console, please paste the
...
http://localhost:8080/dbsync URL in your browser address bar and you will be presented with the DBSync Cloud Replication Home page.

- To stop DBSync Cloud Replication, navigate to the bin folder and execute the script ./catalina.sh stop from the terminal window and to check the status of process execute the command ps --ef | grep java as shown below.

Take a backup of profiles
- Create a backup directory in the home folder
- mkdir <folder name>
- Go to the following directory /home/dbsync/dbsync/dbsync-cdm/WEB-INF/profiles/1
- Use the below command to copy the files present inside the profiles folder
- cp -r <files> ~/<destination folder>/
Take a backup of Scheduler jobs
- Create a backup directory in the home folder
- mkdir <folder name>
- Go to the following directory dbsync/scheduler
- Use the below command to copy the files present inside the scheduler folder
- cp -r <files> ~/<destination folder>/
Overview
Content Tools