2022
Page History
Process Description
Standard Integration between Salesforce and QuickBooks with out of the box solution is explained in the section Salesforce QuickBooks Bidirecitonal Integration Process
If any additional field or object integration is required between Salesforce and QuickBooks, DBSync Mapping must be customized as per the requirement. This section explains the step by step process involved in customizing DBSync Mapping.
- Go to www.mydbsync.com, click on Customer Login. Enter your User Name and Password and click on Sign in. Click on Launch to access DBSync Integration ConsoleProject page.
- In DBSync console click on Edit Link from Manage Toggle Button.
- Click on Edit link for Salesforce Adapter. Enter Salesforce User Name and Password and click on Save Properties button. Click on Validate button to validate the Adapter.
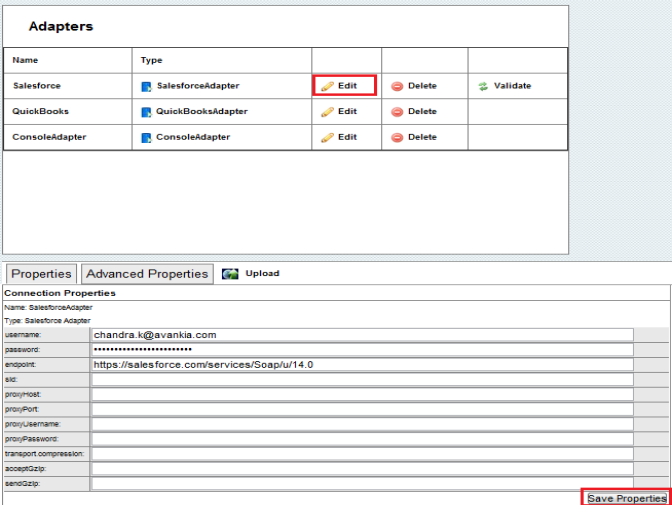
- Click on Edit Link for QuickBooks Adapter. Enter QuickBooks File Path in file text box and click on Save Properties.

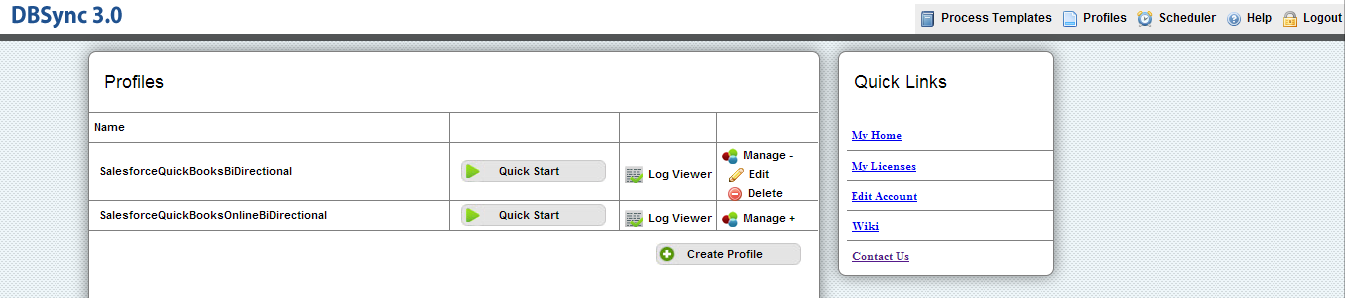
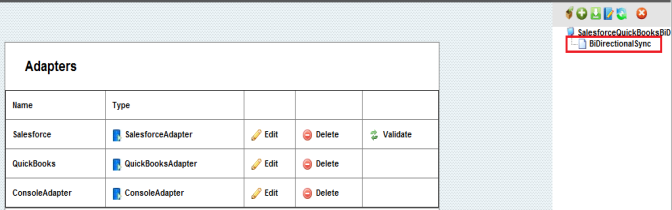
- Double Click or Right Click\Open on the BiDirectionalSync Process to open it for editing.
- If you are using SalesforceQuickBooksBiDirectional profile, you will find a list of states with control flow on process Builder Screen.
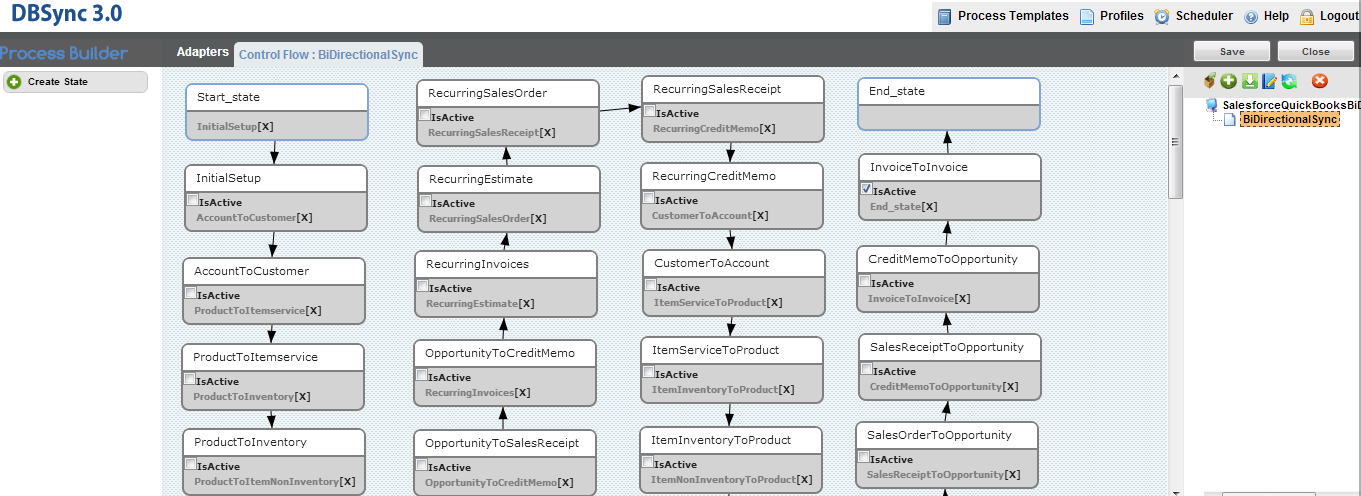
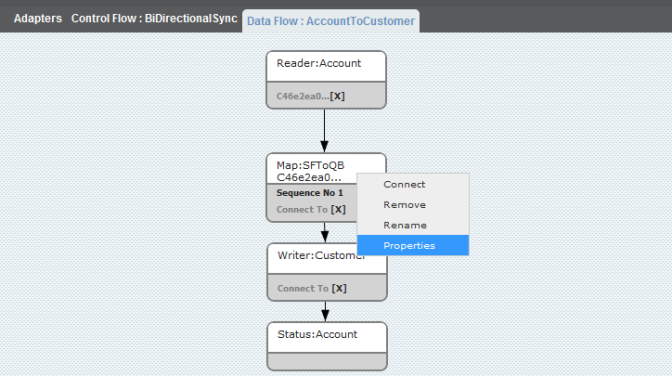
- You can Drag and Drop create state button onto the control flow area to create a new state or double click or Right Click\Open to open any state. In this tutorial I will edit Account to Customer State. So Right click\Open on Account to Customer state. Once On the DataFlow page, Right Click on Map:SFToQB and click Properties as shown below:
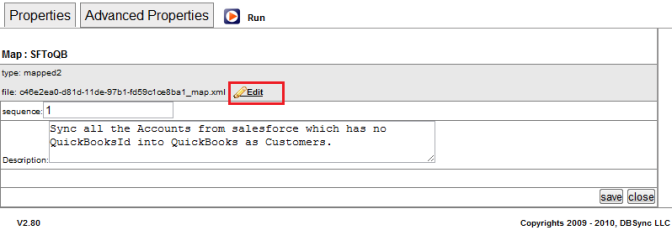
- Scroll down to properties area and click on Edit link to open the mapping screen.
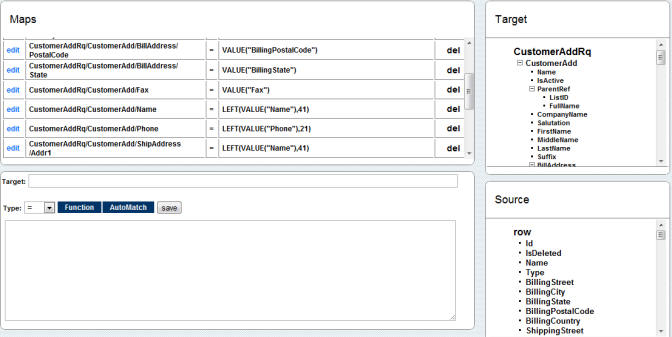
- Make the changes required on the mappings by clicking the edit link on the left or to add a new mapping simply click on Target Column followed by Source Column and click on Save button to save it to maps. A Screenshot of the mapping screen is shown below.
- Once done, click on the close button on the top right. Move to Previous window (Data Flow screen) and click on Save & Close button on the top right. This will save the BiDirectional sync profile. You can test out your mapping by running the sync from QuickBooks Web Connector.
- Go to Windows Start > Programs > QuickBooks > Web Connector
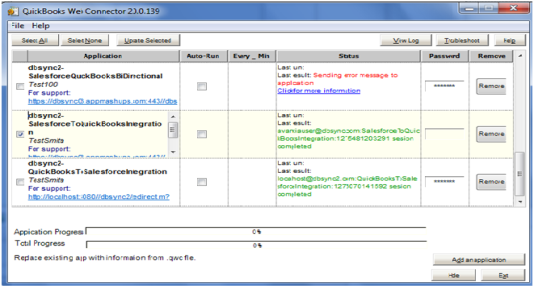
- Web connector is launched with the selected integration profile, select the integration profile/profile Name, Enter dbsync password and finally click on "Update Selected" to make a sync.
- Check your Salesforce and QuickBooks Instance for updated data.
- Login to your DBSync account with the your credentials to make changes or create hierarchy mappings. Once you have logged into your DBSync account, click on Launch to Launch DBSync Project page.
- Ensure that you have validated Salesforce & QuickBooks conncetors.
- Click on Projects on the left panel, you will see list of available projects. Click on the relevant project. You will see the list of Processes.
- Click on the relevant Process, you will see the list of workflows. Create new workflow button can be used to create new workflow.
- Each workflow will have trigger & rules.
- Trigger has 3 tabs, Query Builder, Advanced Query Builder & Properties.
- You can have one or more rule in a workflow. Each rule will have a map. This map displays list of target fields available for mapping. Also, you will see schema of source fields. You can drag & drop these source fields opposite target fields to map accordingly.
- These entities of Mapping are detailed in the wiki section iPaaS
Overview
Content Tools