2022
Page History
...
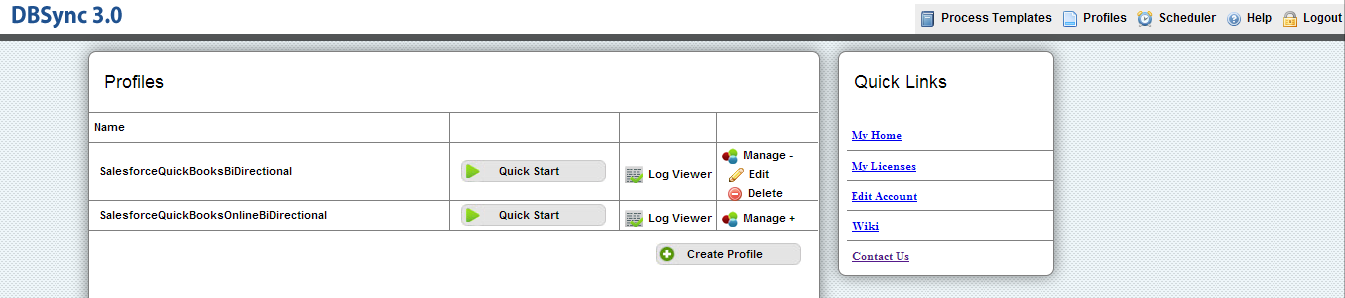
- In DBSync console click on Edit Link from Manage Toggle Button.
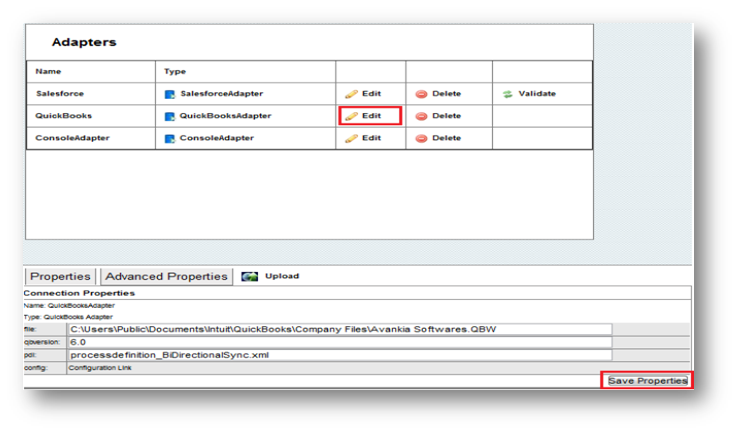
- Click on Edit link for Salesforce Adapter. Enter Salesforce User Name and Password and click on Save Properties button. Click on Validate button to validate the Adapter.
- Click on Edit Link for QuickBooks Adapter. Enter QuickBooks File Path in file text box and click on Save Properties.
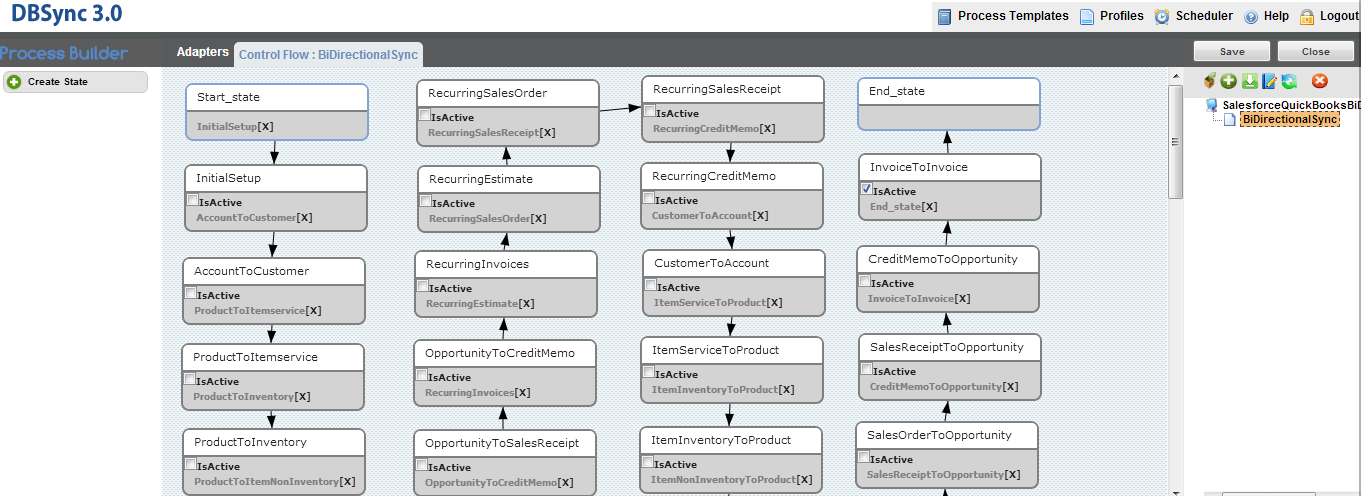
- Double Click or Right Click to open the BiDirectionalSync Process for editing.
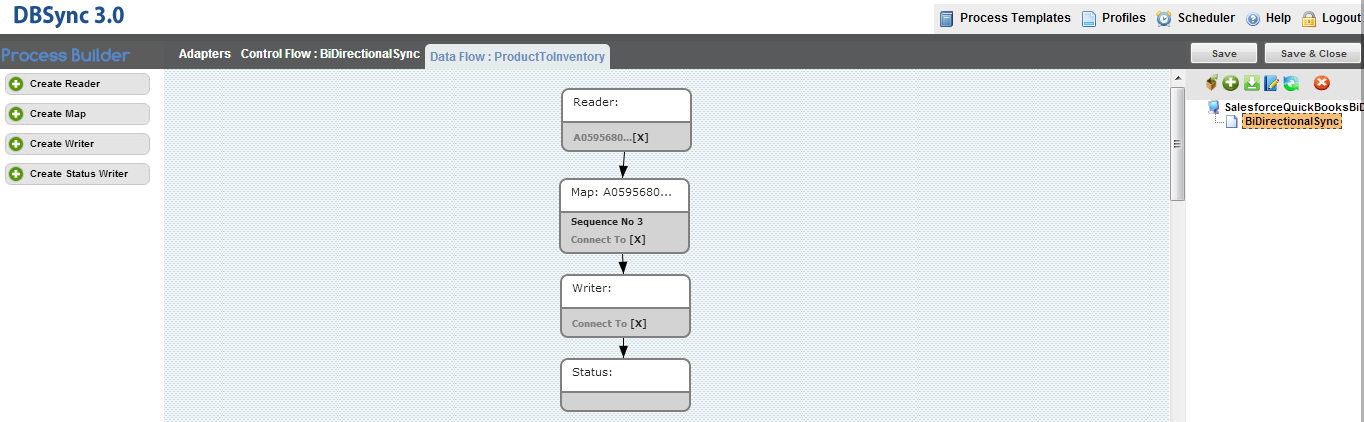
- If you are using SalesforceQuickBooksBiDirectional profile, you will find a list of states with control flow on process Builder Screen. Double click on ProductToInventory State to open data flow as highlighted below.
- Right Click on Properties on Map to open the mapping properties.
- Click on Edit link for **********_map.xml file to open the mapping screen.
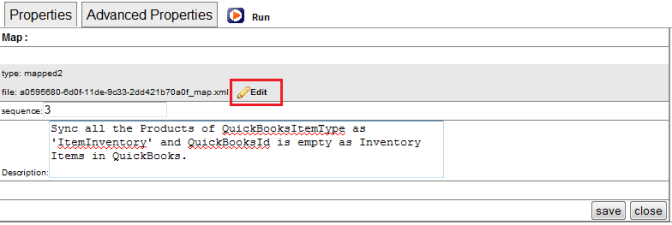
- The mapping screen contains all the default mappings as shown below.

- You can add a new mapping by Entering the target field path in target field followed by the VALUE("ColumnApiName")in description field and clicking Save button. An Example of the mapping is shown below:
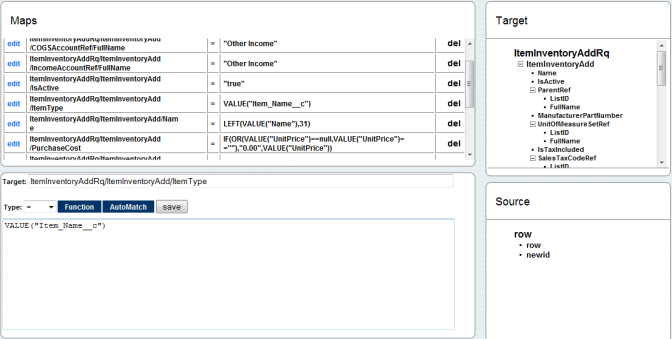
- Similarly add the rest of the mappings as shown below
- ItemInventoryAddRq/ItemInventoryAdd/ItemType =VALUE("Item_Name__c")
- ItemInventoryAddRq/ItemInventoryAdd/ReorderQuantity =VALUE("Reorder_Quantity__c")
- ItemInventoryAddRq/ItemInventoryAdd/Weight = VALUE("Weight__c")
...
Overview
Content Tools