2022
Page History
...
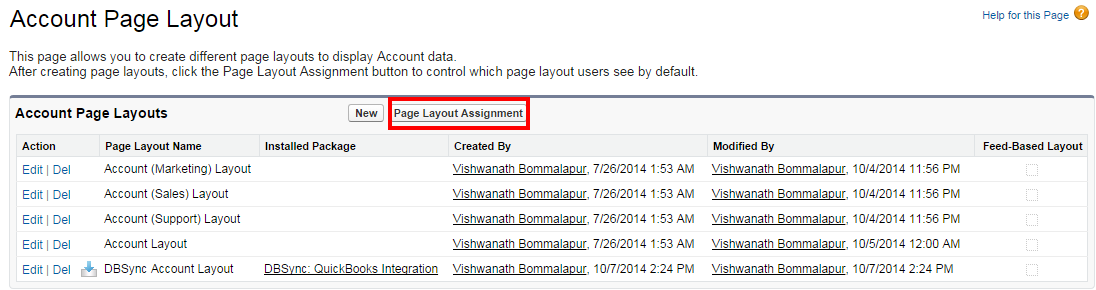
- Go to Salesforce Setup > Customize > Accounts > Page Layouts. This will show the list of available Page Layouts for Accounts Object. Click on Page Layout Assignment.
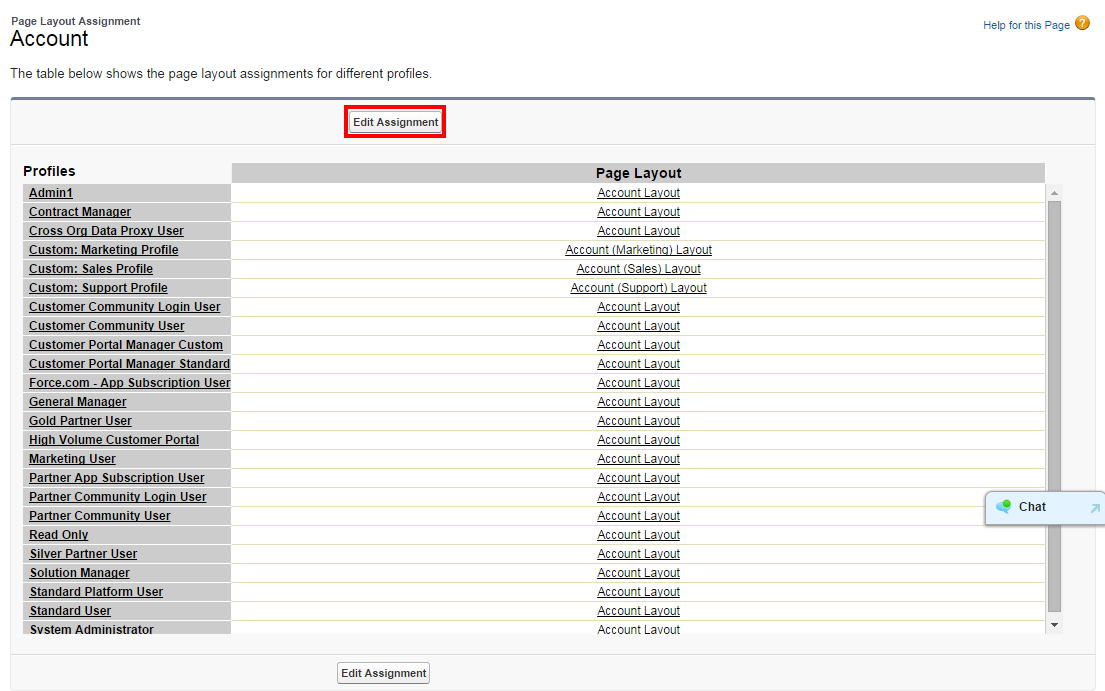
- You will find the list of default Page Layouts assigned for every Salesforce Profile. Click on Edit Assignment to proceed.
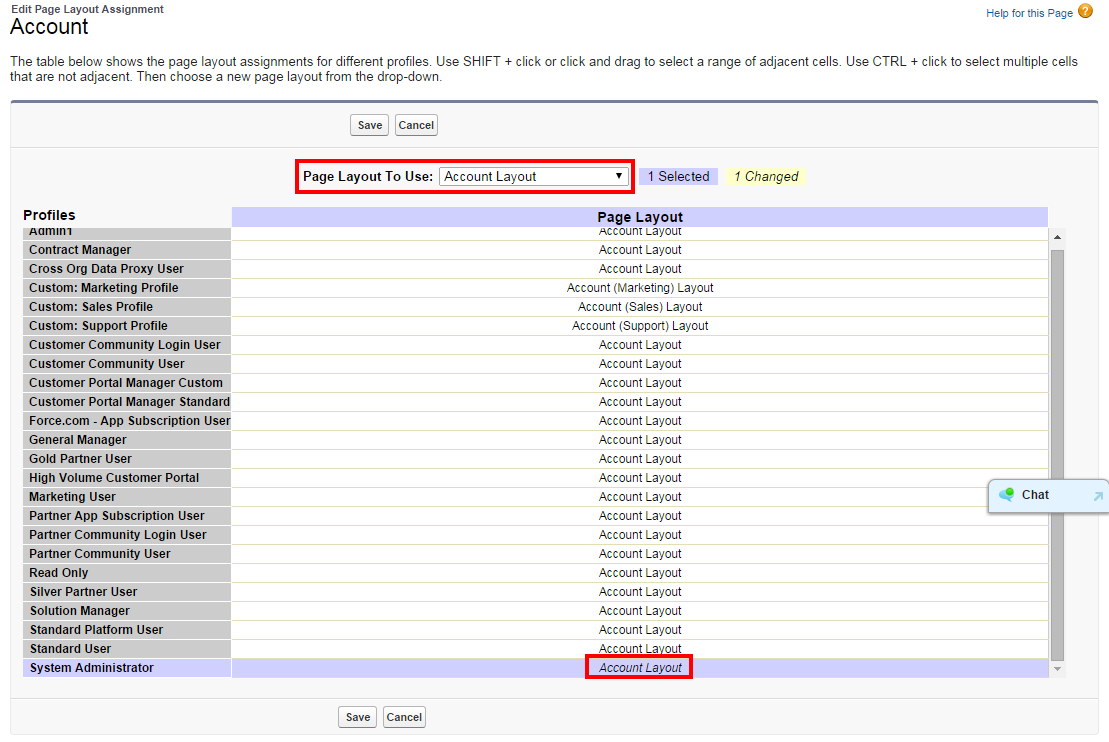
- Click on the Page Layout next to the required profile. Account Layout is the existing page layout for profile System Administrator and System Administrator is the profile that should be assigned with DBSync page layout. In this case Account Layout should be selected next to System Administrator.
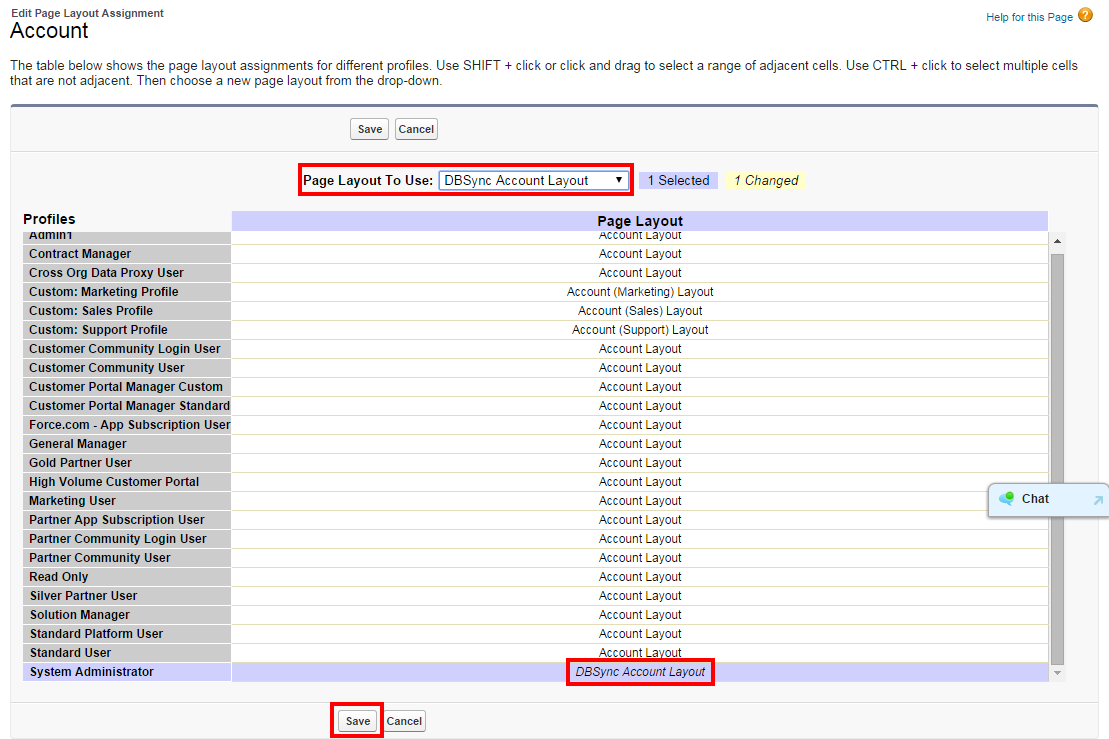
- Select DBSync Account Layout from Page Layout To Use picklist. Page Layout will be changed from Account Layout to DBSync Account Layout. Click on Save to save the new page layout assignment.
- Similarly assign DBSync Page Layout for Salesforce Objects Contacts, Opportunity, Opportunity Products and Products.
...
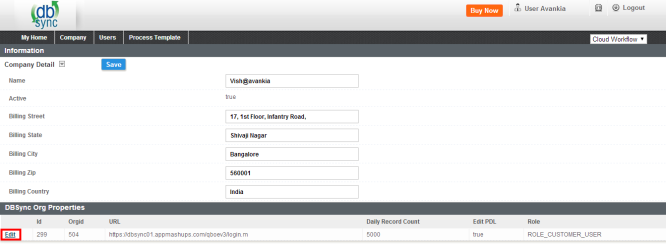
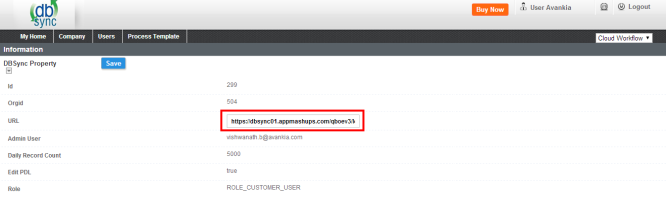
- Login using to dbsync account, go to Company tab, click on edit to view DBSync Org Properties. Click on edit and replace the existing URL with https://dbsync01.appmashups.com/qboev3/login.m

- Go to Process Template tab in DBSync home page and click on SalesforceQuickBooksOnline:BiDirectional to include process template for Bi-directional Integration of Salesforce & QuickBooks Online.
- Click on Launch in My Home tab, you will see SalesforceQuickBooksOnline:BiDirectional profile in Project page in the next tab of your browser.
- Click on Quick Start to configure Salesforce & QuickBooks Adapters
...
Configure Salesforce Adapter
...
- Enter Salesforce Projects on the left panel and then click on the project SalesforceQuickBooksOnline:BiDirectional
- Click on Connectors, you will see Salesforce & QuickBooks Online connectors. These connectors need to be configured as follows.
- Click on Salesforce Connector, select the appropriate End Point under Quick Setup tab. Click on Connect to Salesforce. This will take you to Salesforce login page. Enter your username & password to login to Salesforce. Once you login to Salesforce, your Salesforce connector is connected to your Salesforce instance. If you want to connect using different Salesforce instance, click on Disconnect in Quick Setup tab. Then, connect using the required Salesforce credentials.
- You can also use Advanced Properties tab to connect to your Salesforce instance. Go to Advanced Properties, fill in the Salesforce Username, Password & Security Token . Click on Save Properties to save the settings. Click on Validate to confirm the Salesforce connections settings are valid.
...
Configure QuickBooks Online Adapter
...
- Go to QuickBooks Online Connection properties, click on Configuration link, which will take you to new tab to authorize Intuit to securely share your data to DBSync QBRv3.
...
- Click on Authorize to continue. Confirmation email will be displayed as "Your QuickBooks Online is now connected with the Profile. Please close this window now".
...
- Go to DBSync Quick Start, all the QuickBooks Online Adapter Connection properties fields will be auto populated. Click on Save Properties of for your Salesforce Instance. Select the appropriate End Point. Once you enter all the required details, click on Validate Connection. If the validation is successful, click on Save to Save the Salesforce details. If the validation fails, you will see Validation Errors on the top right corner. Refer the details in Validation Errors section and make the necessary changes in Advanced Properties and click on Validate Connection again.
- Click on QuickBooks Online Connector, click on the link Connect to QuickBooks. Sign in to QuickBooks online to authorize DBSync Salesforce Integration for QuickBooks to connect to Intuit.
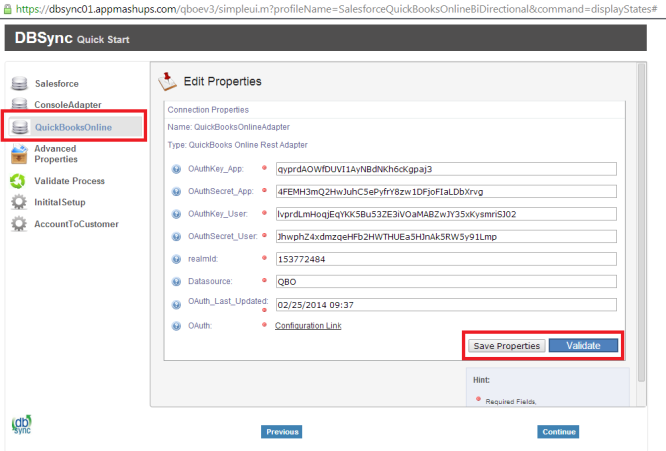
- You can also connect to QuickBooks Online using Advanced Properties tab in QuickBooks Online Connector Settings.
- Go to Advanced Properties enter the details Application OAuth Key, Application OAuth Secret, User OAuth Key, User OAuth Secret, Realm Id, Datasource, OAuth Last Updated, OAuth URL.
- Click on Save to save the settings. Click on Validate Connection to confirm the QuickBooks Online connections settings are valid.
| Anchor | ||||
|---|---|---|---|---|
|
...
DBSync Integration of Salesforce & QuickBooks Online can be initiated by the following three methods.
- Using Salesforce custom buttons
- Using DBSync Scheduler
...
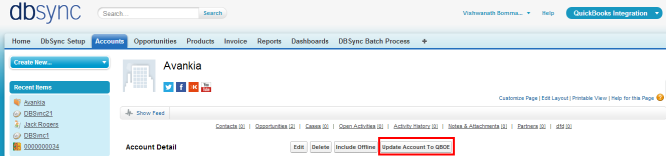
- Salesforce custom buttons in Salesforce Accounts, Contacts and Opportunity can be used to update these specific records into QuickBooks as and when required. To set Auto run of integration, one of the next methods should be used.
- Salesforce Custom Button Update Account to QBOE in Accounts Object is shown below.
- Salesforce Custom Button Update Contact to QBOE in Contacts Object is shown below.
...
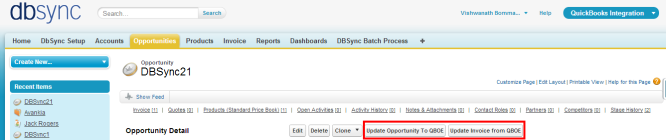
- Salesforce Custom Button Update Opportunity to QBOE and Update Invoice from QBOE in Opportunities Object is shown below.
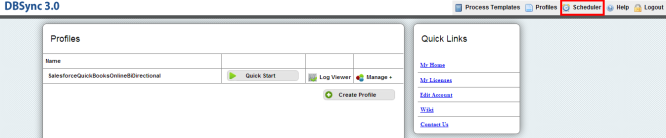
Using DBSync Scheduler
- Scheduler available in DBSync Account can be used to schedule the integration .
- Login to DBSync account, click on Launch to go to DBSync profile page and click on Scheduler on the top right corner.
- Select the integration profile and required process to auto run. Edit the Cron Settings to set the frequency of Auto run and Save Cron Job.
...
- & the details of scheduler is available in the below link http://help2.mydbsync.com/docs1/display/dbsync/Scheduler
Overview
Content Tools