2022
Page History
...
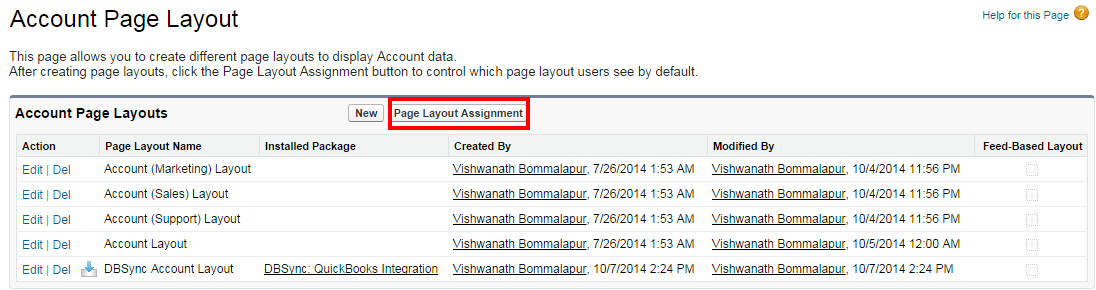
- Go to Salesforce Setup > Customize > Accounts > Page Layouts. This will show the list of available Page Layouts for Accounts Object. Click on Page Layout Assignment.
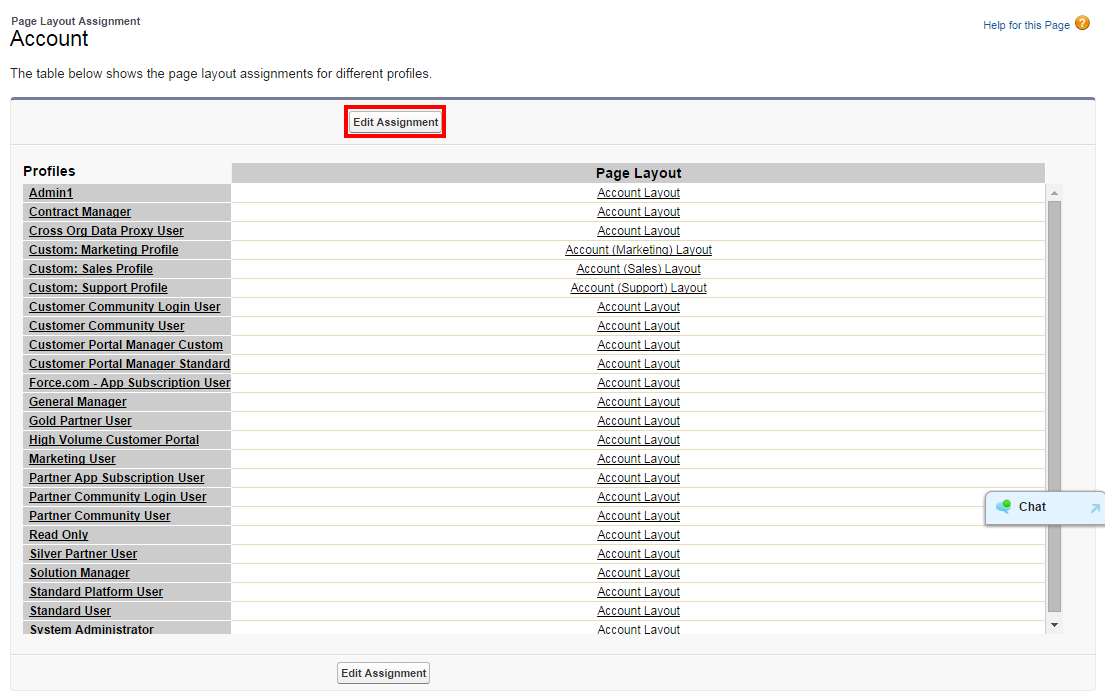
- You will find the list of default Page Layouts assigned for every Salesforce Profile. Click on Edit Assignment to proceed.
- Click on the Page Layout next to the required profile. Account Layout is the existing page layout for profile System Administrator and System Administrator is the profile that should be assigned with DBSync page layout. In this case Account Layout should be selected next to System Administrator.
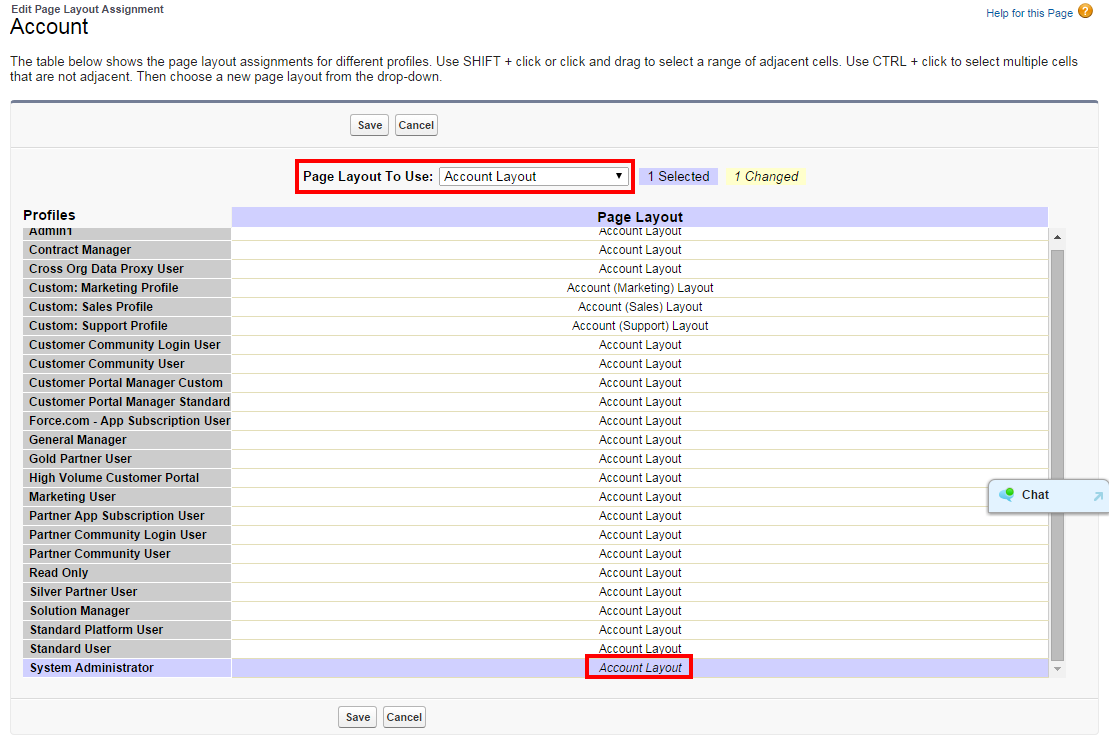
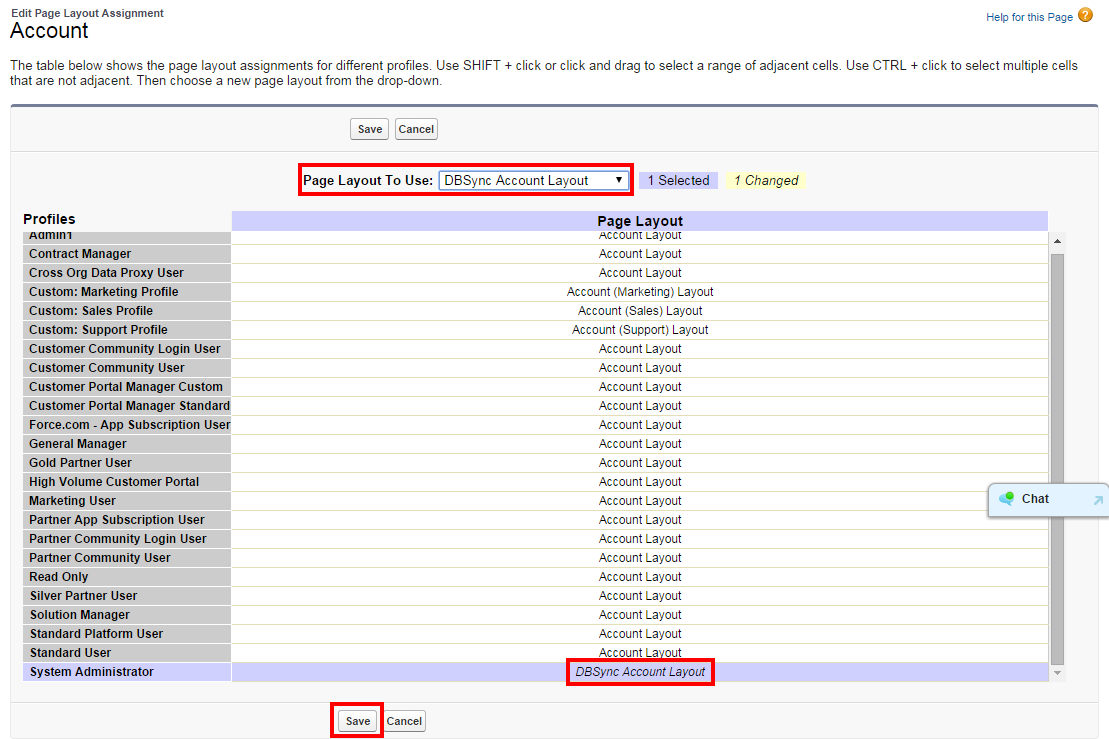
- Select DBSync Account Layout from Page Layout To Use picklist. Page Layout will be changed from Account Layout to DBSync Account Layout. Click on Save to save the new page layout assignment.
- Similarly assign DBSync Page Layout for Salesforce Objects Contacts, Opportunity, Opportunity Products and Products.
...
- Salesforce credentials and QuickBooks location should be saved in your DBSync profile and QuickBooks web connector should be configured. Please refer the below wiki link for detailed steps. http://helphelp2.mydbsync.com/docsdocs1/display/dbsync/Configuring+DBSync+with+Quickbook+WebConnector
| Anchor | ||||
|---|---|---|---|---|
|
...
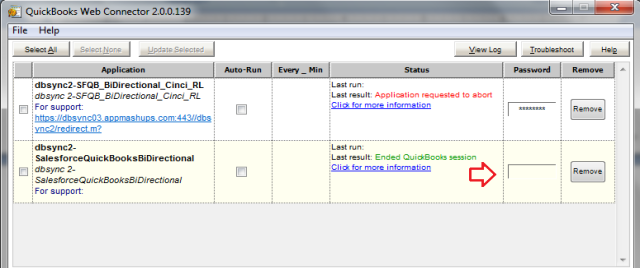
- Once you are done with the mappings go to your QuickBooks Web Connector by Start > Programs > QuickBooks > Web Connector and click on the password textbox for profile dbsync2-SalesforceQuickBooksBiDirectional as highlighted below:
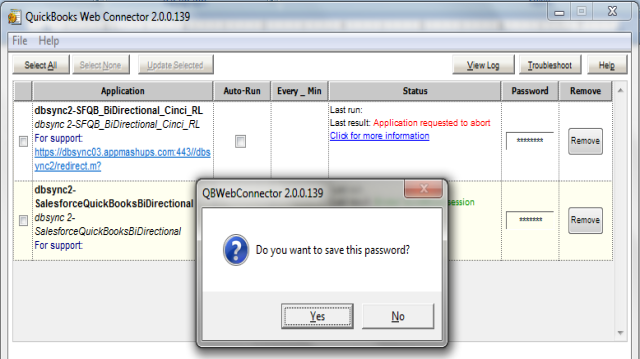
- Enter your DBSync password in the in the text box and hit Enter on your keyboard. One Message Box will be displayed asking you "Do you want to save this password" select Yes button. DBSync Password will be saved in the web connector.
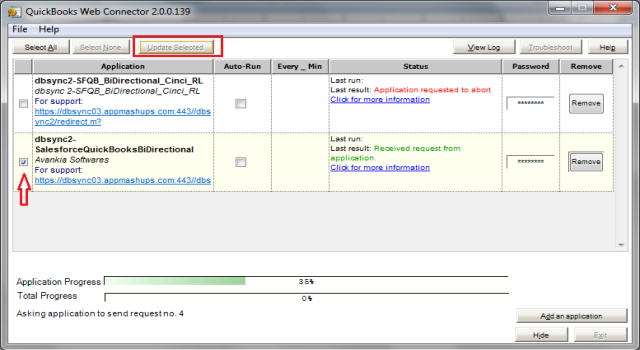
- Check the DBSync2-SalesforceQuickBooksBiDirectional check box and click on Update Selected button and sync will start and complete automatically. Auto-Run can also be used in Web Connector to run integration in regular intervals. For example, if you select 60 minutes, every 60 minutes integration will run by itself, provided Web Connector is open.
Overview
Content Tools