2022
Page History
...
- Click to "add profile" in the right-hand corner of the profiles section of the DBSync replication portal.
- Select, the required source name application from the drop-down menu under the product header.
- Next, enter the name of the profile like "test profile" under the name section.
- Click on save changes button to create a new replication profile.

- Click to "Salesforce setup tab on the left-hand corner in the profiles section of the DBSync Replication portal.
- Don't change the "environment and soap end details", all these details are pre-filled.
- Next, enter the "username" and "password" credentials for Salesforce.

- Once completed, click on the next button to proceed to the database setup tab.
- Click to "database" setup tab on the left-hand corner in the profiles section of the DBSync replication portal.
- Select, the required "type name" from the drop-down menu options like "MySql, SQL Server, Oracle, DB, PostgreSQL, Cassandra, Redshift, Sybase, Snowflakes, AWS S3 and MongoDB" under the "database setup" section.
- To start with database credentials user has to enter all the configuration details like host, port, username, password, database name, and schema.

- Once, this is done click on the save button and test the connection.
- Click on the next button to redirect to the object page, their user has to select the particular Object which he/she wants to do the Data Masking.
- Once, you have selected the Object- Account then click on the Run button to select any command like Cleancopy and wait for the sync.
- Once, the Sync is complete then the user has to go back to Export Tab, select the Object from the Schema and click on the run button and select the column in which you want to change.
- After the selection of the column click on the Add Data Mask button.

- As you can see on the above image Account object is showing on the top left corner and other options like Mask Enabled (Toggle buttons), Column, and Mask Type.
- Enabled mask for any field like Phone and select the Mask Type from the list. See the below image for the reference.
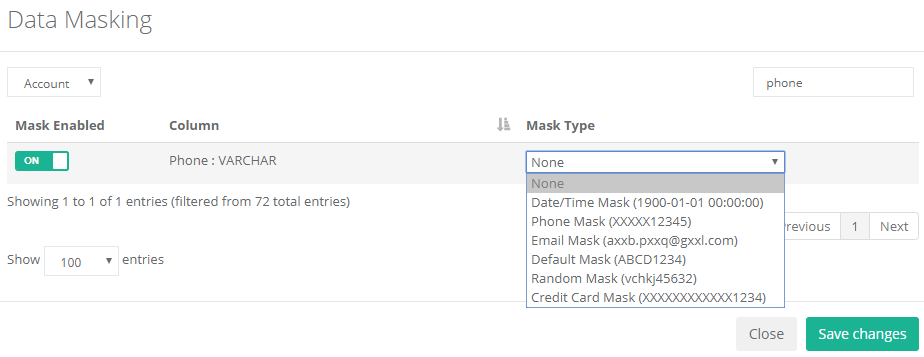
- Here, I have selected the Phone Column and enabled the mask. On the right side, you will see the drop-down menu to select the mask type.Select the Phone
- These are the six Mask type we support for data maskings likeDate/Time, Phone Mask, Email Mask, Default Mask, Rando Mask, and Credit Card Mask.
- After the selection of a Phone mask from the mask type and then click on on the Save changes button.
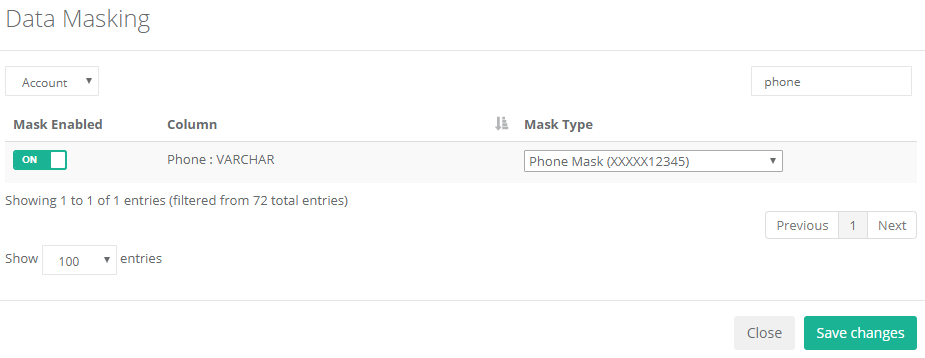
- After the changes click on the Export Tab to move further.
- Once you have clicked on the export tab export button it will pop-up a Source Metadata window. Select the Object- Account and click on the Next button.
- It will redirect to theTarget Profile pop-up, their user has to select the existing profile or create a profile section in which the user has to give the target Salesforce credentials.
- Once it is connected with the Target Salesforce then click on next to validate the data and finish the export task.
- In the final step, you have to go back to your Target Salesforce and check in the Account section all the phone numbers have mentioned in the records were masked by the Data Masking functionality. Check the below image for your reference.

- As you can see on the above image first 5 digits have been masked and the last 5 digits are visible only. This means data was masked successfully.
Overview
Content Tools