2022
Page History
...
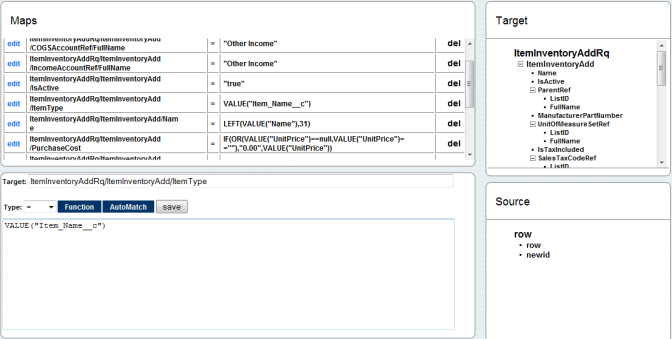
- You can add a new mapping by Entering the target field path in target field followed by the VALUE("ColumnApiName")in description field and clicking Save button. An Example of the mapping is shown below:
- Similarly add the rest of the mappings as shown below
- ItemInventoryAddRq/ItemInventoryAdd/ItemType =VALUE("Item_Name__c")
- ItemInventoryAddRq/ItemInventoryAdd/ReorderQuantity =VALUE("Reorder_Quantity__c")
- ItemInventoryAddRq/ItemInventoryAdd/Weight = VALUE("Weight__c")
- Once done click on the close button to close the on top right. Move to Previous window (Data Flow screen) and click on Save & Close button on the top right. This will save the BiDirectional sync profile.
- Double click on ItemInventoryToProduct State to open data flow.
...
- Right Click ? Properties on Map to open the mapping properties.
- Go to Windows Start?Programs?QuickBooks?Web Connector.
...
- Web connector is launched with the selected integration profile. Select the integration profile/profile Name, Enter DBSync password and finally click on "Update Selected" to perform the sync. The Custom Fields in QuickBooks will be populated with Data in Salesforce.
- Check your Salesforce and QuickBooks Instance for updated data.
Overview
Content Tools
