2022
Page History
...
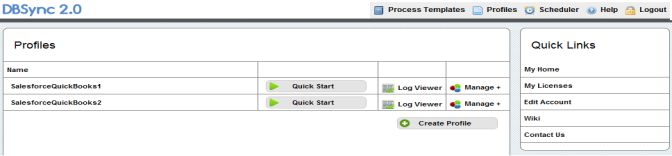
- I have created 2 profiles in DBSync Named
- SalesforceQuickBooks1
- SalesforceQuickBooks2
- Go to your Salesforce and Open *Setup?Customize?Account?Fields* and click on New button in Account Custom Field and Relationships.

- Select Picklist Option button and click on Next.
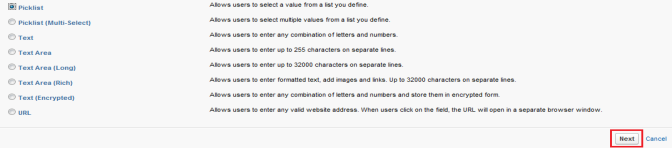
- Enter the field label, enter list of values for picklist, in this demo I am using 2 values as "QuickBooks1" and "QuickBooks2". Select all the checkboxes and click on Next.
...
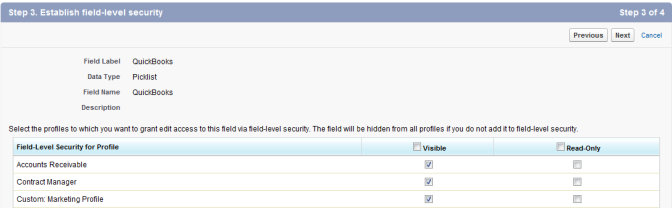
- In the Next Screen, select the Profiles you want to make field visible and click on Next.
- On Add to Page Layout, select the page layout you want to add the fields to and click on Save button to save and create the custom fields.
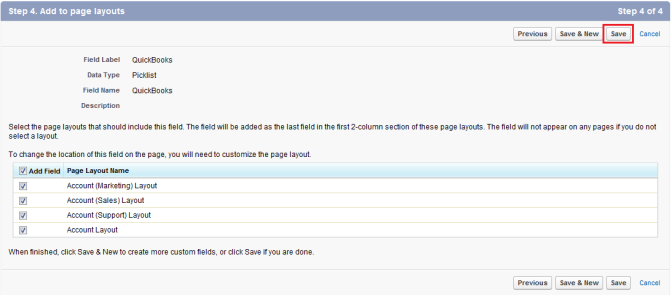
- The Field is created and can be viewed in the Accounts Custom Fields and Relationships section of Account Fields.
...
- Go to Account in your Salesforce and open any account. Here in this tutorial I will open Delphi Chemicals.

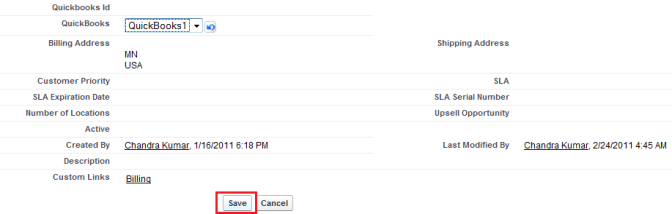
- Select QuickBooks1 from the QuickBooks picklist and click on Save.
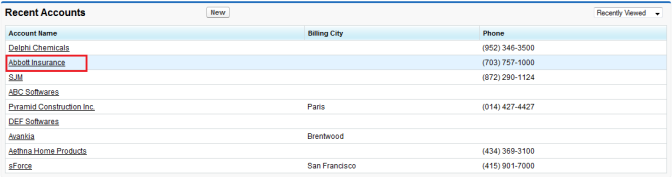
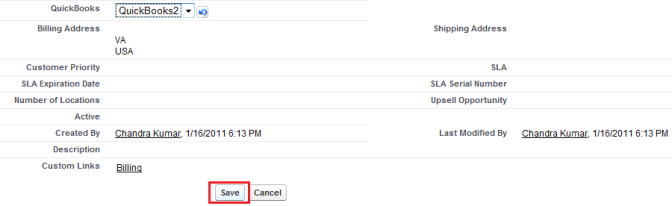
- Similarly open one more Account in your Salesforce and select QuickBooks2 from the QuickBooks field. In this tutorial I will mark Abbott Insurance as the second Account
- Select QuickBooks2 from the QuickBooks Field and click on Save.
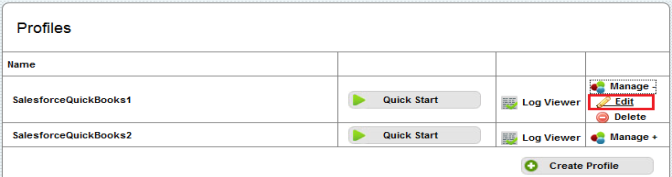
- Go to www.mydbsync.com login to your account and Launch DBSync application.

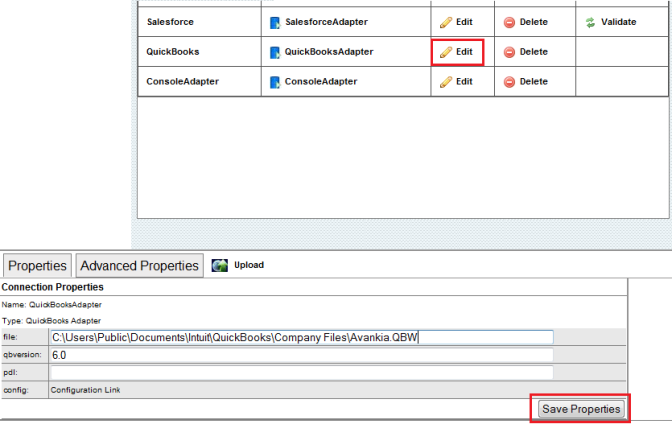
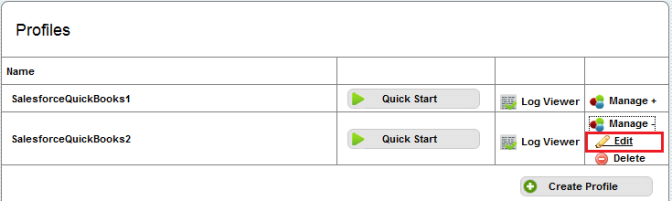
- Click on *Manage?Edit* for SalesforceQuickBooks1 profile.
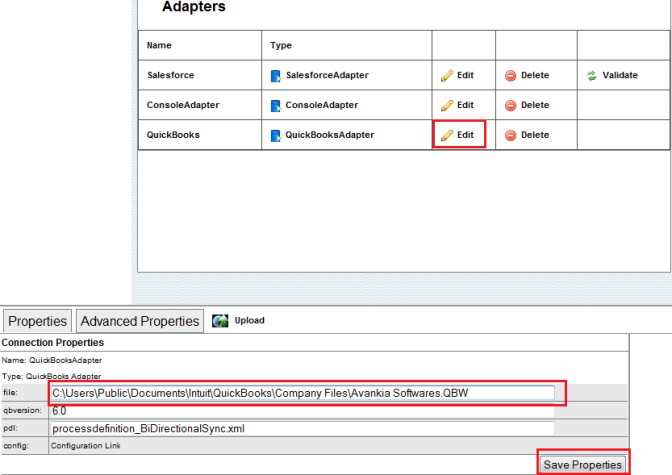
- Click on Edit Link for QuickBooks Adapter, enter your first QuickBooks file path and click on Save.
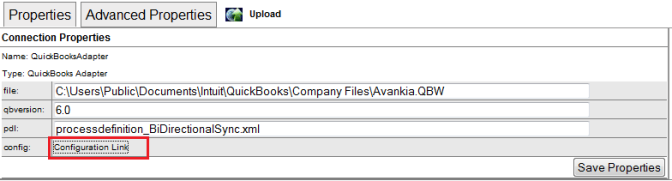
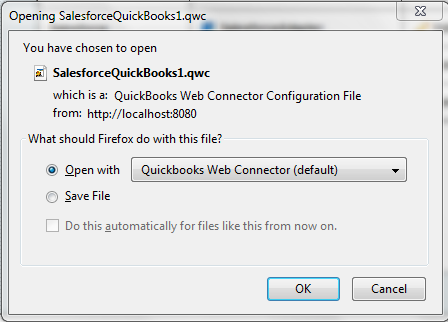
- Click on the Configuration Link for QuickBooks Adapter, select open with "QuickBooks Web Connector" and click on OK button. Both the windows are shown below respectively.
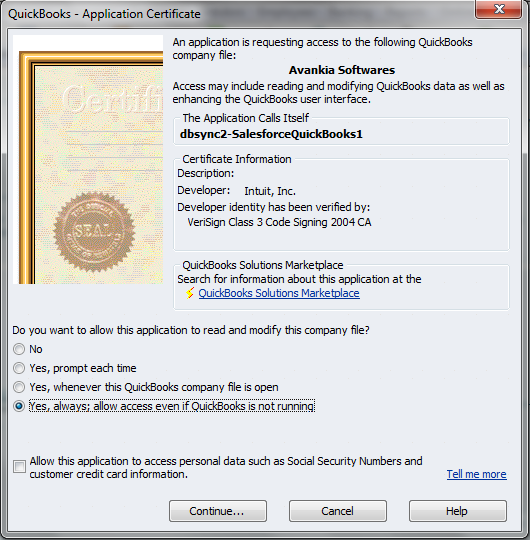
- Click on OK in the next window. Select Option button "Yes always allow access" and click on continue button. The Profile will get added to QuickBooks Web Connector.
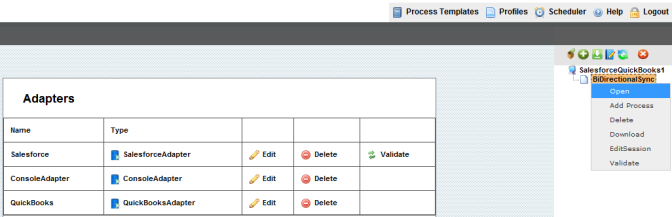
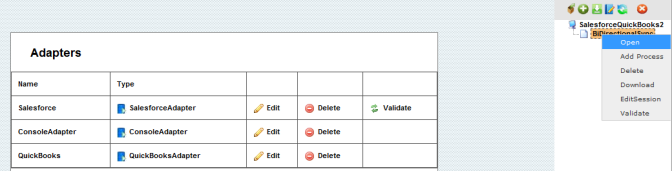
- Right Click on BiDirectionalSync process and select Open to open the integration profile.
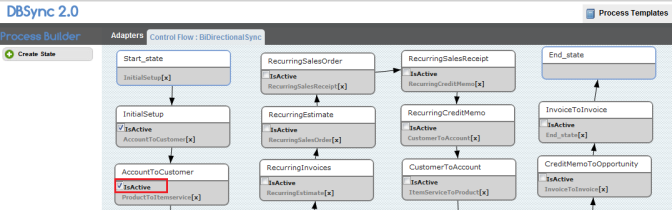
- On AccountToCustomer state, select the IsActive check box and click on Save button to save the states. Double click on the AccountToCustomer State to open it.
- Right Click?Open on the Reader:Account Dataflow to open the properties of the reader. In the query section enter query as select {!.} from Account where AVSFQB_Quickbooks_Idc='' and QuickBooks_c='QuickBooks1' and click on Save.
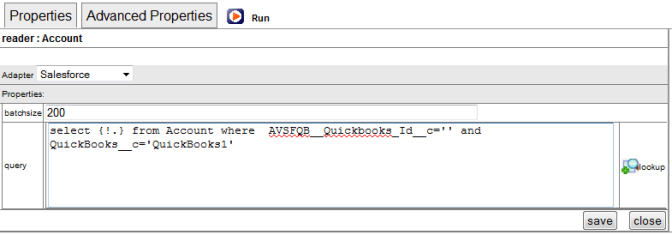
- Click on Save & Close button on the top right and click on OK to save the changes.
...
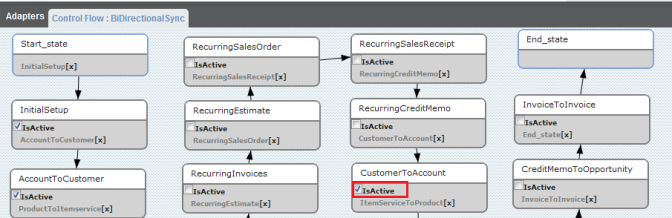
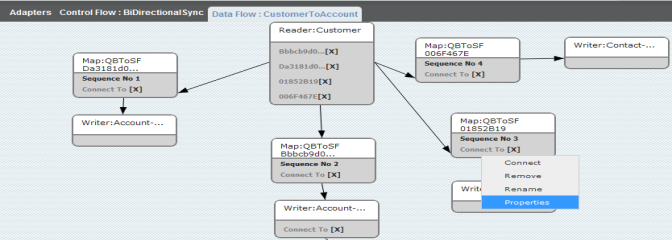
- In the Control Flow window, select the IsActive check box for CustomerToAccount and click on Save button to save the states. Double click on the CustomerToAccount State to open it.
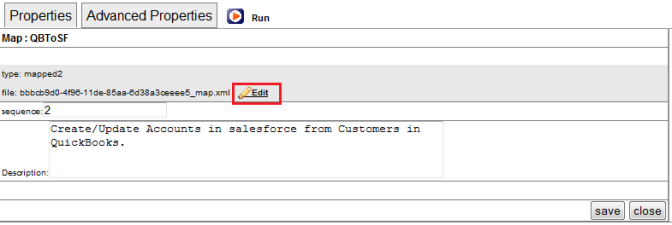
- *Right Click?Properties* on Map:QBToSF with "Sequence Number 1" to open the properties for mapping.
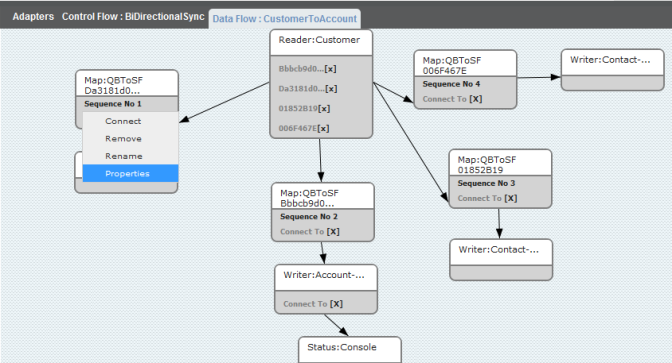
- Click on Edit Link for *********_map.xml file to open the mapping window. Both the screenshot is shown below respectively.

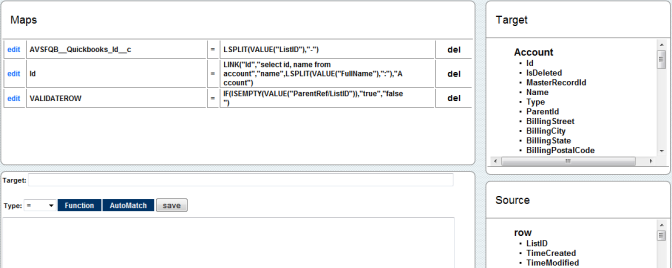
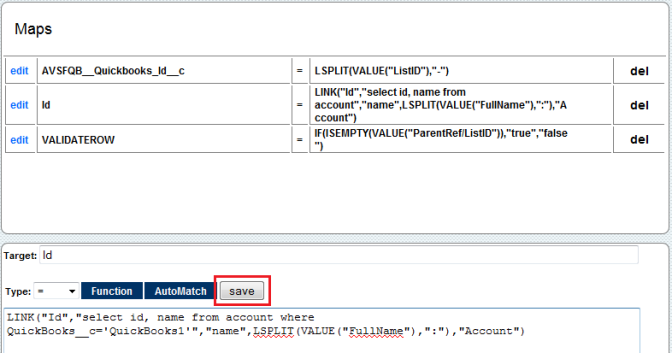
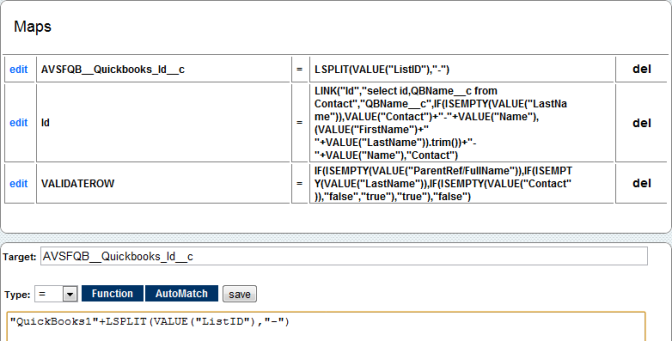
- Click on the Edit Link for first mapping in the list i.e. AVSFQB_Quickbooks_id_c = LSPLIT(VALUE("ListID")) and Enter following mapping for the field and click on Save button.
...
Id=select id, name from account where QuickBooks__c='QuickBooks1'
- Go back to DBSync console and *Right Click?Properties* on Map:QBToSF with "Sequence Number 2" to open the properties for mapping.
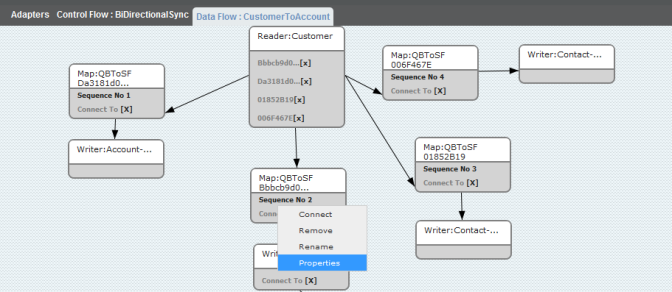
- Click on Edit Link for *********_map.xml file to open the mapping window. Both the screenshot is shown below respectively.
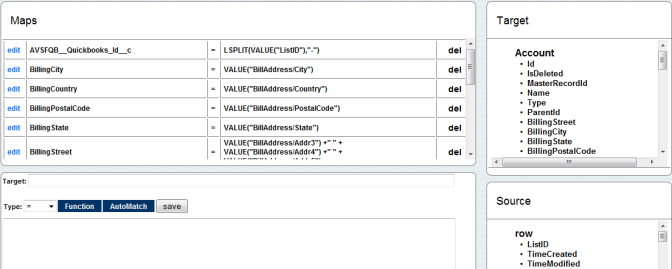
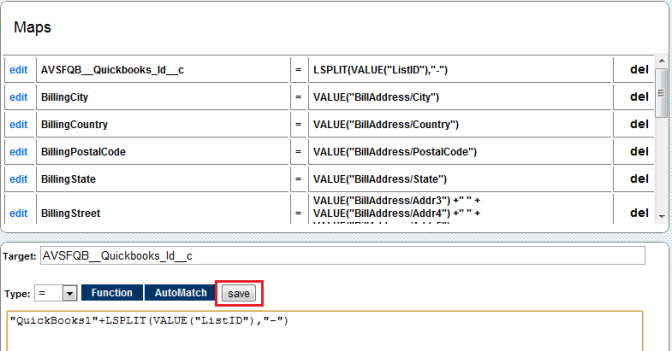
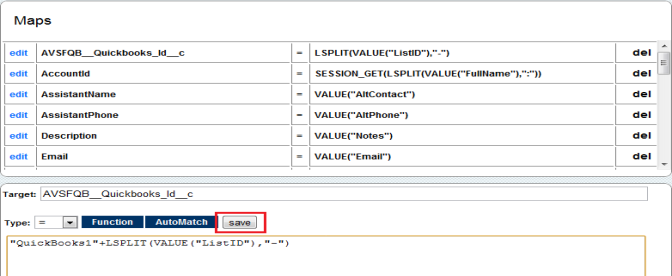
- Click on the Edit Link for first mapping in the list i.e. AVSFQB_Quickbooks_id_c = LSPLIT(VALUE("ListID")) and Enter following mapping for the field and click on Save button.
AVSFQB_Quickbooks_id_c = "QuickBooks1"+LSPLIT(VALUE("ListID"),"-")
- Add a mapping in this window as QuickBooks__c = Value("QuickBooks1")

- Go back to DBSync console and *Right Click?Properties* on Map:QBToSF with "Sequence Number 3" to open the properties for mapping.
- Click on the Edit Link for first mapping in the list i.e. AVSFQB_Quickbooks_id_c = LSPLIT(VALUE("ListID")) and Enter following mapping for the field and click on Save button.
AVSFQB_Quickbooks_id_c = "QuickBooks1"+LSPLIT(VALUE("ListID"),"-")
- Go back to DBSync console and *Right Click?Properties* on Map:QBToSF with "Sequence Number 4" to open the properties for mapping.
...
AVSFQB_Quickbooks_id_c = "QuickBooks1"+LSPLIT(VALUE("ListID"),"-")
- Close the mapping window and go back to DBSync console. Click on the profile link on the top right corner of the screen, to move to profiles in the DBSync.

- Click on Edit Link for SalesforceQuickBooks2 profile to open it for editing.
- Click on Edit Link for QuickBooks Adapter and enter the second QuickBooks file path. Click on Save button to save the properties.
- Click on the Configuration Link for QuickBooks Adapter, select open with "QuickBooks Web Connector" and click on OK button. Follow the steps shown earlier in the tutorial to add the profile to web connector.
- Right Click on BiDirectionalSync process and select Open to open the integration profile.
- On AccountToCustomer state, select the IsActive check box and click on Save button to save the states. Double click on the AccountToCustomer State to open it.
- Right Click?Open on the Reader:Account Dataflow to open the properties of the reader. In the query section enter query as select {!.} from Account where AVSFQB_Quickbooks_Idc='' and QuickBooks_c='QuickBooks2' and click on Save.
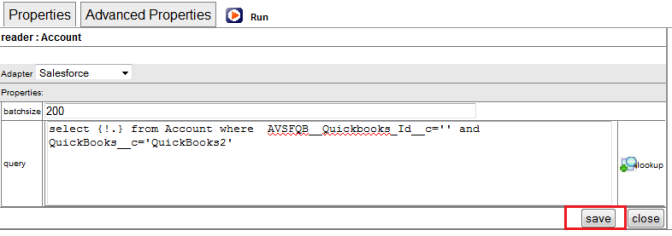
- Click on Save & Close button on the top right and click on OK to save the changes.
...
- In the Control Flow window, select the IsActive check box for CustomerToAccount and click on Save button to save the states. Double click on the CustomerToAccount State to open it.
- *Right Click?Properties* on Map:QBToSF with "Sequence Number 1" to open the properties for the mapping.
- Click on Edit Link for *********_map.xml file to open the mapping window. Both the screenshot is shown below respectively.
- Click on the Edit Link for second mapping in the list i.e. Id = Link(*). Enter following mapping for the field and click on Save button:
Id=select id, name from account where QuickBooks__c='QuickBooks2'

- Go back to DBSync console and *Right Click?Properties* on Map:QBToSF with "Sequence Number 2" to open the properties for the mapping.
- Click on Edit Link for *********_map.xml file to open the mapping window. Both the screenshot is shown below respectively.
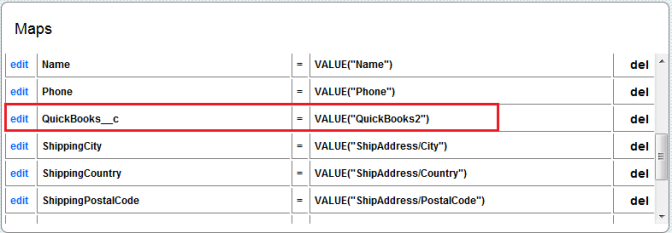
- Add a mapping in this window as QuickBooks__c = Value("QuickBooks2")
- Go back to DBSync console and *Right Click?Properties* on Map:QBToSF with "Sequence Number 3" to open the properties for mapping.
- Click on the Edit Link for first mapping in the list i.e. AVSFQB_Quickbooks_id_c = LSPLIT(VALUE("ListID")) and Enter following mapping for the field and click on Save button.
AVSFQB_Quickbooks_id_c ="QuickBooks2"+LSPLIT(VALUE("ListID"),"-")
- Go back to DBSync console and *Right Click?Properties* on Map:QBToSF with "Sequence Number 4" to open the properties for mapping.
...
AVSFQB_Quickbooks_id_c ="QuickBooks2"+LSPLIT(VALUE("ListID"),"-")
- Close the mapping window. Go to QuickBooks Web Connector, enter your DBSync password for both the profiles, select the profiles and click on Update Selected to start the sync.
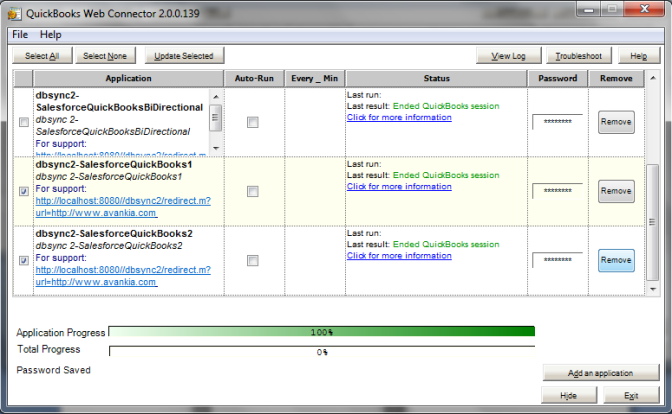
- The Sync will start and will update Salesforce Accounts as Customers in QuickBooks and Similarily All the Customers of QuickBooks that don't exist in Salesforce will be created in Salesforce with identity field marked for specific QuickBooks File.
...
Overview
Content Tools