2022
Page History
...
| Children Display |
|---|
DBSync
...
Problem Statement
With DBSync Cloud replication you get an exe. or a zip file based on your environment and you run the application. Once the server starts you basically go to the browser to run the various functionalities of Cloud replication by using the User Interface. This process requires manual intervention for running the various commands, check logs etc. This is a swagger interface for replication API. DBSync Cloud Replication Web API allows the user to run these functions programmatically. The process of Asynchronous calling is applied where you can run an existing process or pass all parameters in real time.
Setting Up of Web API
To set Web API:
- Login to DBSync Cloud Replication instance

From the left panel click on the
icon
From the left navigation toolbar click on Administration

- From the drop-down menu select API

- You will be redirected to a DBSync swagger interface for our replication API

- Click on Authorize

Provide the User name Password for your profile. (will match the DBSync login credentials)

Click Authorize
A pop-up confirming authorization as AUTHORIZED will appear on the screen

- This is done for authentication purposes so only the specific User can Call the API and no one else can on the User’s behalf. Only when it is authenticated the user can run the requests.
- The URL should be passed to run the replication using Web API. There are 2 options for sending :

a. Replicate : This is to trigger the replication process
Click on this to configure the API call to trigger a replication process.
This will include details of : Salesforce, Database, Objects, Logs, Callback API, Run command option
There is an example of a payload provided for the user to configure the API calls:

Replace the sample values with actual values and execute the command.
Click on TRY IT OUT

You will get an editable payload format where you can enter all the details and configure the API Call.
You can execute the API call by Profile name or configure all the settings for a profile and run the API calls.
For example:
Let us first configure the Salesforce Instance:
The same details which are in the UI will be entered as values in the JSON. In place of String replace with actual text and enter True or false where applicable.
For this example consider the below image from the UI for filling in the Salesforce details:
...
Sample Payload
...
Actual Payload
...

...
Salesforce
...
Salesforce
{
"salesforce": {
"soapEndpoint": "string",
"bulkApiEnable": true,
"password": "string",
"username": "string"
},
{
"salesforce": {
"soapEndpoint": "https://login.salesforce.com/services/Soap/u/47.0",
"bulkApiEnable": false,
"password": "xxxxxxxx",
"username": "dbsync.replicationtest@gmail.com"
},
...
This will set up the Salesforce instance for the above mentioned Profile and for this specific User Name. The URL for the soap endpoint can be taken from the UI. In this instance we do not want Bulk API so we enter as false. Provide the Username and password for the Salesforce instance
...
Database
...
Database
...

...
Will split this into 3 parts:
"database": {
"fileReplication": true,
"fileVersion": true,
"filepath": "string",
"s3": true,
"awsAccessKey": "string",
"awsBucketName": "string",
"awsRegion": "string",
"consumerSecret": "string",
"database": "string",
"host": "string",
"password": "string",
"port": "string",
"schema": "string",
"type": "string",
"url": "string",
"username": "string"
},
"database": {
"fileReplication": true,
"fileVersion": true,
"filepath": "string",
"s3": true,
"awsAccessKey": "string",
"awsBucketName": "string",
"awsRegion": "string",
"consumerSecret": "string",
"database": "xxxxxxxxxx",
"host": "localhost",
"password": "xxxxxxxxx",
"port": "0000",
"schema": "public",
"type": "mysql",
"url": "jdbc:mysql://localhost:3306/performance_schema",
"username": "xxxx"
},
...
PART 1:
...
"database": {
"fileReplication": true,
"fileVersion": true,
"filepath": "string",
...
"database": {
"fileReplication": true,
"fileVersion": true,
"filepath": "C:/DBSync_CloudCDM/files",
...
File Version: This function enables the user to have the same file name stored multiple times. It will not override. If you want to have this versioning then select true if not false.
In the UI you can see these 3 fields under ADVANCED SETTINGS. Refer image below:
Download as local file: File replication
Download files to Directory: File Path
...
PART 2:
...

...
"s3": true,
"awsAccessKey": "string",
"awsBucketName": "string",
"awsRegion": "string",
"consumerSecret": "string",
...
"s3": true,
"awsAccessKey": "string",
"awsBucketName": "string",
"awsRegion": "string",
"consumerSecret": "string",
...
PART 3:
...
"database": "string",
"host": "string",
"password": "string",
"port": "string",
"schema": "string",
"type": "string",
"url": "string",
"username": "string"
},
...
"database": "xxxxxxx",
"host": "localhost",
"password": "xxxxxx",
"port": "0000",
"schema": "public",
"type": "mysql",
"url": "jdbc:mysql://localhost:3306/performance_schema",
"username": "xxxx"
},
...
Object
...
Object
...

...
"objects": [
{
"excludes": [
"string"
],
"filter": "string",
"name": "string"
}
],
...
"objects": [
{
"excludes": [
"xxx"
],
"filter": "name=’Test_2021’",
"name": "xxxx"
}
],
NOTE:
The objects section is an Array. Any number of data can be stored. Multiple entries can be passed in this section as required by the user.
Parameters:
...
For eg: If you do not wish to sync FAX then you can enter this in the exclude column.
"excludes": [
"Fax"
If you want to add more than one field to exclude For eg: phone number:
"excludes": [
"Fax", ”Phone”
Also note that this is for one OBJECT.
For Account you have added one filter and excluded 2 fields.
You can repeat the same for any number of objects that you wish to sync:
{
"name": "Attachment"
}
To add another Object named Attachment.
...
Logs
...
Logs
...
"log": {
"emailError": true,
"database": true,
"dir": "string",
"emailRecipients": [
"string"
],
"emailSender": "string",
},
...
"log": {
"emailError": true,
"database": true,
"dir": "C:/xxx_xxxM/xxxx_logs_dir",
"emailRecipients": [
"xxxxxx@gmail.com"
],
"emailSender": "xxxxxxt@gmail.com",
},
...
NOTE:
Email Error: If the user wants to get notified only in case of an error during a sync then this can be entered. It is a true/False field
"EmailSender": "string",: User can choose who should be the sender(email ID of sender)
This is an optional field. By default it is DBSync. This is to allow permissions for sending the calls.
"EmailRecipients": [ : User can choose who should be the recipient (email ID of receiver)
"string"
"dir": "string", : this is alternative directory that the user can create to store the log files in their systme
Database: If the user wishes to store all information in the database and not in any logs files in the system then enter as true. The logs will be stored as a separate table in the database row-wise.
...
Callback URL
...
Callback URL
If you wish to run the Call from the server enter the URL in this section.
...
"callbackURL": "string"
...
"callbackURL": "xxxxxxxx@dddd.com"
...
Run
...
Run
...
"run": {
"command": "string",
"profile": "string"
}
...
"run": {
"command": "cleancopy",
}
...
NOTE:
Profile section : Use this if you want to run a sync from the profile name.
If this option is used the above mentioned section of Salesforce , Database, Objects etc need not be entered., The sync can be run from the profile name itself.
You can enter the desired profile name once configured.
Run: Enter the command or function you wish to do.
For eg: Clean Copy, Update Schema, Source to DB, DB to Source
The below is an example showing how to run Clean Copy functionality for the profile DBSynctest
{
"run": {
"command": "cleancopy",
"profile": "xxxxxx"
}
}
Click Execute
The responses will appear as CURL
A request URL is given in the REQUEST URL BOX
Response Body
Status, Submit time, Process ID and CallbackURL can be found in this section.
You can also see the Status as submitted if successfully submitted or Failed if any error.Process ID:
The process ID is used to check STATUS of a running process or can be used as a trigger.
b. Check Status(POST) : This is to check the status of the replication process
Enter the Process ID acquired in the 1st option to get the status and Click Execute
The status will show as in-progress or complete.
File Replication is useful to download the files of Salesforce attachment, document, content & chatter feed into specified directory. Enabling & Running File is explained in this section.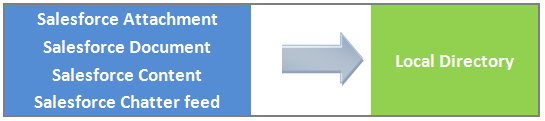
Features
- Download the files from Salesforce attachment, document, content & chatter feed into specified local directory.
- Compatible with Windows as well as Linux.
- Choose Clean Copy or Incremental Download.
- Enable File Version for Download.
- Uses only SOAP API during File Replication.
Overview
Content Tools