2022
Page History
DBSync Setup
- Open www.mydbsync.com and click on Customer Login button.
- Enter your DBSync Username and Password for and click on Login button.
- Once logged in, click on My Home from the menu and click on Launch button in the following page to navigate to DBSync console page.
...
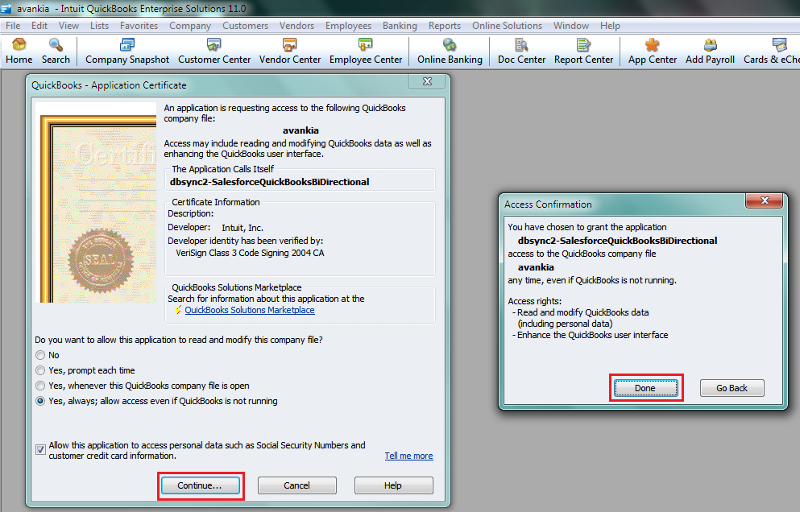
- Select the option "Yes, Always; allow access even if QuickBooks is not running'" and click on continue" Continue.
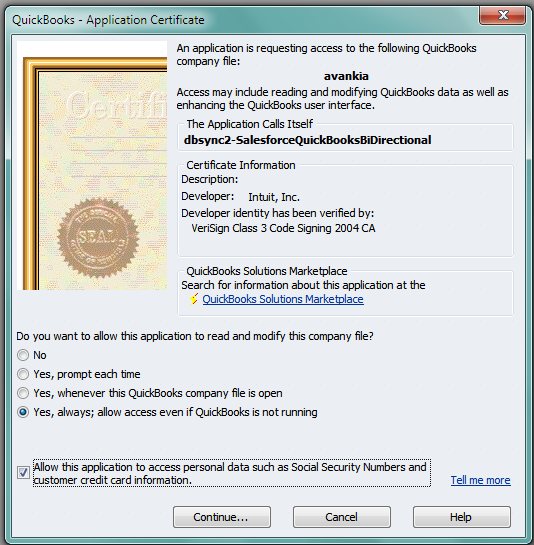
- Click on "Done".
- Next sections of the navigation provide you the details of the sync process in a sequential manner.
- Incase if you need to change any mappings that are available in your profile, then you can navigate to that respective process and click on 'Edit Map' link.
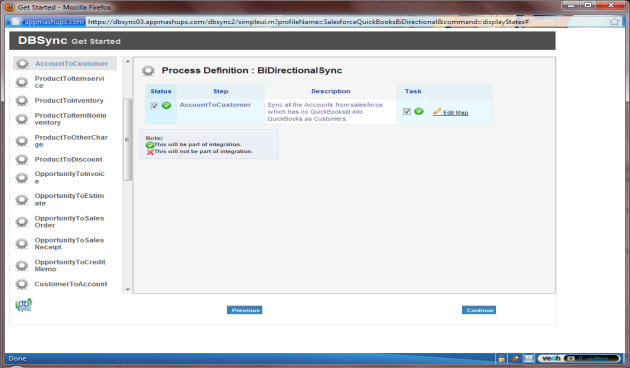
- On click of 'Edit Map', you would get a pop-up window similar to the one shown below. You can modify the mappings are per to your requirements and save it.
...
- Once you click on Done, the DBSync integration profile will be added to your Quickbooks Web-Connector as shown below. Once the profile is added to the web-connector, add the DBSync account password in the highlighted section of the Web-Connector.
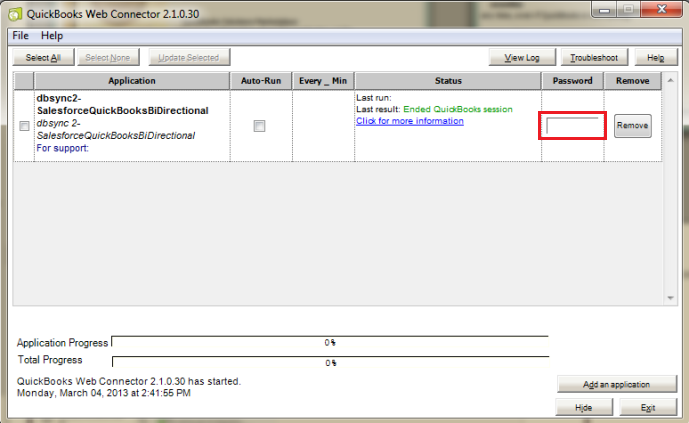
- This completes the process of configuring DBSync for integration with your Quickbooks company file.
Overview
Content Tools