2022
Page History
This section explains the process of customizing DBSync Mapping with the example. Three custom fields are created in Salesforce Product Object & QuickBooks Item. The steps shown below explains DBSync customization process to integrate these custom fields of Salesforce and QuickBooks
...
.
- Create few custom fields in Product Object of Salesforce named as
- Item Type Text
- Reorder QuantityNumber
- Weight Text
...
- Click on Edit link for Salesforce Adapter. Enter Salesforce User Name and Password and click on Save Properties button. Click on Validate button to validate the Adapter.
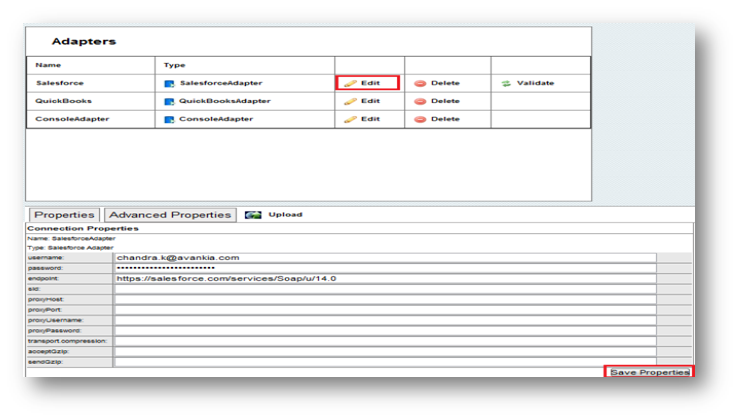
- Click on Edit Link for QuickBooks Adapter. Enter QuickBooks File Path in file text box and click on Save Properties.
...
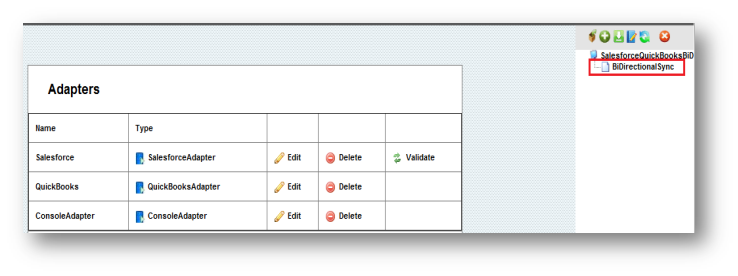
- Double Click or Right Click \Open on to open the BiDirectionalSync Process to open it for editing.
- If you are using SalesforceQuickBooksBiDirectional profile, you will find a list of states with control flow on process Builder Screen. Double click on ProductToInventory State to open data flow as highlighted below.
...
- Similarly add the rest of the mappings as shown below
- ItemInventoryAddRq/ItemInventoryAdd/ItemType =VALUE("Item_Name__c")
- ItemInventoryAddRq/ItemInventoryAdd/ReorderQuantity =VALUE("Reorder_Quantity__c")
- ItemInventoryAddRq/ItemInventoryAdd/Weight = VALUE("Weight__c")
- Once done, click on the close button to close on the on top right to close. Move to Previous window (Data Flow screen) and click on Save & Close button on the top right. This will save the BiDirectional sync profile.
...
Overview
Content Tools