2022
Page History
...
...
Data Flow:
Process Map:
Pre-requisites
...
...
...
...
...
...
...
...
DBSync Profile Setup:
Running the Integration:
| Anchor | ||||
|---|---|---|---|---|
|
Overview:
DBSync for Salesforce & QuickBooks Online Integration is an easy to use application to integrate Salesforce Accounts / Contacts, Products, Opportunity with QuickBooks Online Customers, Items, Invoice, Sales Receipt & Credit Memo. This is also useful to migrate historical QuickBooks Online data into Salesforce or vice versa.
DBSync provides Bi-directional sync with pre-built field to field map along with flexibility for more complex and dynamic mapping capability. DBSync also has an automatic online update, enabling DBSync customers to enjoy all the product updates and features with every new release.
| Anchor | ||||
|---|---|---|---|---|
|
Data flow of Bi-directional integration between Salesforce & QuickBooks Online is shown in the below table.

| Anchor | ||||
|---|---|---|---|---|
|
Process Map:
Process Map of Bi-directional integration between Salesforce & QuickBooks Online is shown in the below image.

| Anchor | ||||
|---|---|---|---|---|
|
Pre-requisites for Integration:
- Integration of Salesforce to QBOE transaction is invoked provided the Generate field in Salesforce Opportunity is selected with the required transaction.
- It is mandatory that SF Opportunity (to be integrated with QBOE Invoice) is associated with the respective SF Account & also should have Products with Standard Price Book attached to it for DBSync to invoke integration.
| Anchor | ||||
|---|---|---|---|---|
|
- Click on the below link to install the DBSync App from AppExchange
...
.
- Enter your Salesforce Username and Password to install DBSync Package in that Salesforce instance. The Salesforce instance must have the administrative privileges to install App.
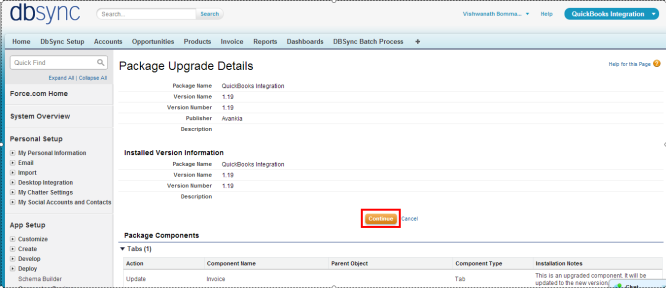
- DBSync Package Installation Details will be displayed in your Salesforce instance. Click on 'Continue'.
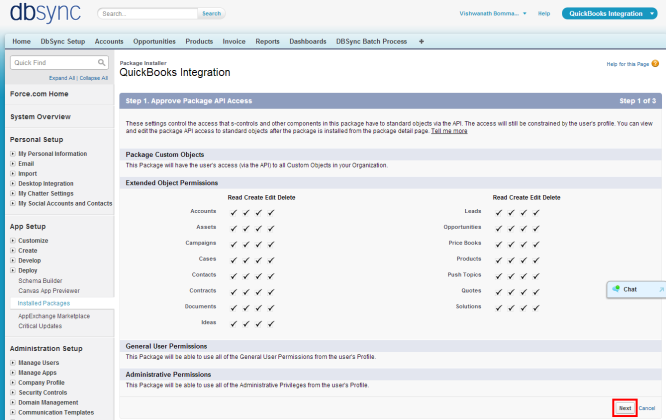
- Approve Package API Access and then click on 'Next'.
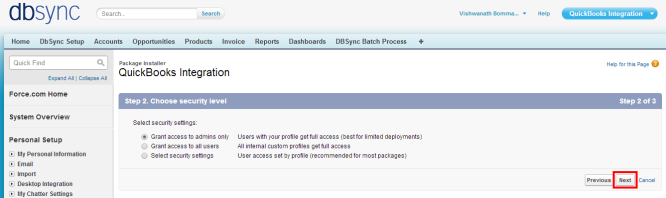
- Choose Security Level to Grant Access and then click on 'Next'.
- Package is ready to be installed. Click Install to 'install'.

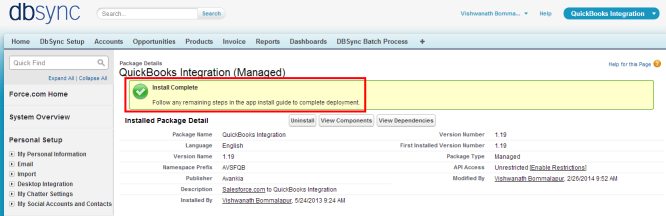
- Install complete message will be displayed which confirms that DBSync Package is installed.
- Go to setup
 Customize Account
  'Page Layout'
  Edit the Page Layout. Under the Page Layout drag the fields specified below to add it in Page Layout and Save.
 - Fields: "Quickbooks Id", "QB Error"
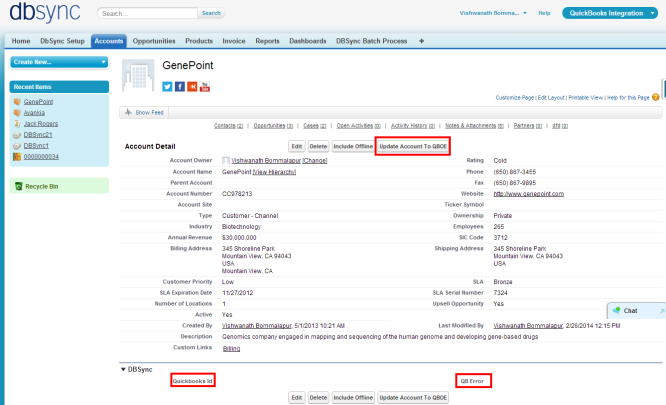
- Button: " Update Account To QBOE"
- Go to setup Customize Contact 'Page Layout Edit the Page Layout.
- Under the Page Layout drag the fields and buttons specified below to add it in Page Layout and Save.
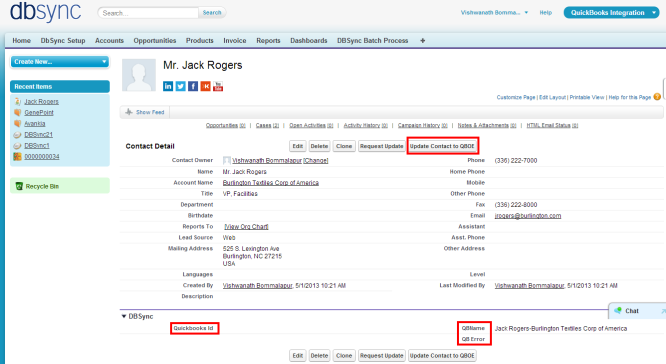
- Fields: "Quickbooks Id", "QB Error", "QBName"
- Button: " Update Contact To QBOE"
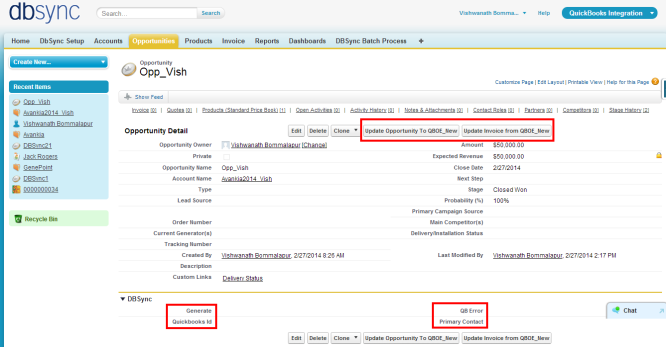
- New Buttons "Update Opportunity To QBOE_New" and "Update Invoice from QBOE_New" should be created in Salesforce Opportunity by referring the below steps.
Go to setup ![]() Customize
Customize ![]() Opportunity
Opportunity ![]() 'Buttons, Links and Actions'
'Buttons, Links and Actions' ![]() New Button or Link.
New Button or Link.
Enter the below mentioned details and save to create two buttons.
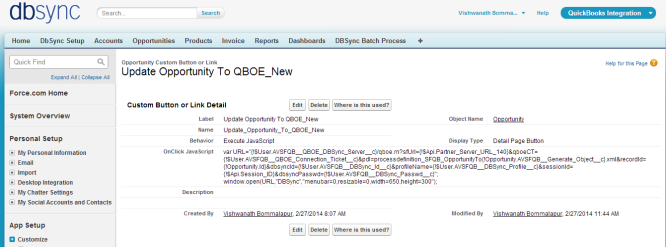
Label: Update Opportunity To QBOE_New
Behavior: Execute JavaScript
Display Type: Detail Page Button
OnClick JavaScript:
| Panel | |||
|---|---|---|---|
|
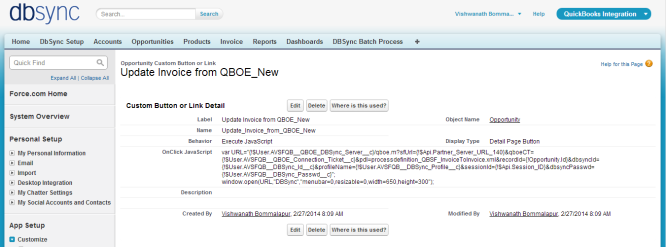
Label: Update Invoice from QBOE_New
Behavior: Execute JavaScript
Display Type: Detail Page Button
OnClick JavaScript:
| Panel | |||||||||||||||||||||||||||||||||||||||||||||||
|---|---|---|---|---|---|---|---|---|---|---|---|---|---|---|---|---|---|---|---|---|---|---|---|---|---|---|---|---|---|---|---|---|---|---|---|---|---|---|---|---|---|---|---|---|---|---|---|
|
- These new buttons along with the other required fields should be included in the page layout by following the below steps.
Go to setup ![]() Customize
Customize ![]() Opportunity
Opportunity ![]() 'Page Layout'
'Page Layout' ![]() Edit the Page Layout.
Edit the Page Layout.
- Under the Page Layout drag the fields specified below to add it in Page Layout.
- Fields: "Quickbooks Id", "Primary Contact", "Generate", "QB Error"
- Buttons: "Update Opportunity To QBOE_New", "Update Invoice from QBOE_New"
- Move Invoices from the Opportunity Related List to the page layout.
- Click on Invoices in the Related List Section and hit "edit properties" button. Select columns as Invoices, Invoice number, Total Invoice Amount, Payments, Balance, Days Outstanding, and Transaction Date. Save the opportunity 'page layout'.

- Go to Setup
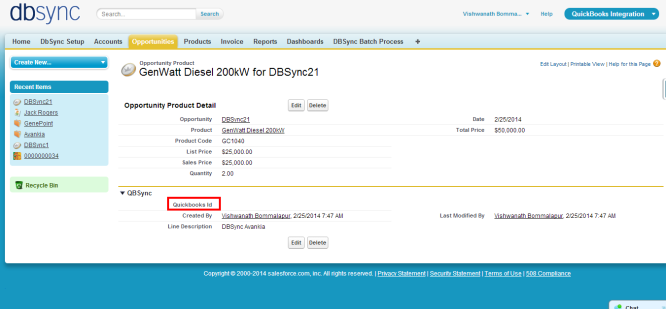
 Customize Opportunity Opportunity Products Edit Page Layout to move 'QuickBooksID' field to the page layout.
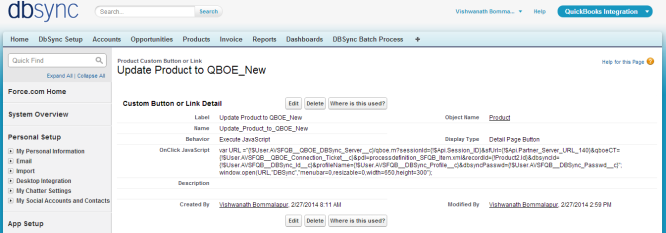
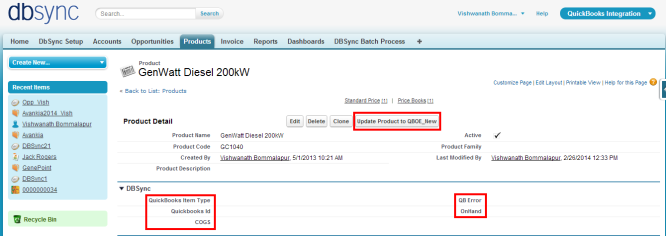
- New Button "Update Product To QBOE_New" should be created in Salesforce Product by referring the below steps.
- Go to setup Customize Product 'Buttons and Links' New Button or Link.
- Enter the below mentioned details and save to create two buttons.
Label: Product To QBOE_New
Behavior: Execute JavaScript
Display Type: Detail Page Button
OnClick JavaScript: var URL ="{!$User.AVSFQB_QBOE_DBSync_Serverc}/qboe.m?sessionId=
...
{
...
!$Api.Session_ID
...
}&sfUrl=
...
{
...
!$Api.Partner_Server_URL_140
...
}&qboeCT=
...
{
...
!$User.AVSFQB
...
QBOE_Connection_Ticket
...
c
...
}&pdl=processdefinition_SFQB_Item.xml&recordId=
...
{
...
!Product2.Id
...
}&dbsyncId=
...
{
...
!$User.AVSFQB
...
DBSync_Id
...
c
...
}&profileName=
...
{
...
!$User.AVSFQB
...
DBSync_Profile
...
c
...
}&dbsyncPasswd=
...
{
...
!$User.AVSFQB
...
DBSync_Passwd_
...
c
...
}";
...
window.open(URL,"DBSync","menubar=0,resizable=0,width=650,height=300");
...
- Go to Setup Customize Product 'Page Layout' fields to add is "QuickBooks Item type" , "QuickBooks Id" , "QB Error", "COGS" and "OnHand'" and Buttons "Update Product To QBOE_New" to the page layout.
- Go to setup Customize Users 'Page Layout' Edit the Page Layout. Under the Page Layout drag the fields and buttons specified below to add it in Page Layout and Save.
- Field "DBSync Id"
- Field "DBSync Passwd"
- Field "DBSync Server URL"
- Field "DBSync Profile"
| Anchor | ||||
|---|---|---|---|---|
|
- Go to mydbsync.com & register for Free Trial. Ensure that Source & Target Adapters are Salesforce & QuickBooks Online respectively.

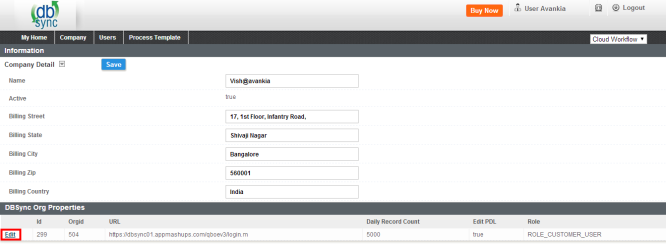
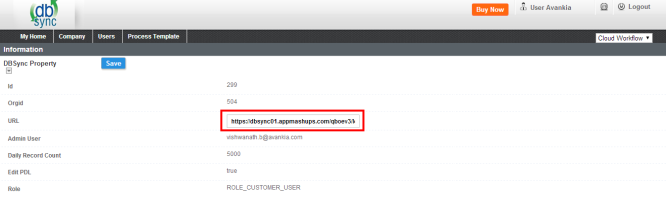
- Login using to dbsync account, go to Company tab, click on edit to view DBSync Org Properties. Click on edit and replace the existing URL with https://dbsync01.appmashups.com/qboev3/login.m
...

- Go to Process Template tab in DBSync home page and click on SalesforceQuickBooksOnline:BiDirectional to include process template for Bi-directional Integration of Salesforce & QuickBooks Online.
- Click on Launch in My Home tab, you will see SalesforceQuickBooksOnline:BiDirectional profile in the next tab of your browser.
- Click on Quick Start to configure Salesforce & QuickBooks Adapters
...
Configure Salesforce Adapter:
...
- Enter Salesforce Username, Password & Security Token. Click on Save Properties to save the settings. Click on Validate to confirm the Salesforce connections settings are valid.
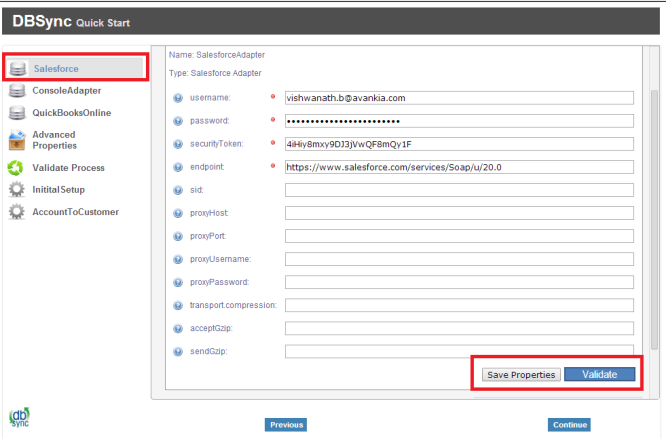
...
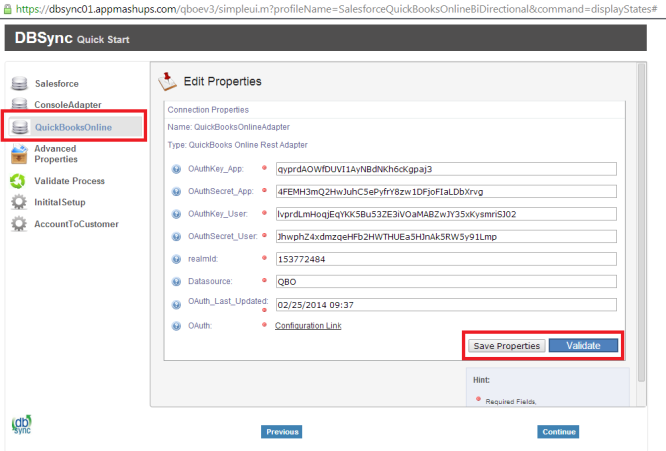
Configure QuickBooks Online Adapter:
...
- Go to QuickBooks Online Connection properties, click on Configuration link, which will take you to new tab to authorize Intuit to securely share your data to DBSync QBRv3.
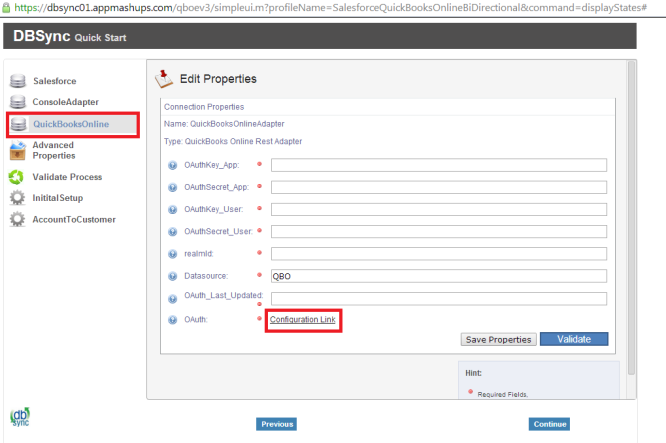
- Click on Authorize to continue. Confirmation email will be displayed as "Your QuickBooks Online is now connected with the Profile. Please close this window now".

- Go to DBSync Quick Start, all the QuickBooks Online Adapter Connection properties fields will be auto populated. Click on Save Properties of to save the settings. Click on Validate to confirm the QuickBooks Online connections settings are valid.
| Anchor | ||||
|---|---|---|---|---|
|
Running the Integration:
DBSync Integration of Salesforce & QuickBooks Online can be initiated by the following three methods.
- Using Salesforce custom buttons:
- Using DBSync Scheduler:
...
Using Salesforce custom buttons:
...
- Salesforce custom buttons in Salesforce Accounts, Contacts and Opportunity can be used to update these specific records into QuickBooks as and when required. To set Auto run of integration, one of the next methods should be used.
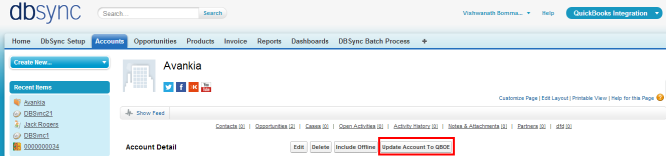
- Salesforce Custom Button Update Account to QBOE in Accounts Object is shown below.
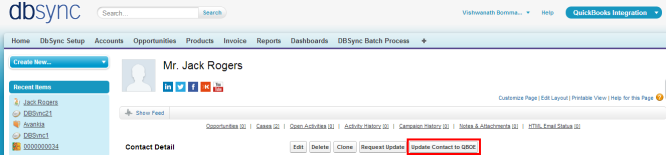
- Salesforce Custom Button Update Contact to QBOE in Contacts Object is shown below.
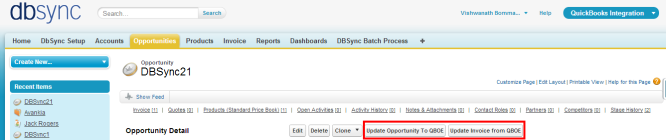
- Salesforce Custom Button Update Opportunity to QBOE and Update Invoice from QBOE in Opportunities Object is shown below.
...
Using DBSync Scheduler:
...
- Scheduler available in DBSync Account can be used to schedule the integration.
- Login to DBSync account, click on Launch to go to DBSync profile page and click on Scheduler on the top right corner.
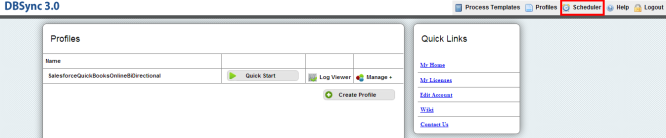
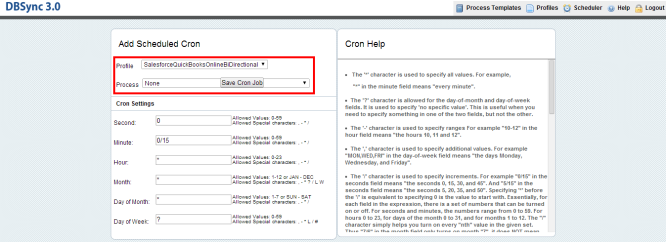
- Select the integration profile and required process to auto run. Edit the Cron Settings to set the frequency of Auto run and Save Cron Job.
Overview
Content Tools