2022
Page History
| Anchor | ||||
|---|---|---|---|---|
|
| Anchor | ||||
|---|---|---|---|---|
|
| Anchor | ||||
|---|---|---|---|---|
|
The process of using MS NAV Adatper is explained in this section with an example of integrating MS NAV with MySQL Database.
| Anchor | ||||
|---|---|---|---|---|
|
| Anchor | ||||
|---|---|---|---|---|
|
- Login into www.mydbsync.com and click on Customer Login.
- Enter your DBSync Username and Password and click on Login.
- Once logged in, click on "My home" tab from the menu and click on Launch button.
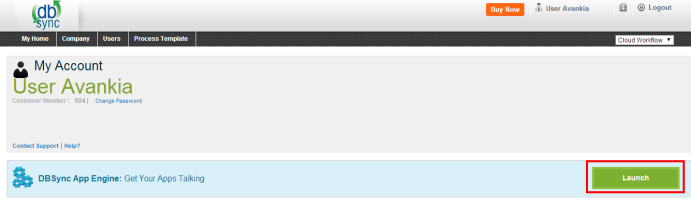
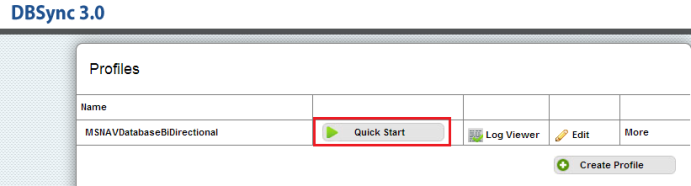
- You will be re-directed to DBSync profile page.
- Click on Quick Start button to navigate to the configuration window as shown.
- Click on MS NAV on the top left corner of the Quick Start window.
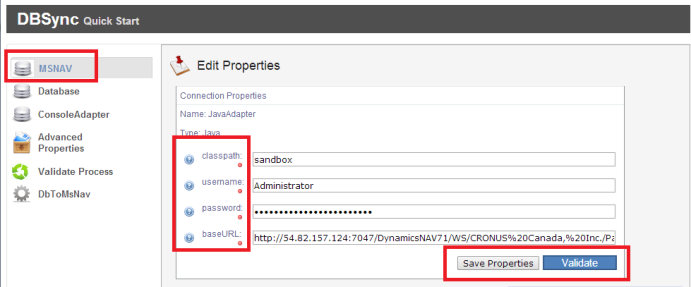
- Retain the default classpath.
- Enter your MS NAV username & password in the specified field.
- Enter the base URL for the server wherein MS NAV is installed. If DBSync is installed in the same machine where MS NAV is installed URL field need not be entered.
- Click on Save Properties to save MS NAV settings.
- Click on Validate to confirm validation.
- Click on Database on the top left corner of the Quick Start window.
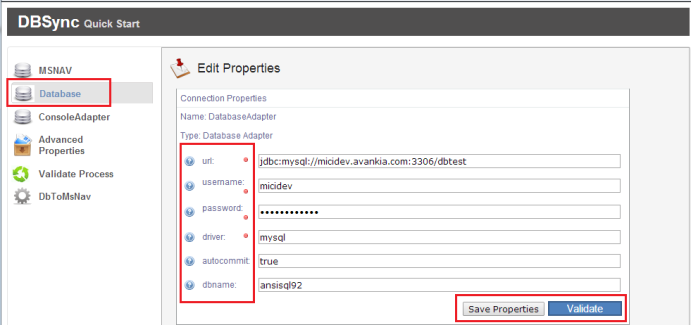
- Enter your database URL.
- Enter your database username & password in the specified field.
- driver should be the type of database.
- autocommit should be true.
- dbname should be the name of database.
- Click on Save Properties to save MS NAV settings.
- Click on Validate to confirm validation.
Running the integration:
Integration can be run using scheduler or run button. Scheduler can be used to setup auto run & run button can be used to run the integration manually.
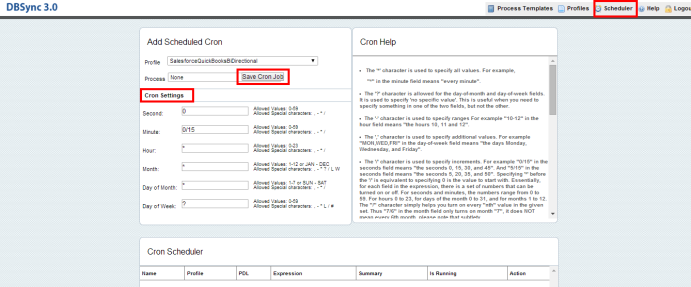
Scheduler:
- Click on the Scheduler button on the top right corner of DBSync profile page.
- Select the required profile to schedule & Process.
- Enter the frequency of sync under Cron Settings.
- In the bottom, Cron Scheduler will show the scheduled process.
- In case, the scheduled process is no longer required, you may delete the schedule.
Manual Run:
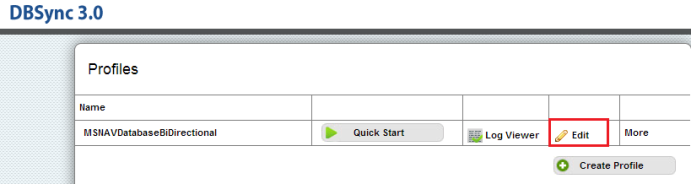
- Click on edit on DBSync profile page.
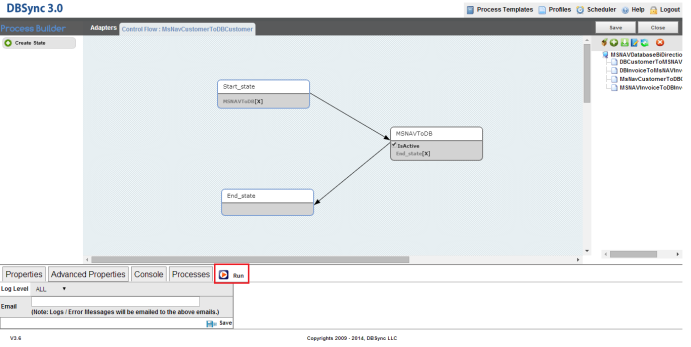
- Select the required process to run.
- Click on Run to manually initiate integration.
Overview
Content Tools