Requirements:
Salesforce Adapter
GreatPlains Adapter
Provider:
DBSync
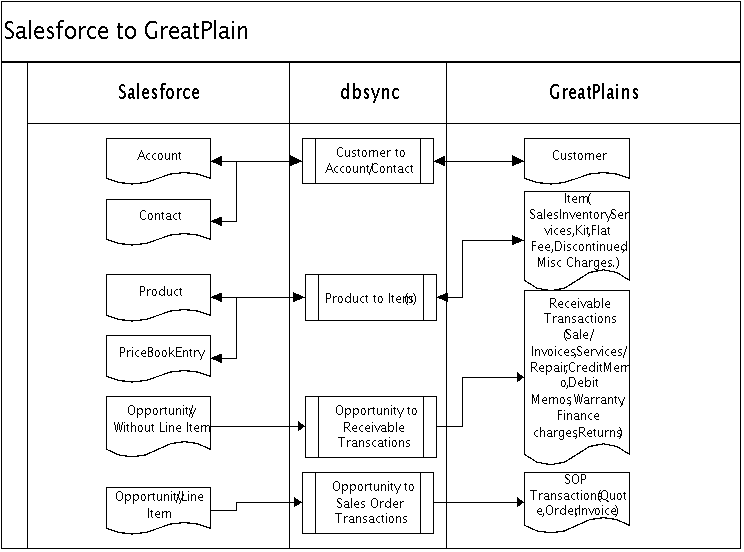
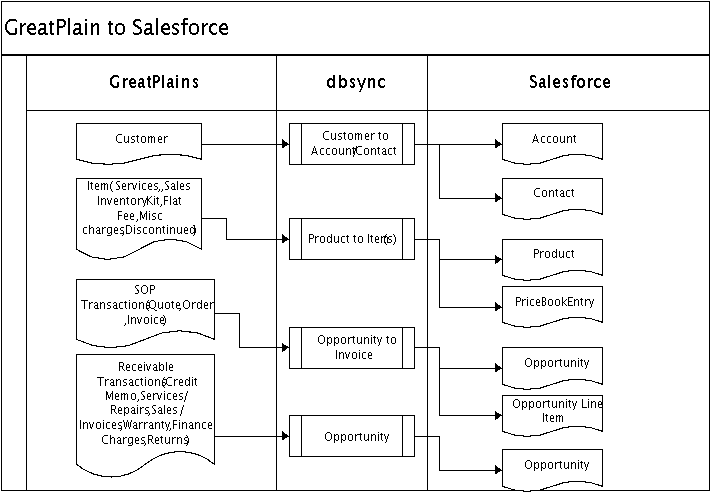
Provide synchronization between Microsoft Dynamics GreatPlains to Salesforce. Data Integration from GreatPlains to Saleforce is performed using DBSync where it is defined as a process under a profile.
Salesforce GreatPlains
SOP Transactions
Salesforce to GreatPlains.
Salesforce |
s |
Account |
Customer |
Opportunity(Without Opportunity Line Item) |
Receivable Transactions(Sales/Invoices,services/Repairs,CreditMemo) |
|
SOP Transactions(Quote/Order/Invoice) |
Product/PriceBook |
Sales Inventory/ Services/Discontinued/Kit/Flat Fee/Disc Charges |
GreatPlains to Salesforce
GreatPlains |
Salesforce.com |
Customer |
Accounts |
Customer |
Contacts |
SalesInventory |
Products |
Services |
Products |
Flat Fee |
Products |
Discontinued |
Products |
Kit |
Products |
Misc Charges |
Products |
Receivable Transaction(Without Line Item) |
Opportunity |
SOP Transactions(With Line Item) |
Opportunity/LineItem |


Installation
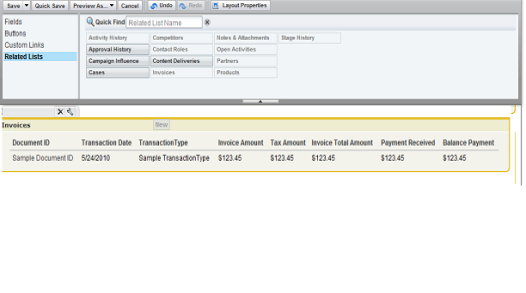
Save the opportunity 'page layout'.
At this point, you have successfully completed your Salesforce.com instance setup.
Installation steps:
a.Run the Setup wizard

b.Click on Next and select I accept the agreement.
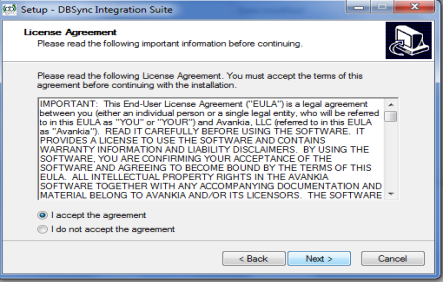
c.Click on Next and Enter Destination Location.

d. Select Start menu Folder.

e. Set Additional task.

f. Click on Install.

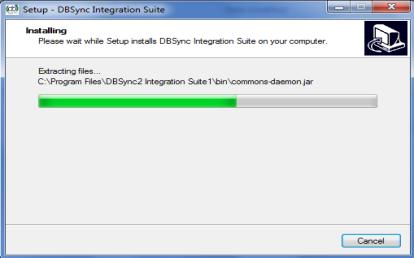

Click on Finish
At this point, you have successfully completed your Dbsync Installation on your Desktop. If you have selected the option 'Set DBSync as Service', then DBSync would be running as a Windows Service in the background. If you have not opted to select this, then you can start DBSync from your Start Up ? Program Files ? DBSync Integration Suite.
Dbsync Configuration
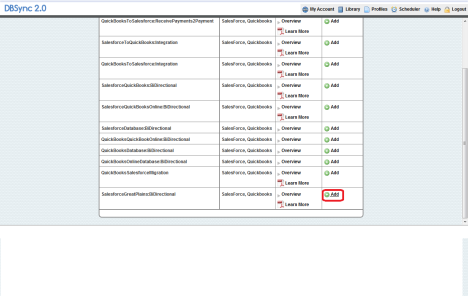
3. Enter eConnectport (Default: 18888), Datasource, Dbname and click on save properties.
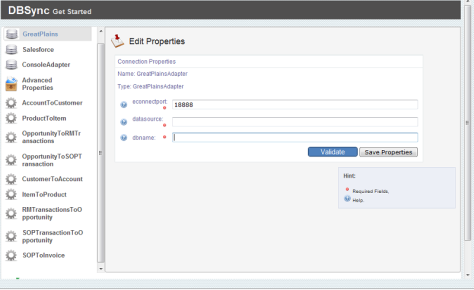
Examples:
Datasource : DESKTOPUSERNAME\MSSQLSERVER2008
Dbname : <<Your GreatPlains Company Database name. >>
3. Click on Validate to check wether the connection properties are valid or not.
4. Click on Continue and Enter Username and password. Make sure you enter your Salesforce Security Token at the end of the password.
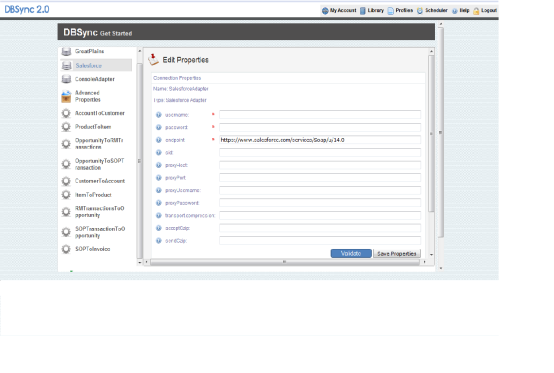
5. Click on save properties .After this click on validate to check wether the connection properties are valid or not.
DBSync LLC
750 Old Hickory Blvd.
Bldg 2, Suite 150
Brentwood TN 37027
U.S.A
Email
sales@avankia.com
Phone/Fax
1-877-739-2818
Copyright @ 2010, DBSync LLC and/or its affiliates. All rights reserved. This document is provided for information purpose only, and the contents hereof are subject to change without notice. This document is not warranted to be error-free, nor is it subject to any other warranties or conditions, whether expressed orally or implied in law, including implied warranties and conditions of merchantability or fitness for a particular purpose. We specifically disclaim any liability with respect to this document, and no contractual obligations are formed either directly or indirectly by this document. This document may not be reproduced or transmitted in any form or by any means, electronic or mechanical, for any purpose, without our prior written permission.
DBSync is a registered trademark of DBSync LLC and/or its affiliates. Other names may be trademarks of their respective owners.