2022
For Integration from Salesforce into Quickbooks
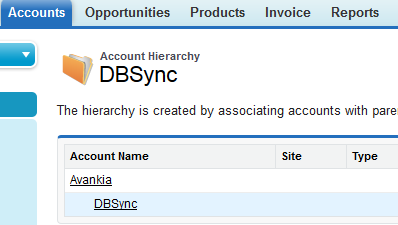
- If Quickbooks Customer and Salesforce Account object has hierarchy structures enabled, then the following changes have to be implemented within your DBSync mappings / template to facilitate hierarchy mappings. A typical hierarchy structure in Salesforce Accounts and Quickbooks Customer entities is as shown below.
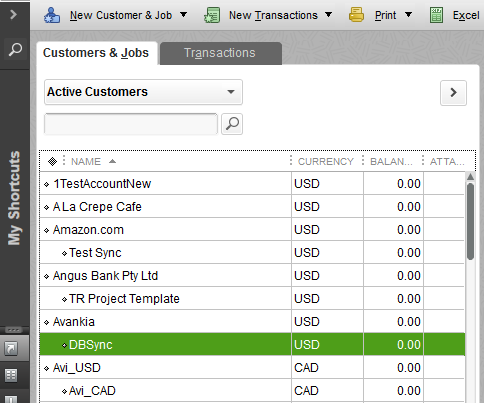
- The default mappings within DBSync standard template integrates the above Salesforce Account records as two separate Customer records "Avankia" and DBSync" and not as Parent & Child records.
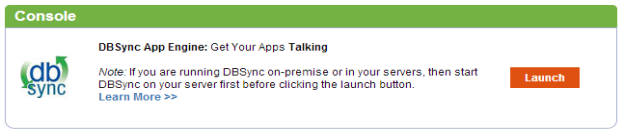
- Login to your DBSync account with the your credentials to make changes or create hierarchy mappings. Once you have logged into your DBSync account, click on MyHome menu.
- Click on Launch Button to Launch DBSync integration console.
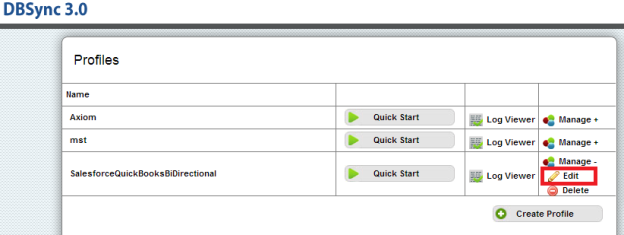
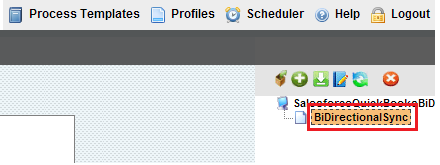
- Click on Manage --> Edit to navigate to the Process Builder page.
- Double click on BiDirectionalSync process on the extreme right hand corner of the Process Builder Page.
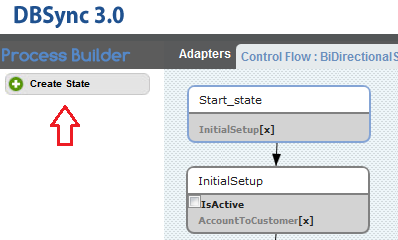
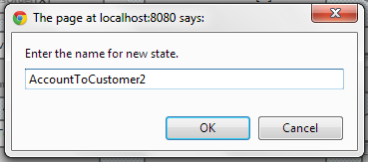
- Once inside the process builder page, create new State / Wokflow named as Account to Customer2 as illustrated in the below two screenshots.
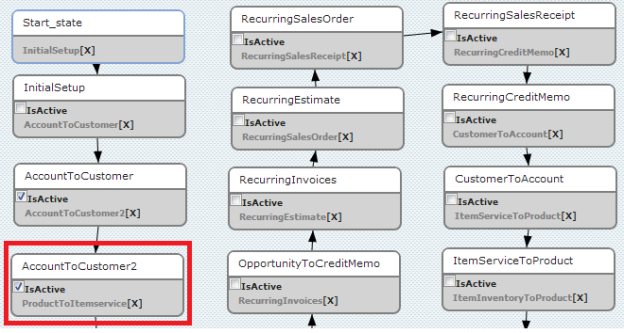
- After Creating the state AccountToCustomer2, link it with AccountToCustomer state as shown in screen shot below.
- Open the AccountToCustomer2 State/Workflow and add the following mapping as shown below.
- Make sure to add Reader, Writer, Map & Status Writer similar to AccountToCustomer state.
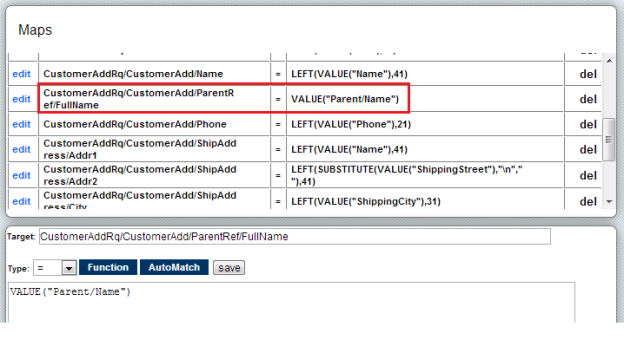
- Make the following changes in the Mapping window as shown in the below screen shots.
Target == "CustomerAddRq/CustomerAdd/ParentRef/FullName"
Source Field == "VALUE("Parent/Name")"
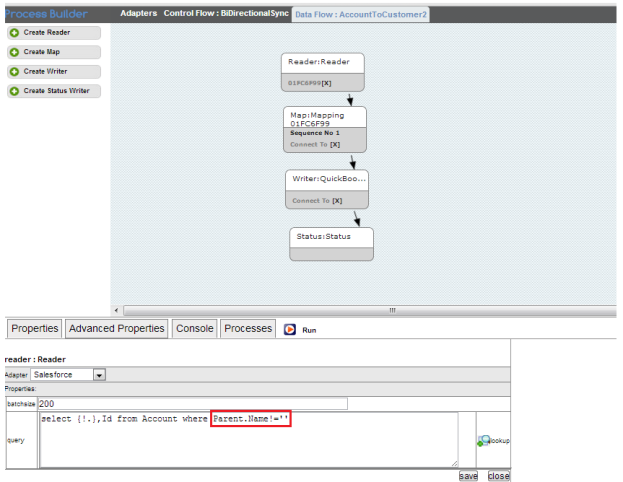
- Now make the following changes in AccountToCustomer2 reader Query.
- Make change in Reader Query with the below code.
select {!.} from Account where AVSFQB__Quickbooks_Id__c = '' and Parent.Name!=''
- Similary change AccountToCustomer reader query with the below code.
select {!.} from Account where AVSFQB__Quickbooks_Id__c = '' and Parent.Name =''
- Once you are done with all the above mentioned changes, run the sync and data will be integrated into Quickbooks with their respective hierarchies in place as shown below.

- This concludes Account hierarchy mappings for the data-flow from Salesforce into Quickbooks.
Overview
Content Tools