2022
DBSync Cloud Workflow is a J2EE compliant application that can run in any J2EE container like Tomcat, JBoss, WebSphere or others as a WAR deployment.
The default install of DBSync Cloud Workflow comes along with Tomcat and is supported by the DBSync Cloud Workflow team.
Since DBSync Cloud Workflow is a Java-based application, it can run in any Java supported platform like
- Windows
- Windows 10
- Windows 8
- Windows 7
- Windows Vista
- Windows 2003 Server
- Linux
- Solaris
- Fedora
- Redhat
- CentOS
- Ubuntu
- Unix flavors
It is also supported for both 32bit and 64bit processors by installing the appropriate Java VM and J2EE container.
Minimum Software & Hardware Requirement
Software
• Oracle Java JDK 1.8 and above, a version can be 32-bit or 64-bit based on Linux Server config.
Hardware
• 1 GB Free RAM
• 1 GHz or better CPU
• Install: 150 MB free space
• Map/Process store: 5MB/map
• Operational: 1GB (Log files, Event Queues, etc)
Supported Browsers
DBSync recommend using the following browsers.
| Browser | Browser Version | MAC Support | Windows Support |
|---|---|---|---|
| Chrome | 11 & Above | Supported | Supported |
| Firefox | 10 & Above | Supported | Supported |
| Internet Explorer | 9 & Above | Supported | Not Supported |
| Safari | 4 & Above | Not Supported | Supported |
Useful Hint
- All browsers must have cookies and java script enabled.
- Browsers that use the latest version of Webkit, Blink or Gecko are not directly supported.
- For Firefox, apart from the stable versions, there is also support for the latest Extended Support Release of the chrome.
- Internet Explorer 8 & 9 are also supported. But, please be aware that some CSS3 and HTML5 elements are not fully supported.
- Please whitelist DBSync Website, iPaaS from your browser setting. Sometimes, a browser may block pop ups and as a result user may not open few modal windows.
- The platform may not function in old Internet Explorer compatibility modes. Make sure user are using latest rendering mode. To do so from your debugging tools -> Press F12 and check the property "Document Mode".
Download & Install
Follow the steps below to download the Windows and Linux link from the DBSync Appcenter page. Download link will be available in user's local file system in the "Downloads" folder. The installer is named as "DBSync_CloudWorkflow_VX.X.X.X" following the naming convention - i.e. the first part "DBSync_CloudWorkflow" specifies the product line of DBSync and the second part "VX.X.X.X" specifies the version of the download installer.
Steps to follow:
Start your free trial on "https://www.mydbsync.com/"
Create an Account for a new user.
Choose prefered package from the list -"Starter, Enterprise On-Premise and Enterprise On-Cloud" to "Get Started" by registering with business email.
Follow the instructions sent on the email Id and setup the user profile.
Login to DBSync Cloud Workflow account.
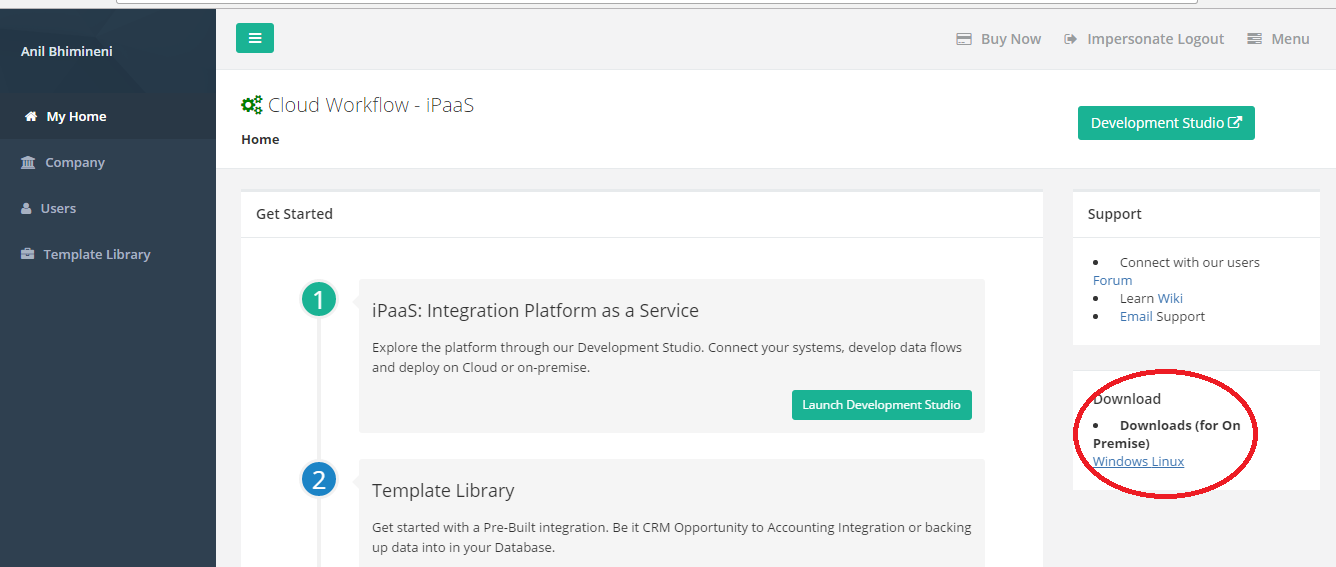
Download link will be available for users in DBSync Cloud Workflow Appcenter page.
Based on user requirements, download a desired operating system version either Linux or Windows.
Download link of DBSync Cloud Workflow On-Premise Windows and Linux as shown in the image below.
DBSync Cloud Workflow On-Premise Installation
Users can install the installer from the "Downloads" folder by following the steps below:
- Start the installation process to select the option "Run as Administrator".
- If windows doesn't allow user to install file system "User Account Control" window pops up, then select the 'Yes' option to authorize the windows to proceed with installation.
- Select "I Accept the agreement" from "License Agreement" screen and proceed with the installation.
- The default installation path is shown - "C:\DBSync_CloudWorkflow". If user wish to choose a different folder, then select the Browse option for desired location to proceed with the installation.
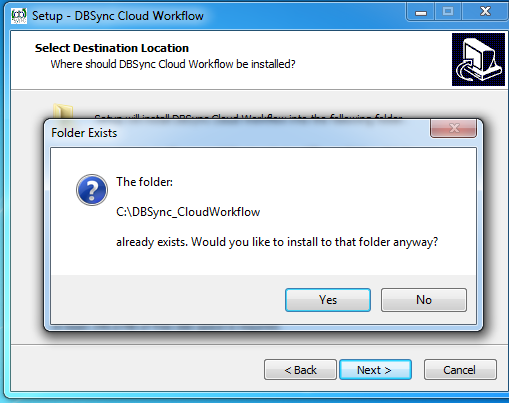
- If DBSync version already exists then the below alert message is displayed.
- Select "Yes" to wish to install the new version. Or else, "No" to change the installation directory.
- On the "Select Additional Task" screen, check options (1) "Create a desktop Shortcut" and, (2) "Create a QuickLaunch shortcut" if user wishes to place DBSync shortcuts and quick launch panel on his/her desktop, then select the "Next" to proceed with the installation.
- From the "Ready to Install" window, select the Install to proceed with the installation. Progress bar on the bottom of the "Installing" window will display the status of the installation process.
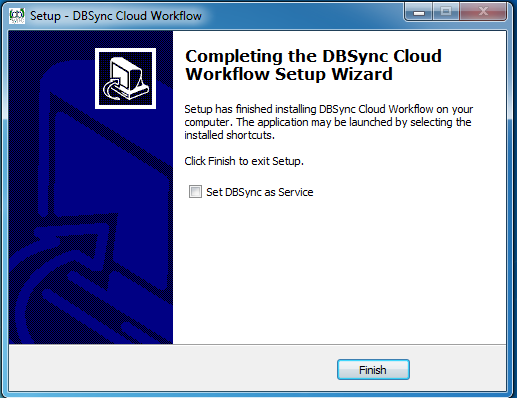
- Once the installation process is complete, user will be on a screen named "Setup - DBSync Cloud Workflow". Here, user will have an option to "Set DBSync as service".
- If user wish to set it as a service, then check the Checkbox "Set DBSync as Service" and select the "Finish" to complete the installation.
- If user select the option 'Set DBSync as Service' then, DBSync will run as a Windows Service in the background.
- If user wish to start DBSync manually, then user can do from his/her desktop by starting "Start\All Programs\DBSync CloudWorkflow\DBSync".
DBSync Cloud Workflow On-Cloud Installation (On-Demand)
Steps to follow:
Start your free trial on "https://www.mydbsync.com/"
Create an Account for a new user.
Choose prefered package from the list -"Starter, Enterprise On-Premise and Enterprise On-Cloud" to "Get Started" by registering with business email.
Follow the instructions sent on the email Id and setup the user profile.
Login to DBSync Cloud Workflow account.
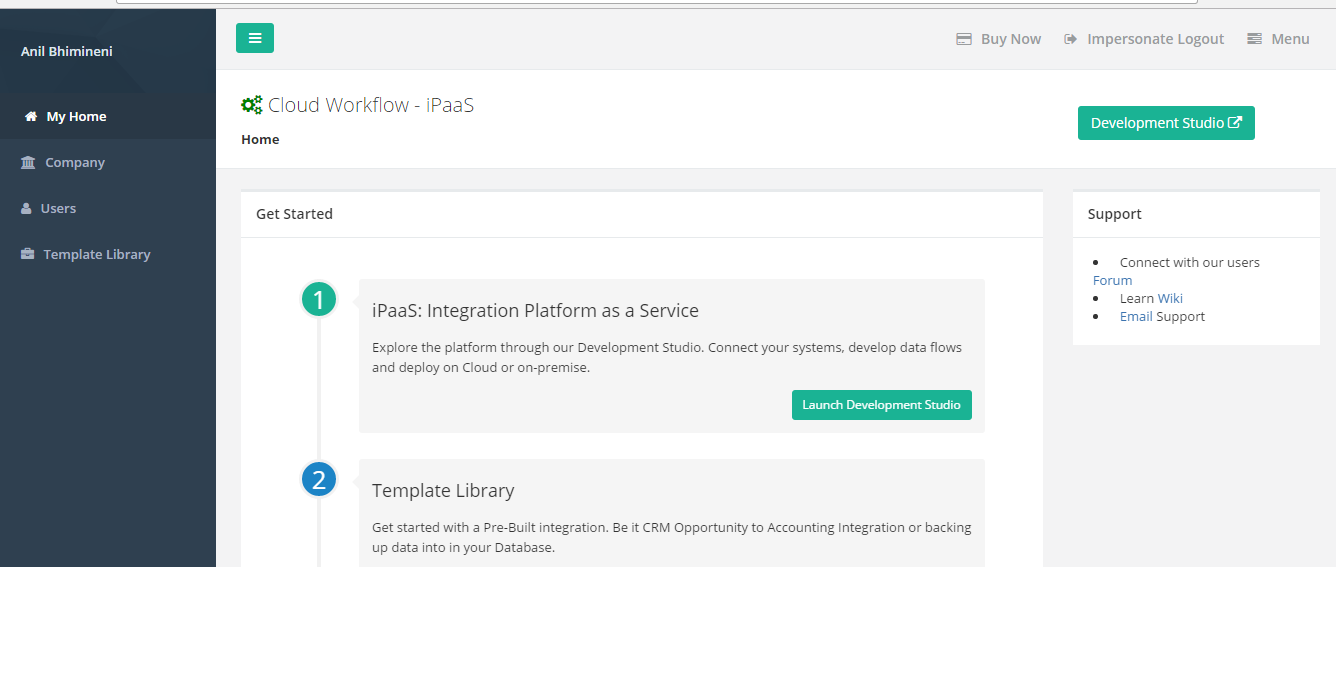
Steps are illustrated in the screens below.
Launch DBSync through All-Programs
If user wish to start DBSync Cloud Workflow from the program files, then user has to go to Start->All Programs->CloudWorkflow and choose DBSync service to launch the tomcat.
User can also learn about different available options listed in the installed folder of DBSync Cloud workflow. The following table lists with all the available options:
| Features | Description |
|---|---|
| DBSync | DBSync service will launch tomcat and this will act as DBSync application server on the machine where it is installed. |
| Remove Service | Choosing this option will remove the service from the Windows services which runs in the background. Go to Control panel→Administrative Tools→ services. Look for the service Apache Tomcat 8.5 DBSync and remove it. |
| Set as Service | At the startup of windows, instead of starting the service every time, user can choose the option 'Set as Service'. This will run the service in the background. Go to Control panel→Administrative Tools→ services. Look for the service Apache Tomcat 8.5 DBSync that keeps running. |
| Stop Service | Stop Service will stop the DBSync service. |
| Uninstall | Uninstall will remove all the DBSync cloud workflow components from user's machine. |


