2022
Setup
After adding your GL Accounts (Chart of Accounts), you might want to add hierarchy or the parent-child relationship to the accounts. For that you will need to export the GL Accounts data to the CSV file and identify the SalesForce ID. The second step is to identify the SalesForce IDs of the Parent accounts to map those to the Child accounts. Insert Parent Account IDs next to the Child Account Names in the CSV file by V-lookup operation. Once you have the IDs of the Parent Accounts in CSV, you can perform the update operations on GL Accounts and map those respective parent accounts using Data Loader.
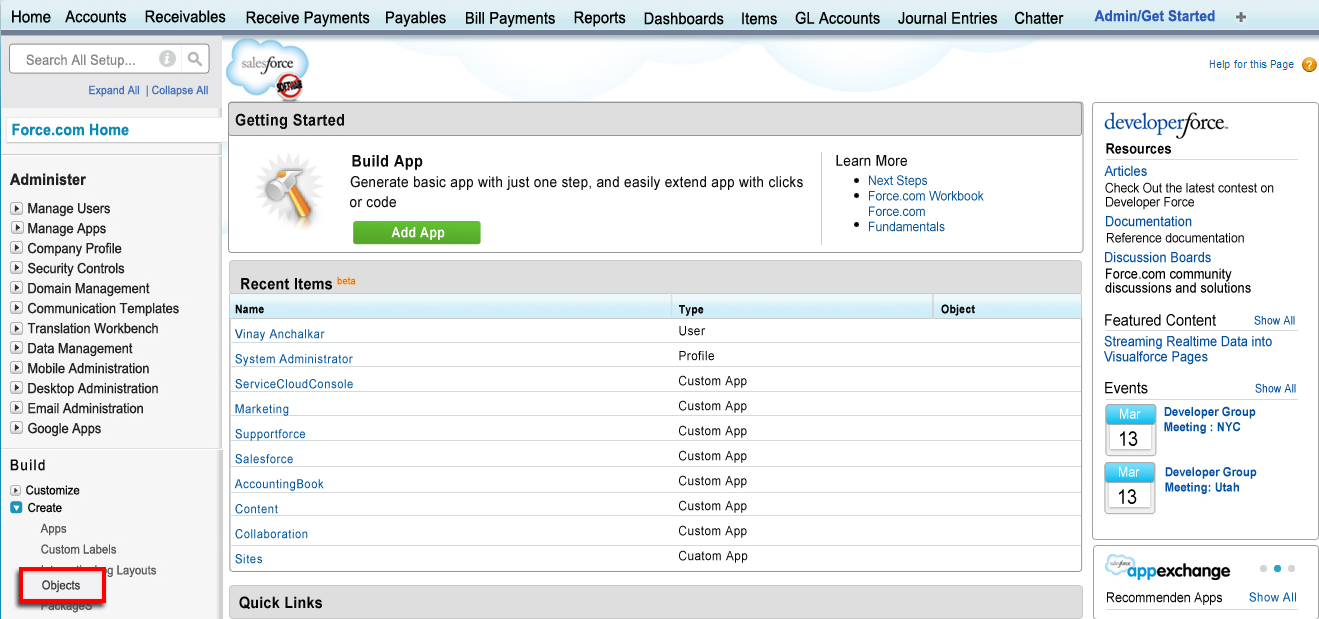
Once the GL Accounts are imported into the SandBox or the SalesForce, you are supposed to add the default accounts to the GL Default Setup. To do this, in the home page click on the Admin/Get Started object. (Note: Importing of GL Accounts are also explained in the Chapter GL Accounts).
Similarly, Items can also be uploaded into the AccountingBook in the Items Object. The procedure to add a single item is explained in the Chapter Items for your reference.
Once the GL Accounts are loaded into the AccountingBook, the default accounts needs to be defined to get the correctness in the entries. To do so follow the below steps
Click on Admin/Get Started object

Select the appropriate accounts from the drop down menu

- From the dropdown menu select the Default Revenue Account
- From the dropdown menu select the Default Cash GL Account
- From the dropdown menu select the Default Bank GL Account
- From the dropdown menu select the Default CC Account
- From the dropdown menu select the Default Revenue Account for Accounts Payable
Once you have Setup the defaults, click on the Save GL Defaults button.
Note: If the Account Name/s are not reflected in the dropdown list, the reason might be that the spelling of the Account is incorrect. While importing the GL Accounts through the Data Loader if the defaults accounts are spelled correctly then those accounts are to be automatically reflected in the dropdown menu, else you need to manually rename the Account names. |
To edit the Account Type, if it is incorrectly spelt click on the Setup Link in the Home Page.

In the new page click on the Packages tab
A new page is opened where you need to click on GL Account Tab as shown below

On clicking the GL Account Tab a new window gets opened where you need to click on Account Type tab in the Custom field & Relationships section

In the new page scroll down to Picklist Values. Click on the Edit link to change the Accounts in the Values column.

Let us take an example of Accounts Receivable value and see how it goes.

- Edit the Account Type to the desired one in the space provided for
- Click on the Save button
You have learnt how to create default accounts and edit the account type now.
Remote Site Security setting
What does remote site setting do? |
Goto Setup> under Security Controls Tab> Click Remote Site Setting.

In the new page click on the New Remote Site button

In the new page save the remote site settings by clicking Save button

- Add that in Remote Security setting with name – "Instance"
- Copy the first part of the URL address to the Remote Site URL. Refer the underlined URL in the picture
- Click on Save button, it looks as below once saved

Once the Remote site is added in the settings, the page needs to be retrieved to do this follow the below steps
Click on the Admin/Get Started object, scroll down to Retrieve Page Layouts related detail and click on the button Retrieve Page Layouts

On Clicking the button Retrieve Page Layouts the following page pops up and takes you back to the same page

Retreive page layout updates page layouts for edit screens for Receivables and Payables objects to organize all the controls(Field) in one layout. Which enables to either add or remove the feilds from the page layout.
Enable Left side AccountingBook Links

- Goto Setup menu
- Click on Customize
- Click on Home
- Click on Home Page Layouts, a new page gets open

- Click on the Edit link to open a new page

- Tick the check box and close the page, this will create a short cut in the AccountingBook home page the links will take you to the statement of accounts. Refer picture below, each one is the link which will open up as described

This completes AccountingBook Setup
Overview
Content Tools