2022
Issue:

Description:
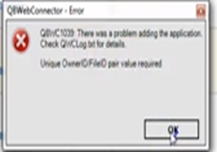
Cause- It can be caused due to either of this one issue
1-The company file has been moved from its original location.
2-The third-party application or Warehouse Manager was incorrectly removed from the QuickBooks Web Connector.
Solution:
Reinstall the .qwc file to Web Connector
Download the QBWC CP3Tool. (Note: This download requires Internet Explorer 10, Chrome, or Firefox browsers.)
- Double-click theQBWC_CP3Tool_Installer.exe file to install the tool.
- After the installation completes, select Launch the QBWC CP3Tool.
- Minimize the tool.
- If you haven't done so already, download the .qwc file for your application:
- Open QuickBooks Desktop and select the company file you are having trouble with.
- Make a backup copy of this company file. (The tool asks you to do this, so it is easier to do it first.)
- Bring the QBWC CP3Tool back up on the screen by clicking it in the Taskbar.
- Click Select Fileand locate the.qwcfile.
- Click Remove Stamp.
- When the Application Certificate appears, select the third option,Yes, whenever this QuickBooks company file is open, and then click Continue.
- In the Application Access Request window click Yes.
- On the access confirmation message, click Done.
- Click OK on the message asking you to make a backup, since you already did this in step 7.
- The QBWC CP3Tool displays a confirmation message if the owner ID was successfully removed.
- Close the QBWC CP3Tool.
- Install the .qwc file to the Web Connector:
Open Web Connector and click Add Application.
- Go to the .qwc file for your third-party application and open it.
- Enter your third-party password in the Web Connector, and click Yes on the message to save the password.
The Web Connector is now ready to sync.
Overview
Content Tools