2022
Page History
...
http://help.mydbsync.com/docs/display/dbsync/2+-+Getting+Started
| Panel |
|---|
Deploying Appcode on DBSync platform |
- Log into AppCenter and Launch DBSync2
- First add the Java and DB connector .
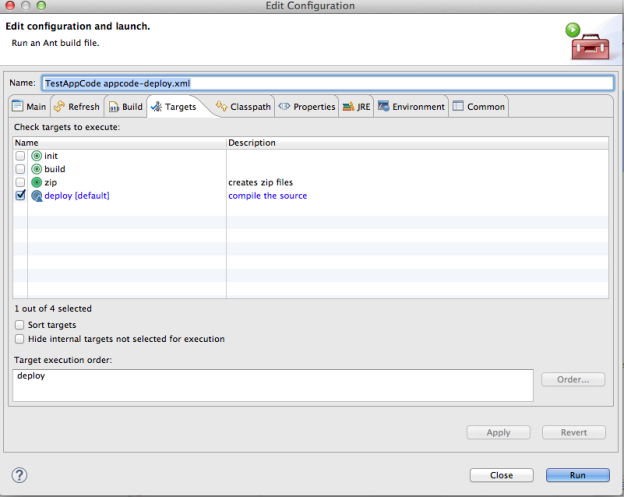
- Now before we configure the adapters it is important that we deploy our custom HelloWorld AppCode to the dbsync2 environment so that when we configue the Java Adapter it has the relevant class files packaged ,for that as mentioned let us edit appcode-deploy.xml to point to the correct profile name:
| Code Block |
|---|
<property name="profile" value="HelloProfile" />
|
5. Now we need to run the ant script for appcode-deploy.xmlwith the target as deploy we see the output as follows:
 6. The log shows a successful deployment. Now let us configure the properties for Java Connector. In our case the only property which we need to set is the environment name setting in the classpath property.
So we need to set it to "sandbox".
7.The log shows a successful deployment. Now let us configure the properties for Java Connector. In our case the only property which we need to set is the environment name setting in the classpath property. So we need to set it to "sandbox".
8. Similarly for db adapter set the connection and db properties to be used while sync,Now let us go ahead and configure our use-case, we need to configure the db adapter to be able to read from the db table and write it out in our Hello World program Before we can use the connectors in our project, we need to validate them.
9. Now define and save the reader ( dbreader) properties by using the metadata exposed through the Lookup button .Let us define the sql query which we will be using to fetch data from the selected table. In this case we use the following query: "select * from test_customer"
Note :
In this example we are using the AppCode as a writer and not a reader. However, as explained in the previous sections, we can use the AppCode as a source as well from where we do a read operation. In that case, we need to pass a SELECT statement as an input query which would be converted into a filter. The filter params are passed in the where condition as key='value' comma separated. The structure of the same is given below:
select * from <tablename> where <filterkey>='<filtervalue>',<filterkey2>=’<filtervalue2>’SaveResult[] <methodName>(List<InputMetadataParameter> )
We set the batchSize to 100 and the table name to "writeHello" which we defined in our HelloWorld AppCode in this example
After selecting the table and saving the properties, we need to map the reader and the writer properties
For that open the properties of the Map box and set them. We need to define the map sequence and the description
In this case, we set Map Sequence as 1 and the description as "Test"
Now let us edit the Map where we map out the Reader metadata elements to that of the Writer
we need to select the fields from the Source and Target and map them out respective from the Map Screen.To get more details about the whole process of Mapping you can go through WIKI documentation in the DBSync section
Overview
Content Tools