2022
Repository: https://<username>/dbsync/dbsync-widget-js.git
1. Initialize the plugin by referencing the necessary files:
<link rel="stylesheet" type="text/css" href="dbsyncwidget.min.css">
<script src="${pageContext.request.contextPath}/scripts/bootstrap.min.js"></script>
<script src="dbsyncwidget.min.js"></script>
2. Add div on the page:
<div id="dbsyncwidget"></div>
3. Add javascript initialization in the script tag:
Here are the keys that you can use:
appName - name of application to connect with
validationUrl - API Url to check if application is connected
connectUrl - API Url to connector page
<script>
var dbsyncwidget = null;
var dbsyncButton;
var options = {
appName: 'Application Name',
validationUrl: 'Validation API Url',
connectUrl: 'Connection API Url'
};
$(document).ready(function () {
dbsyncButton = $('#dbsyncwidget');
dbsyncwidget = dbsyncButton.dbsyncwidget(options);
});
4. (Optional: Customizing DBSync widget look&feel).
To change dbsyncwidget button we can override the next css classes:
dbsync-widget-logo - css class which describes styles of the button in case of validation is not successfull
dbsync-widget-logo-connected - css class which describes styles of the button in case of validation is successfull
To change the size of modal window we can override:
modal-large - css class which describes dimension styles of modal window
Example of using dbsyncwidget in c2c:
- Add necessary files:
<link href="${pageContext.request.contextPath}/css/dbsyncwidget.min.css" rel="stylesheet" />
<script src="${pageContext.request.contextPath}/scripts/bootstrap.min.js"></script>
<script src="${pageContext.request.contextPath}/scripts/dbsyncwidget.min.js"></script>
- Add div:
<div id="dbsyncwidget"></div>
- Add script tag:
<script>
var dbsyncwidget = null;
var dbsyncButton;
var params = {
partner_key: '<%=System.getProperty("partnerKey")%>',
partner_token: '<%=System.getProperty("partnerToken")%>',
app_target: 'qbonline',
username: 'TestComp001_User001',
company: 'TestComp001',
appId: 'qbonline',
appName: 'QuickBooks Online',
context: '${pageContext.request.contextPath}',
validationUrl: 'verifyProfile'
};
var options = {
appName: 'QuickBooks Desktop',
validationUrl: 'http://localhost:8080/c2c/verifyProfile/TestComp001_User001',
connectUrl: 'http://localhost:8080/c2c/qbdesktop/qbdesktop/TestComp001_User001/TestComp001'
};
$(document).ready(function () {
dbsyncButton = $('#dbsyncwidget');
dbsyncwidget = dbsyncButton.dbsyncwidget(options);
});
</script>
- Add custom css styles:
<link href="${pageContext.request.contextPath}/css/style.css" rel="stylesheet" />
Content of styles.css:
.modal-large {
width: 60%;
}
.dbsync-widget-logo {
outline: none;
text-decoration: none;
border: none;
background: url(../images/logo.png) no-repeat 0 0;
width: 100px;
height: 30px;
display: inline-block;
margin: 5px;
}
.dbsync-widget-logo:hover {
filter: brightness(105%);
}
.dbsync-widget-logo-connected {
outline: none;
text-decoration: none;
border: 2px;
background: url(../images/logo-connected.png) no-repeat 0 0;
width: 100px;
height: 38px;
display: inline-block;
margin: 5px;
}
.dbsync-widget-logo-connected:hover {
filter: brightness(105%);
}
If validation API method responses with json {status: success}
We will see the next button on the page:

Clicking on the button we will see
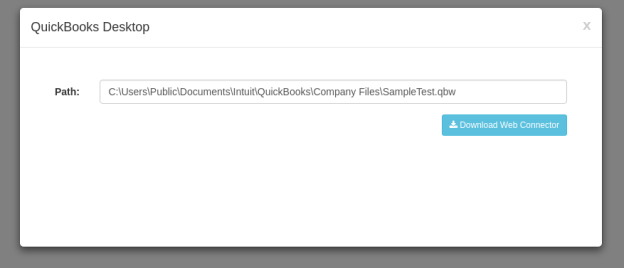
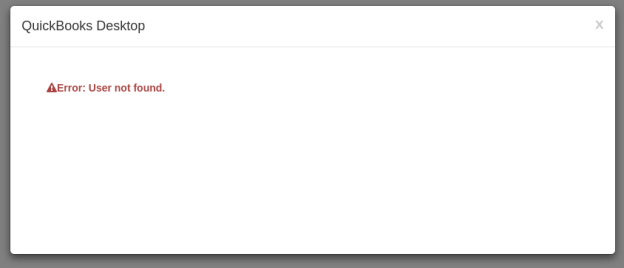
Otherwise if validation API method responds with status other than success we will see
![]()
Clicking on the button we will see
Overview
Content Tools