2022
Quick Start with Copy Data Management
Copy Data Management (CDM) provides its users with an easy capability to Copy Salesforce instance to one or more Salesforce instances.
This feature enables Salesforce Admins, Developers and Data Migrators to manage better their Development or Data Migration projects. So now with a few clicks, you can Export / Import Account, Contact, Opportunity, Opportunity Line Items, Tasks or any standard and custom objects- with all ownership and users.
Log in to the DBSync replication portal
Sign in to the DBSync Replication portal.
Steps by Steps Guide to Run CDM
Follow these steps to buy the trial subscription of Cloud Replication and Copy Data Management (CDM).
- First, go to the link mydbsync.com and click on My Account section to do the Customer Login.
- Next, click on Create an Account to select the editions like Developer, Enterprise On-Cloud and Enterprise On-Premise.
- Click on get started button and enter your business email to start the registration process (Please refer this link for Registration: Steps for Registration)
- Or Sign in, directly to the DBSync Replication portal, If you are an existing customer.
- Once, you have registered with us then go to the top right corner of the dropdown menu and select the Buy Now option to buy the trial account of 14 days for Cloud Replication and CDM.
- After the selection, the trial account of Cloud Replication and CDM will be added automatically in your right top corner of the menu.
- Select the Cloud Replication and CDM option and click on Launch Development Studio to get enter in Cloud Replication and CDM platform.
Follow these steps in the DBSync replication portal
- Once, you have logged in then click to "main menu" in the right-hand top corner on the home page of DBSync replication portal.
- Next, follow the link to go through each functionality of Cloud Data Replication and CDM. (Steps in Replication).
- Next, click on the Export Tab to start the CDM tool.
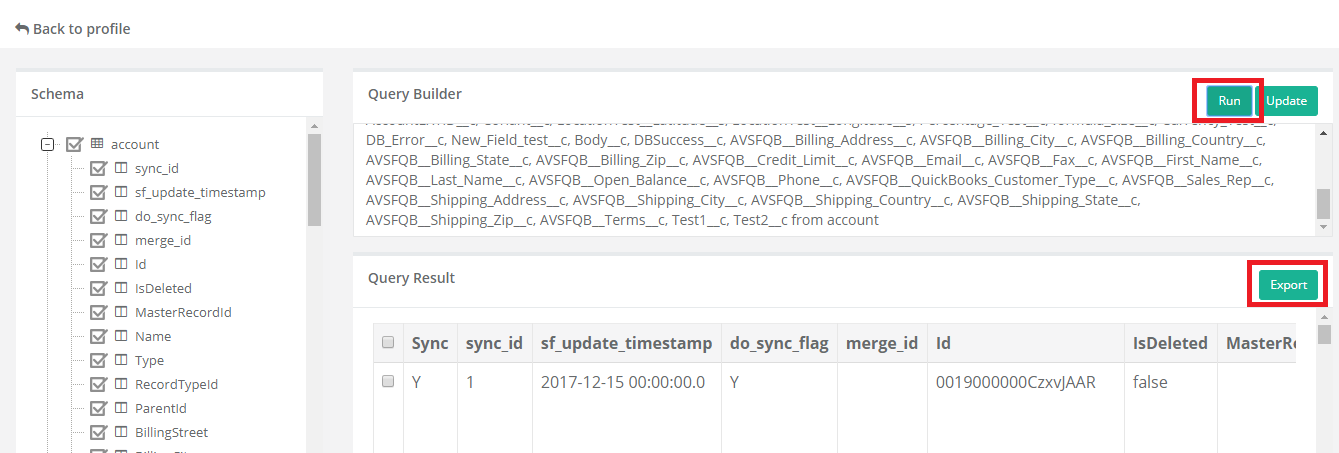
- This opens the Query Builder page. The left panel of this page lists the schema available in the source profile. You can choose the scheme you want to restore and choose the run button. The query for the selected schema will be presented in the query panel. You can edit this query to filter the results.
- When you click on the run button, the results are listed below the query panel. You can choose the rows or if you don't choose anything all of the rows are selected.
- Click on the export button and this opens the export widget.
Choose the source metadata in the first tab and click next.
The next tab is the validation tab. The source and target profiles are compared and any discrepancies are listed in this tab. The number of discrepancies is provided as a hyperlink and clicking on it list the fields that don't match. Once you are comfortable with the comparison results and then click on next.
- Next is the Notification tab where you provide the email to which the result is emailed.
- Finally, Click on the Export button. The export process is done and the results are emailed to the email id provided in the Notification tab. The mail has the details on the number of data inserts and errors. Details errors are provided as a CSV file attachment.
Overview
Content Tools