2022
Get started by creating a profile and replicate your Dynamics 365 instance to your MySQL or SQL Server database.
Follow the Steps below for initial setup guidelines.
Steps to Start DBSync Replication process:
- Log in to your DBSync Dynamics 365 CRM Replication instance using your credentials.

- Get started by clicking on the Add App to create a profile for configuring replication.

Select the option ‘Dynamics365crm’ as shown in the image above
Enter a desired profile name and click Save.
A new profile will now be created.
Click on the profile name.
You will be redirected to set up your Microsoft instance.
Dynamics 365 CRM Setup
- Enter the endpoint URL of your desired profile
- Click on Connect to Dynamics 365 CRM for instant web authentication. and the following steps would be witnessed:
- A pop-up asking for your Dynamics 365 CRM credentials will appear on the screen
Provide the login credential and click Log In
The User Name and Organization ID fields are automatically populated
Click 'test connection' to verify you are connected to the application
Click Save
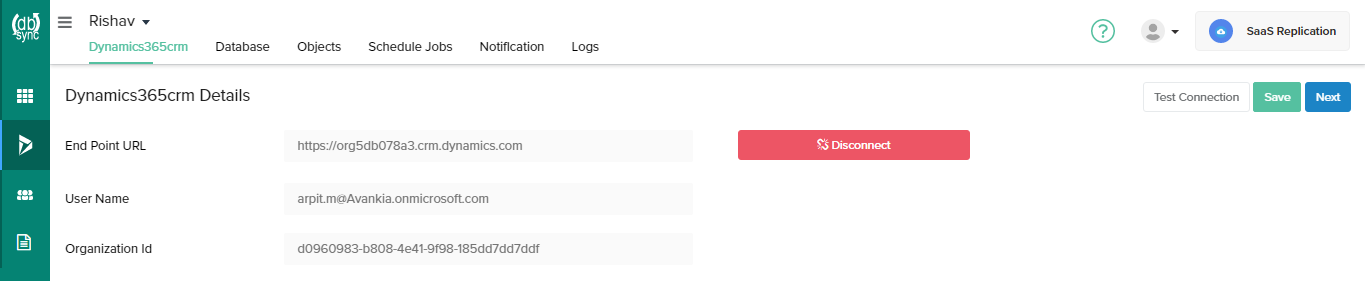
Click Next
You will be redirected to configure your Database.
Configure Database

- Click the Database tab from the top navigation toolbar.
- Select the type of database to which you wish to replicate the Dynamics 365 CRM instance linked in the previous step.
- To start with, the database credentials of the user are required such as Host, Port, Username, Password, Database Name, and Schema.
- Based on all the details entered by the user, the URL field gets auto-filled.

- Click Save
- A pop-up confirming the Connection is Saved will appear on the screen

Click Test Connection
A pop-up confirming the connection is established will appear on the screen.

Click Next
You will be redirected to configure Dynamics 365 CRM objects
Advance Settings:
This Tab primarily focuses on 3 advanced settings:
File Download

Click the checkbox next to download as local files to download into your local system
The URL for download file directory is provided
Click the checkbox next to Keep Multiple Version of Files this will assist in keeping multiple version of the files when downloading (Will rename older version before downloading new ones)
2. Prefix settings:
Include a prefix if required and enter the prefix details in the table below which will get populated into the database.
Sync Dynamics 365 CRM objects to database
Ensure you are connected to your Dynamic365 CRM instance
Ensure you have configured the database
Once a user has connected to Dynamics 365 CRM then objects will get synced and it will show on the objects tab.
Select any " Dynamics 365 CRM objects" to sync into the database objects table section as shown below.
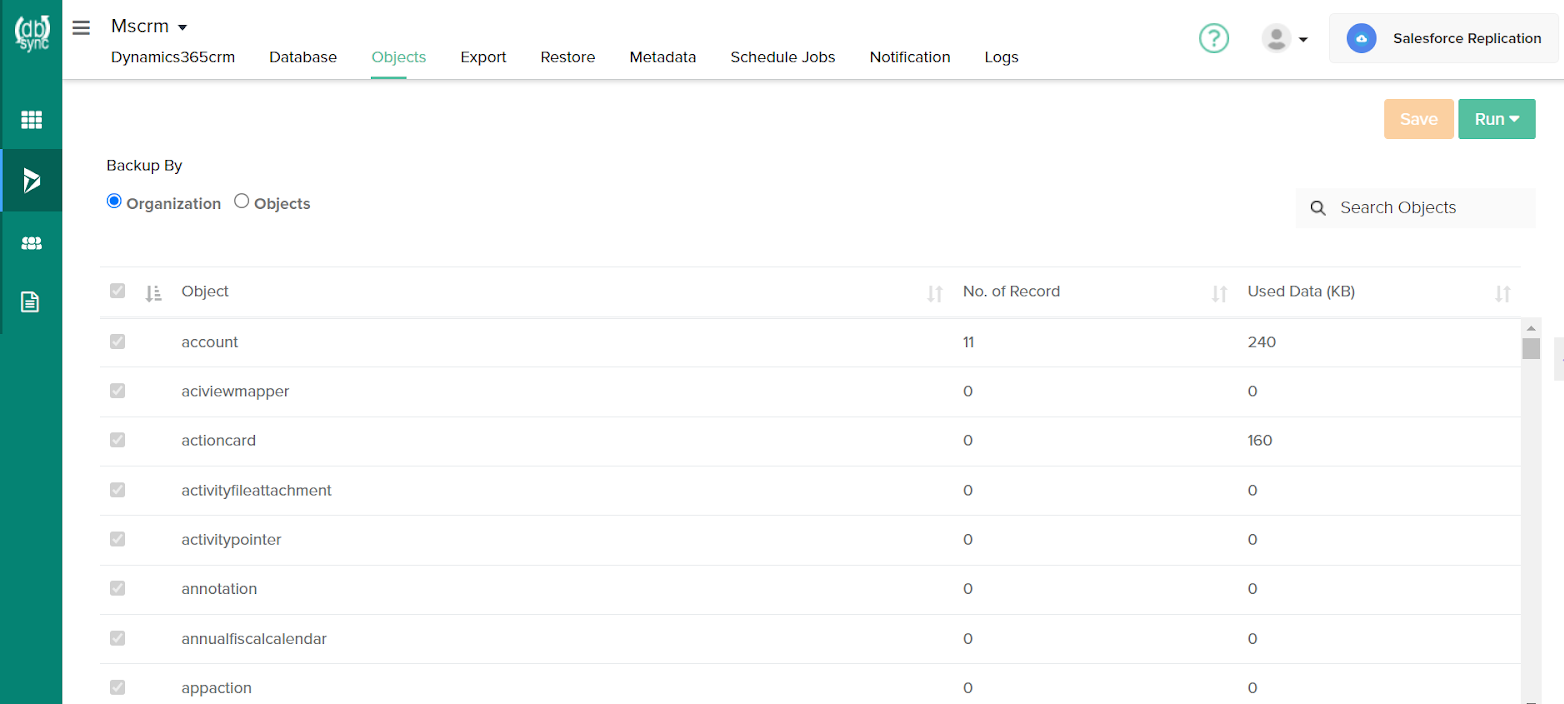
Select the object fields you want to sync into the database from the "Available Fields" section and use the "exclude fields" section to filter out fields you don't want to sync into the database.
Click the RUN button and select the Clean Copy command to get an exact copy of your Dynamics 365 CRM-selected objects.

Choose any of the 2 functions to perform:
Run Process | Actions Performed |
Clean Copy | Inserts a clean copy of Dynamics 365 CRM object records into respective database tables & columns. |
Source to DB | Performs incremental sync from Dynamics 365 CRM to the database based on the changes/edits made in the Dynamics 365 CRM |
Overview
Content Tools