2022
The scheduler allows a user to add a process to a job scheduler (also referred to as a “cron”). This enables database synchronizations to occur automatically (as per the time scheduled by the user).“Cron Settings” refers to a time at which a user sets the process to perform the synchronization.
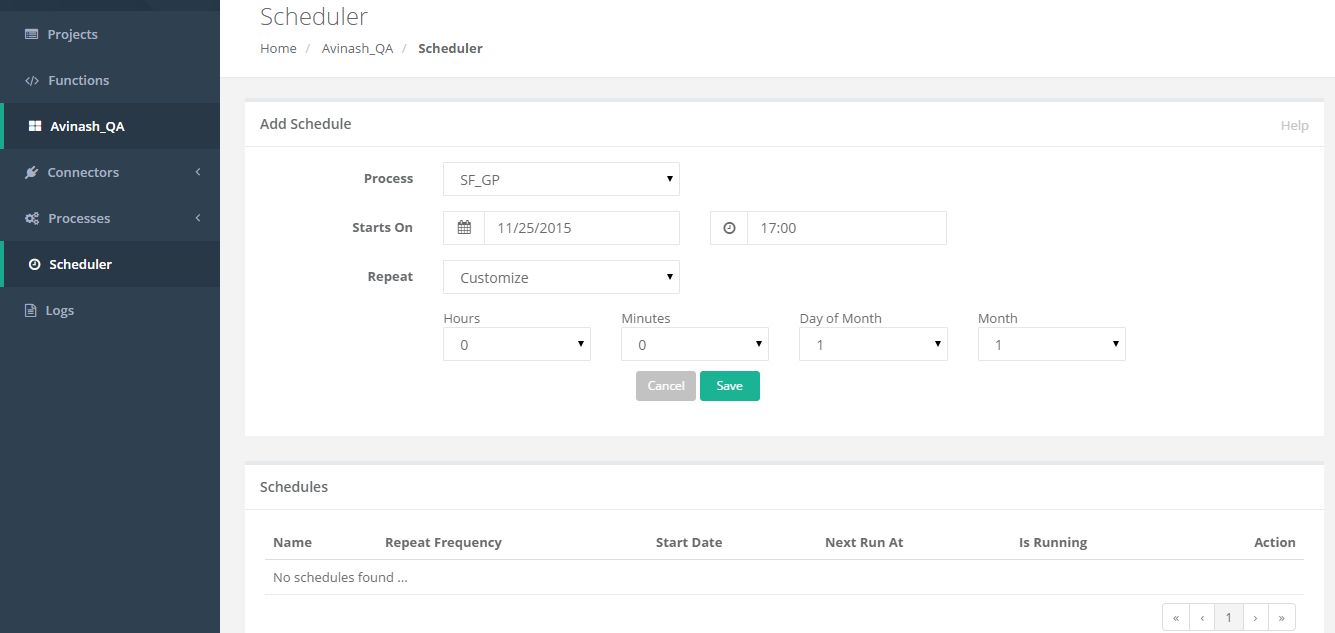
The Scheduler page can be accessed, within a project. The screenshot below illustrates the scheduler process.
Create, Edit and Delete Schedule
To create a scheduled job, follow the guidelines:
- To create a scheduled job, select a process to create a schedule. Select a date range and a repeat factor and Save.
- The record saved will be displayed as the top record in the schedule table - as shown in the screenshot below.
- The Repeat factor is usually of two types - (1) No Repeat - where a single job is created, executed and purged; or (2), if any time interval is selected, the job created will repeat for the selected time intervals.
- To Edit a scheduled job, click on the Edit button from the schedule table and make the changes from the form. In the case of the edition, Save as will be enabled so that a new record will be created, if the user selects save, the same record will be overwritten.
- To Delete a scheduled job, click on the Delete. The record will be purged from the database and no future schedules will run.
The Below table explains the schedule elements of the schedule.
S.No | Element Name | Element Description | Possible values |
|---|---|---|---|
1 | Start Date | The date on which job should be triggered | DD-MM-YYYY |
2 | End Date | The date on which job should end in case of repeat | DD-MM-YYYY |
3 | Hours | Hour is the time component | 0-23 |
4 | Minutes | Minutes are the time component | 0-59 |
5 | Days of Month | Possible day of the month | 1-31 |
6 | Month | Possible months within a year | 1-12 |
![]() The scheduler is not supported for QuickBooks Desktop Integration as QuickBooks WebConnector is used to schedule data transfers.
The scheduler is not supported for QuickBooks Desktop Integration as QuickBooks WebConnector is used to schedule data transfers.
Overview
Content Tools