2022
Page History
...
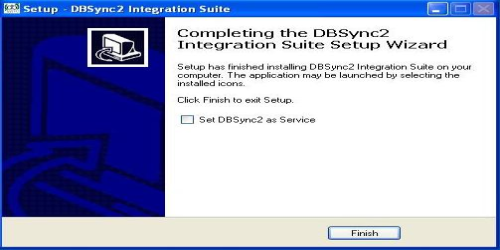
Note: You can also use DBSync as a service by having the check box checked as shown above.
Configuring DBSync with Salesforce and Quickbooks
DBSync Setup:-
- Open www.mydbsync.com and click on Customer Login tab.
- Login with your DBSync username & password .
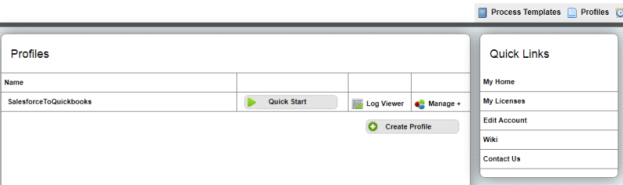
- Click on My Home tab from the Menu and click on Launch button to navigate to DBSync Profile page.
- Click on the Quick Start button on the profile page.
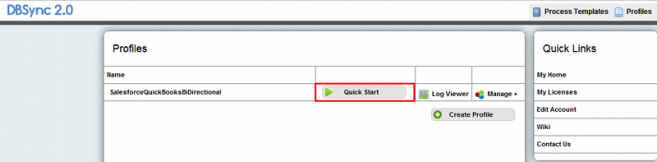
- This would open up a pop-up window with the screen similar to the one shown below. This screen provides you the step-by-step instruction for configuring your DBSync setup for performing the integration.
...
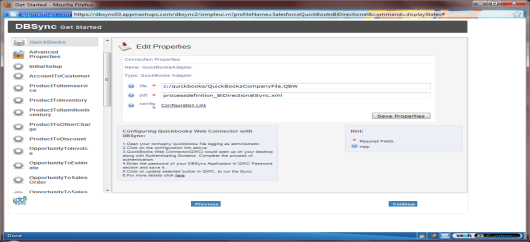
- Fill in required details for each adapter and save it. You can proceed to the next step by clicking the Continue button at the bottom of the screen.
...
- Click on the Quickbooks adapter in the left column, enter full path of your QuickBooks file in the file section of the 'QuickStart' window.
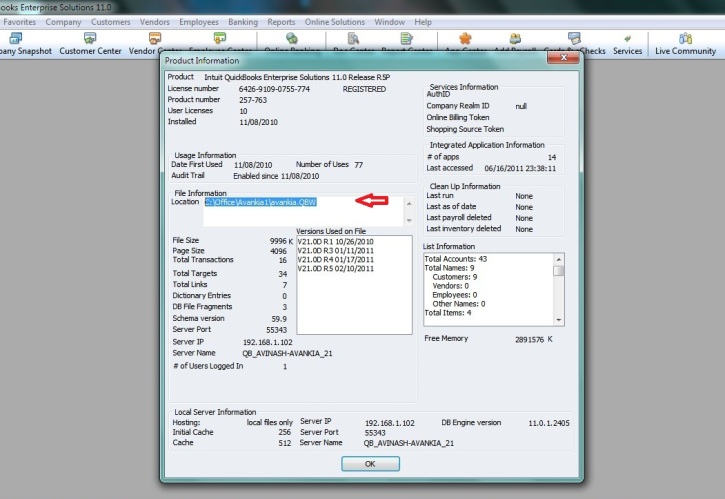
- You can retrieve full path / location of your Quickbooks file by pressing 'F2' key on your keyboard when in Quickbooks 'Home' page as shown below.
- Once done entering the path of the Quickbooks file, click on Save Properties button.
- Once the Quickbooks credentials are saved, click on the configuration link and open the .QWC file with QuickBooks Web Connector.
...
- Click on OK on the Authorization screen.
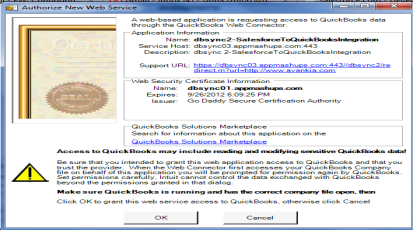
- Select the option "Yes, always; allow access even if QuickBooks is not running". Click on Continue and Done.
...
- After clicking on Done, the QuickBooks "Web-connector" is launched with the configured integration profile as shown below.
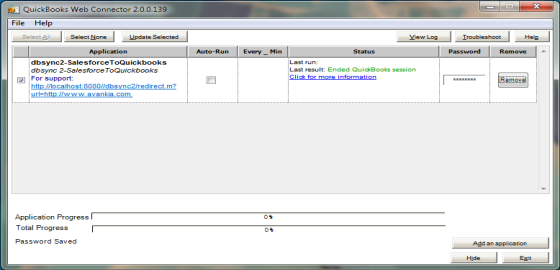
- Once through with the configuration of the web-connector, enter your "DBSync Password" under the password section of the Web-Connector and press "Enter" key on your keyboard. You will be prompted to store the password, click on Yes to store your DBSync password.
- This completes the configuration process of your Quickbooks with DBSync. You can run the integration by checking the "check box" besides your profile in the web-connector and clicking on the Update Selected button.
...
Downloading and Uploading DBSync Integration Profile
- Login to www.mydbsync.com
- Enter your DBSync username & password.
- Click on My Home from the Menu tab and click on Launch button to navigate to DBSync Profile page
- Click on the *manage ? edit* as shown in the screenshot below.
...
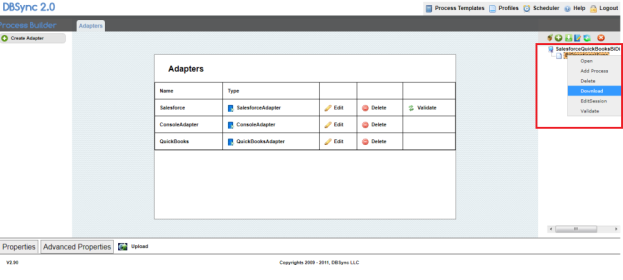
- Once clicked on edit, you will be redirected to the DBSync console page.
- Right click on the PDL (Bi-directionalSync) and click on download from the list menu as shown in the screenshot.
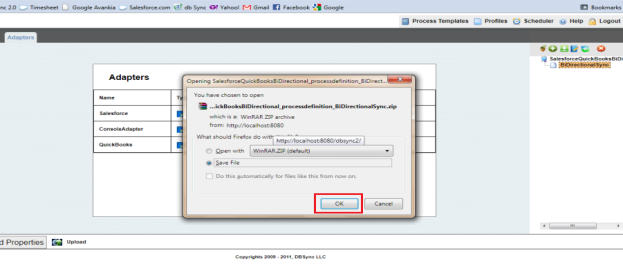
- Click on OK button and save the profile to the desired location on your hard drive.
Uploading DBSync Profile
- Once logged into DBSync home page, click on Launch button as illustrated in the above steps.
- You will be redirected to DBSync profile page. Click on the create profile button to create a new DBSync profile as shown below.
...
- Click on the Save button to create a profile with the desired name.
- A new profile is added to your DBSync console as shown below.
- Once the profile is created, click on *manage? edit* as shown in the above examples.
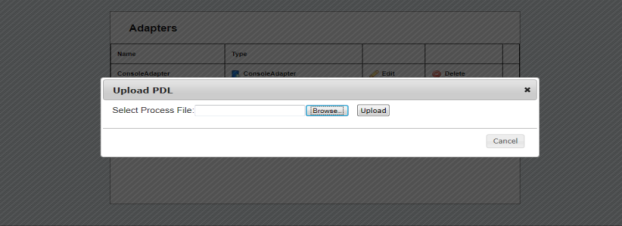
- You will be redirected to the console page, click on the upload link as shown.
...
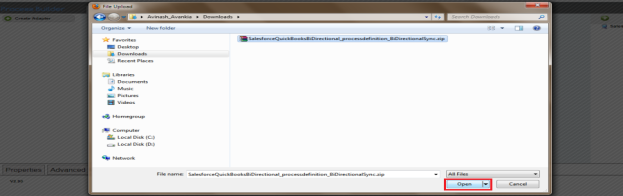
- A pop-up browser window will open. Select the location of your downloaded DBSync profile and upload the same as illustrated below.
- Navigate to the folder / path where your profile was downloaded previously, select the file and click on Open button as shown below.
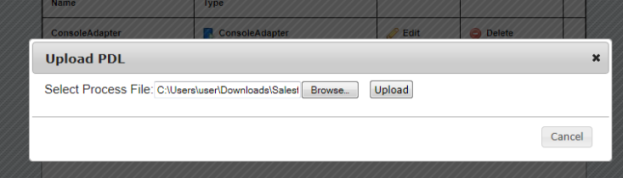
- Once you select the PDL file to upload, click on upload button as shown to complete the upload process.
- Once the upload is complete, a new window / tab are opened in your browser indicating that profile has been uploaded successfully.
- Once the profile is uploaded successfully, validate your Salesforce and Quickbooks credentials as illustrated in the above steps.
Overview
Content Tools