2022
Multiple Price Levels of QuickBooks can be integrated with the respective Salesforce Price Books using DBSync. This section explains the steps involved in DBSync customization for multiple Price Level Integration.
Customization Steps:
- Lets take an example of integrating two QuickBooks Price Levels PriceLevel1 & PriceLevel2 with Salesforce Price Books. To start, two Salesforce Price Books PriceBook1 & PriceBook2 should be created. The below process will sync the items of QuickBooks PriceLevel1 & PriceLevel2 with Salesforce Price Books PriceBook1 & PriceBook2 respectively.
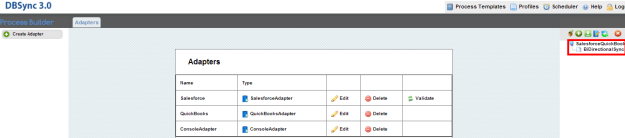
- Login to DBSync account using your credentials. Click on Launch to open the DBSync profiles in the next tab of browser. Go to DBSync Profile Salesforce QuickBooks Bidirectional, click on manage and then edit.

- Adapter list will be displayed. Ensure that Salesforce Adapter is validated and QuickBooks webconnector is configured.
- Double click on Bidirectional Sync to open all the available states of DBSync Standard Integration for Salesforce and QuickBooks.
- Create a new state PriceLevelToProduct2 between the states ItemSalesTax2Product and InvoiceToOpportunity and connect the states as shown below and Save.

- Open dataflow of PriceLevelToProduct2, create Reader, Map and Writer and connect them as shown below.

- Open Reader Properties and enter the details as shown below and Save.

- Open Writer Properties and enter the details as shown below and Save.

- Open Map Properties, enter the sequence number and the description as required and Save.

- Open Map Properties, click on edit to map the fields in the next tab of browser.

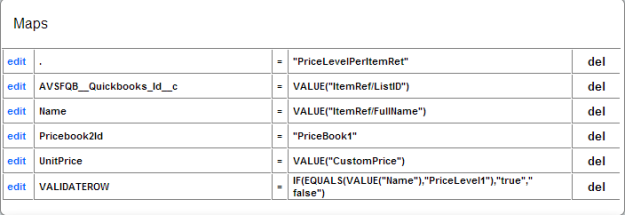
- Map the fields as shown below and Save. PriceBook1 is the name Salesforce PriceBook and PriceLevel1 is the name of the QuickBooks Price Level.
- Create another Map and Writer to sync QuickBooks PriceLevel2 with Salesforce PriceBook2 and connect them as shown below.

- The same Reader will be used to connect with the second Map and Writer.
- Open Writer Properties and enter the details as shown below and Save.

- Open Map Properties, enter the sequence number and the description as required and Save.

- Open Map Properties, click on edit to map the fields in the next tab of browser.

- Map the fields as shown below and Save. PriceBook2 is the name of Salesforce Price Book and PriceLevel2 is the name of QuickBooks Price Level.

- To sync new QuickBooks Price Level, repeat the above process. For every PriceLevel in QuickBooks, create a new Map and Writer and edit the properties and maps as discussed above.
Overview
Content Tools