2022
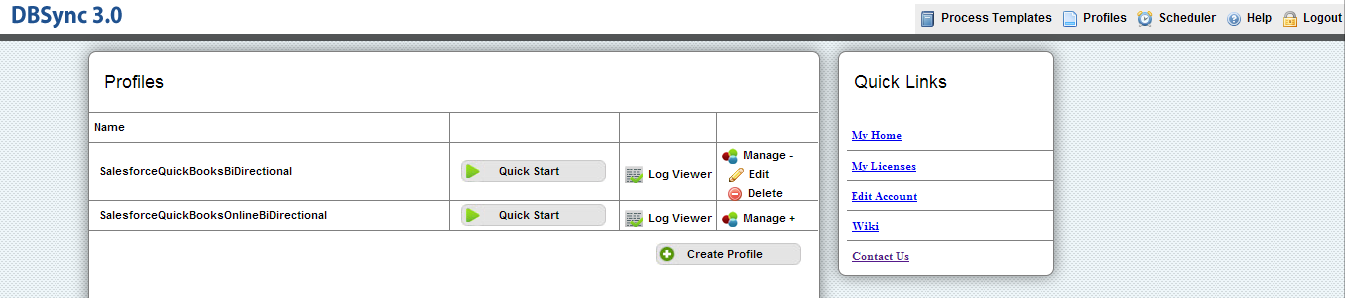
- Go to www.mydbsync.com, click on Customer Login. Enter your User Name and Password and click on Sign in. Click on Launch to access DBSync Integration Console.
- In DBSync console click on Edit Link from Manage Toggle Button.
- Click on Edit link for Salesforce Adapter. Enter Salesforce User Name and Password and click on Save Properties button. Click on Validate button to validate the Adapter.
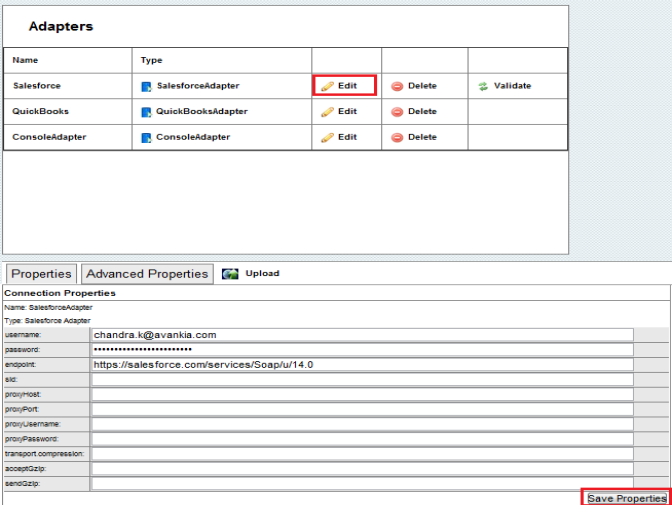
- Click on Edit Link for QuickBooks Adapter. Enter QuickBooks File Path in file text box and click on Save Properties.

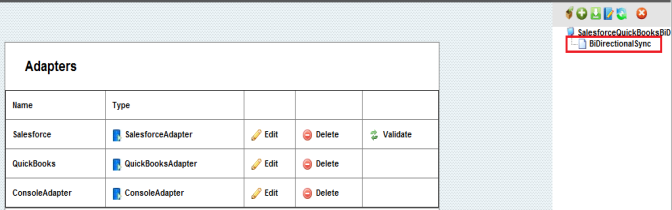
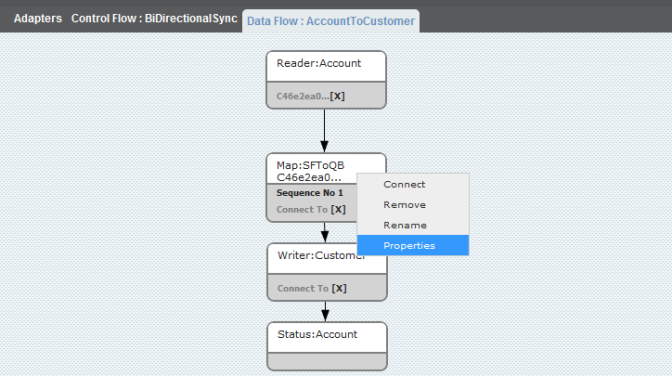
- Double Click or Right Click\Open on the BiDirectionalSync Process to open it for editing.
- If you are using SalesforceQuickBooksBiDirectional profile, you will find a list of states with control flow on process Builder Screen.
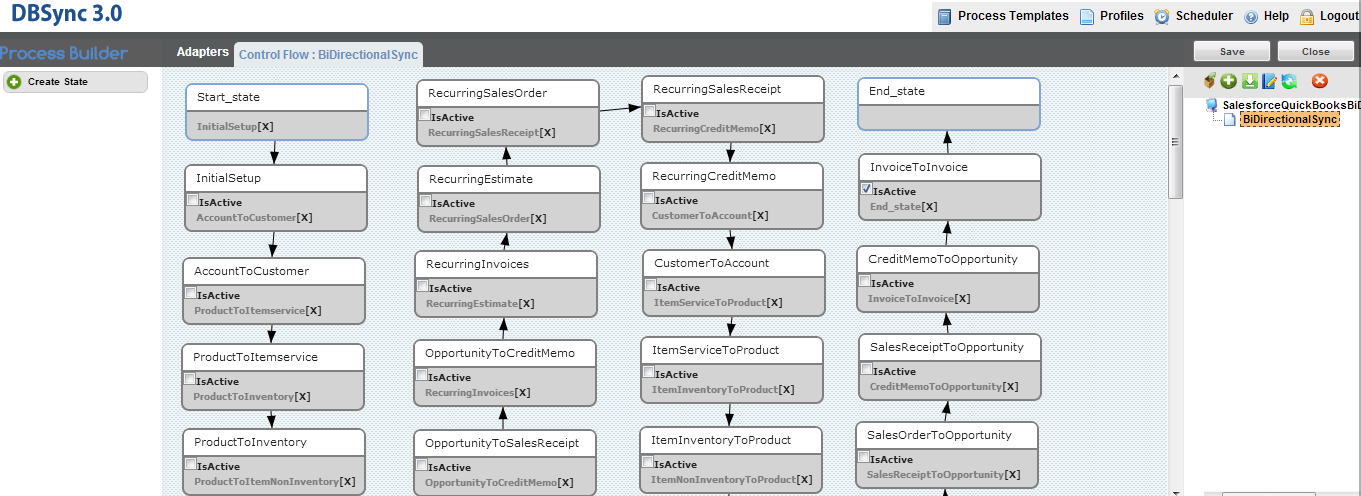
- You can Drag and Drop create state button onto the control flow area to create a new state or double click or Right Click\Open to open any state. In this tutorial I will edit Account to Customer State. So Right click\Open on Account to Customer state. Once On the DataFlow page, Right Click on Map:SFToQB and click Properties as shown below:
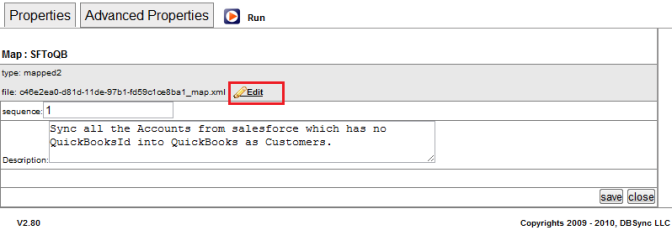
- Scroll down to properties area and click on Edit link to open the mapping screen.
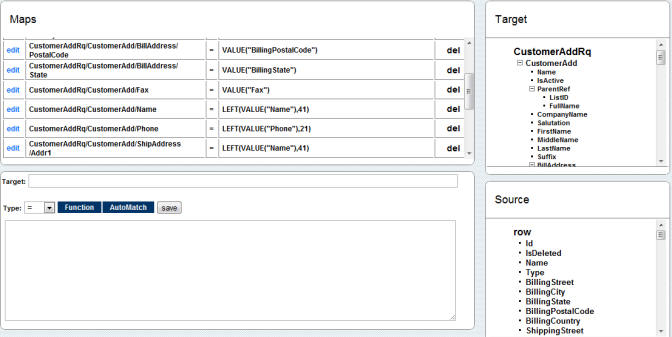
- Make the changes required on the mappings by clicking the edit link on the left or to add a new mapping simply click on Target Column followed by Source Column and click on Save button to save it to maps. A Screenshot of the mapping screen is shown below.
- Once done click on the close button to close the on top right. Move to Previous window (Data Flow screen) and click on Save & Close button on the top right. This will save the BiDirectional sync profile. You can test out your mapping by running the sync from QuickBooks Web Connector.
- Go to Windows Start ? Programs ? QuickBooks ? Web Connector
- Web connector is launched with the selected integration profile, select the integration profile/profile Name, Enter dbsync password and finally click on "Update Selected" to make a sync.
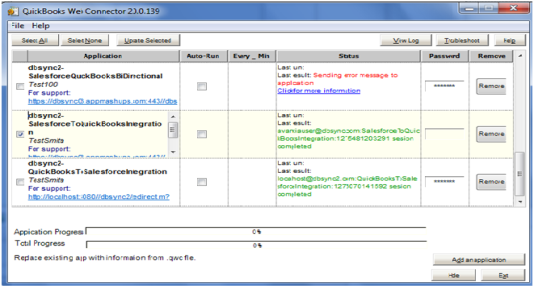
- Check your Salesforce and QuickBooks Instance for updated data.
Overview
Content Tools