2022
- Click on Customer Login in www.mydbsync.com and enter the registered user name and password to sign in, then click on Launch to Access DBSync Integration Console.

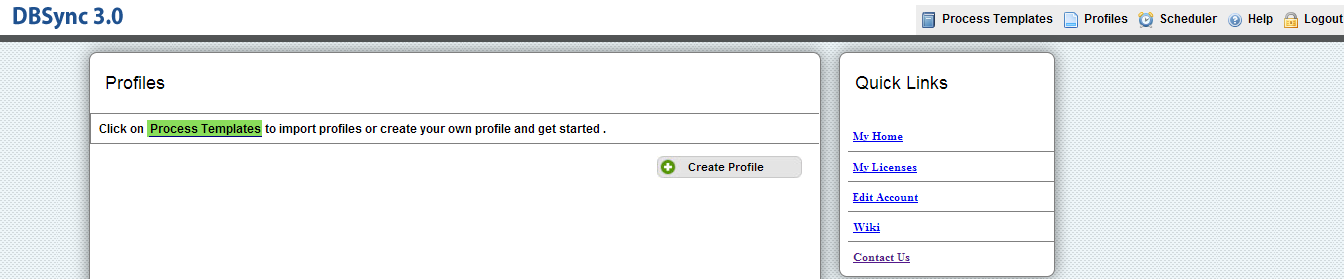
- You will be redirected to DBSync console, select Process Template from top Menu to add a Process Template in DBSync Console. It will take you to Process Template Page.
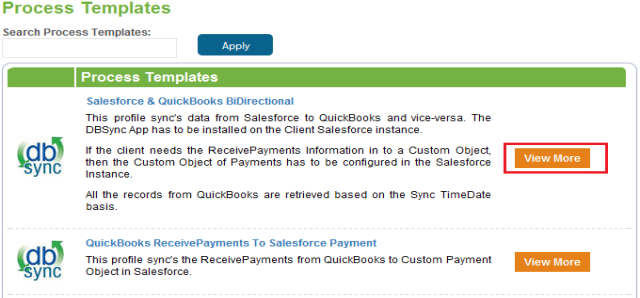
- Choose your process template according to the adapters you have. In this Demo I will be using "Salesforce & QuickBooks Bidirectional" Template. Click on View More Button In front of the Process Template and on the next screen click on Add Now Button.
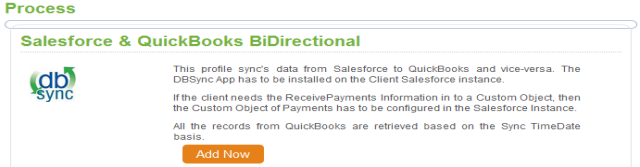
- A new profile will be added in profiles section with Process Template Name.
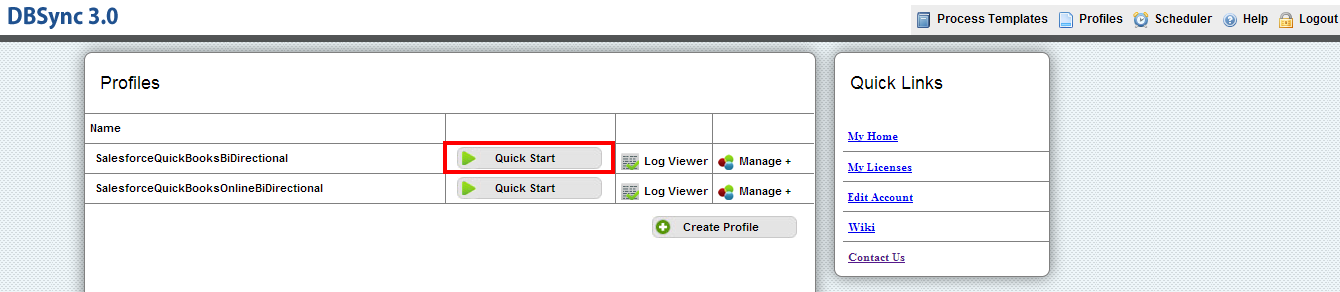
- Once the process is added, click on "Quick Start" Link in Profiles Section of DBSync Console. You will be presented with a new page to get you started with configurations for Integration.
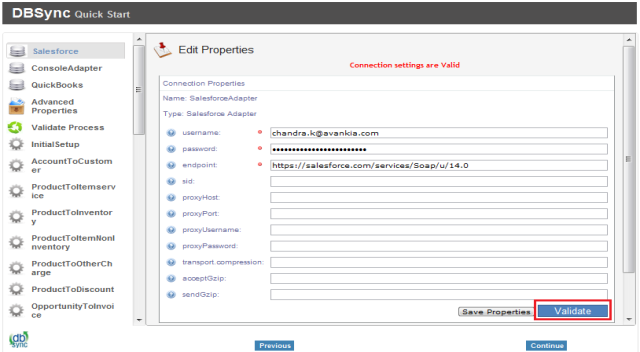
- Enter your login information in the properties window for Salesforce and click on validate button to validate the login credentials of Salesforce. Once you receive the message "Connection settings are valid" click on Continue button at the bottom. If you receive the message "Connection settings are invalid" then please check the followings
- Check whether User ID and Password for Salesforce is correct.
- Is there any invalid Network Access Settings.
- Make sure that security token is added in your password (for Salesforce Adapter)
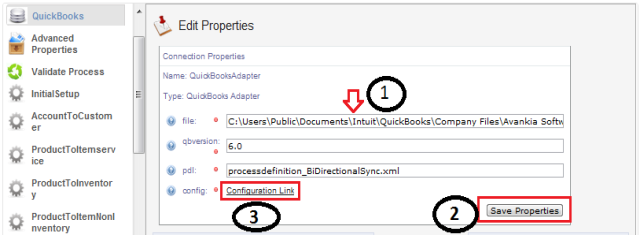
- Click on QuickBooks link from the left Menu to open QuickBooks settings. Enter you QuickBooks Desktop file path in the "file:_\* (file:_*)" text box and click on *Save Properties button. Click on configuration Link{_} at the bottom.
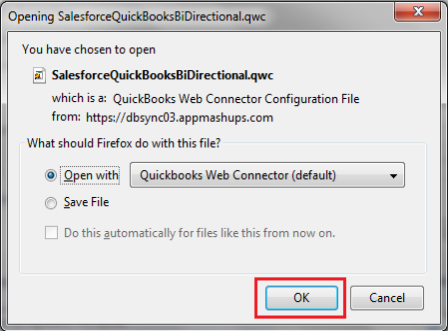
- A Pop-up box will appear, asking to open the file with "QuickBooks Web Connector (default)" click on OK button as highlighted below in screenshot.
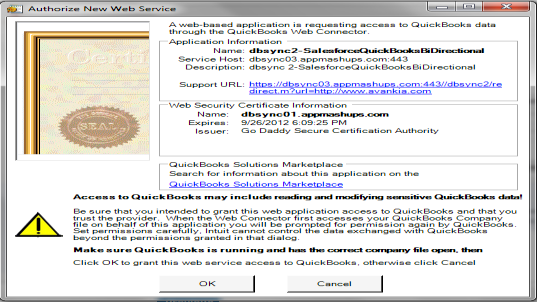
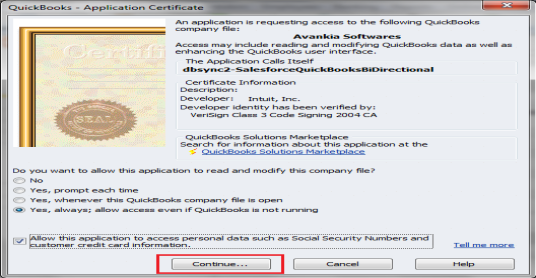
- Click on OK in the next window (first screenshot below) and on the next window select the option button "Yes, always; allow access even if QuickBooks is not running" and check the check box for "Allow this application to access personal data" and click on continue button (second screenshot below).
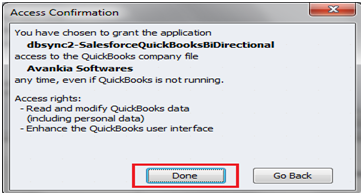
- In the Access Confirmation window click on the Done button. And the profile will get added to your QuickBooks Web Connector. A screenshot of the QuickBooks Web Connector is displayed
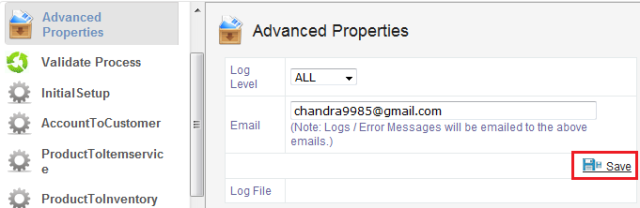
- In the Advanced Properties settings select ALL from Log Level Drop Down. Enter your Email- ID in Email Text Box so you can receive notification results for every Integration. Click on Save Button below Email to save these settings. Click on Continue button at the bottom to move to Validate Process.
- On Validate process click on the button Click to Validate Process. This process will check all the Adapter settings, mappings and states for the sync and present you with a report. In the report all the valid actions are marked with a green check icon as
 and all invalid actions are marked with red minus icon as
  . If all the actions are valid ( ) then click on continue button at the bottom.

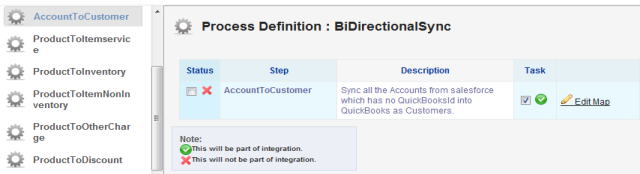
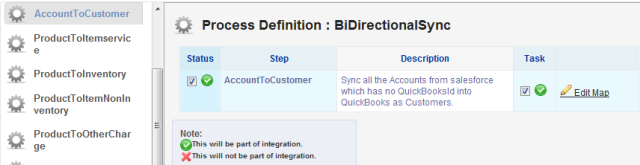
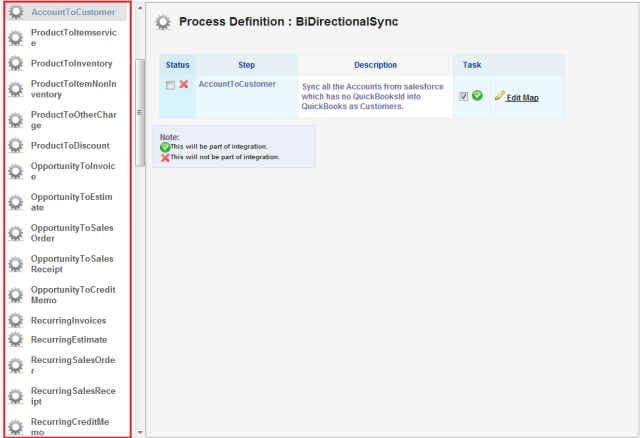
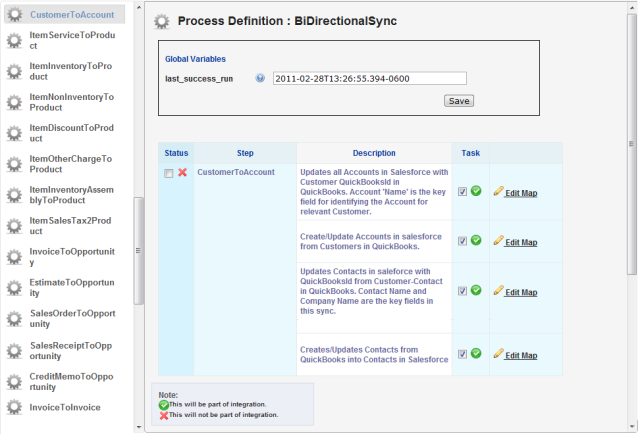
- All the default mappings are listed in the left menu. You can choose to use or not use any mappings, like in the images below the mapping is done for Salesforce Accounts to be moved in QuickBooks as Customers. You can check the Status Check Box to make it part of integration, if you leave it unchecked it will not be part of integration. Similarly you select or deselect other mappings as required. You also have the capability to create custom mappings as per your business process.
Salesforce as Master Database
- Enable the only states highlighted in screenshot below to make Salesforce as master database for uni-directional integration.
QuickBooks as Master Database
- Enable the states highlighted in screenshot below to make QuickBooks as master database for uni-directional integration.
Run Integration
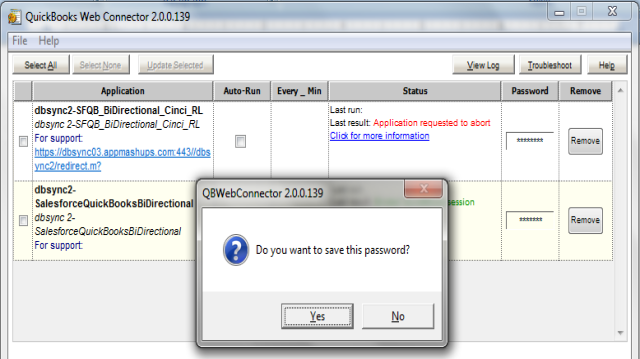
- Once you are done with the mappings go to your QuickBooks Web Connector by Start?All_Programs?QuickBooks?Web Connector* and click on the password textbox for profile *{*}dbsync2-SalesforceQuickBooksBiDirectional* as highlighted below:
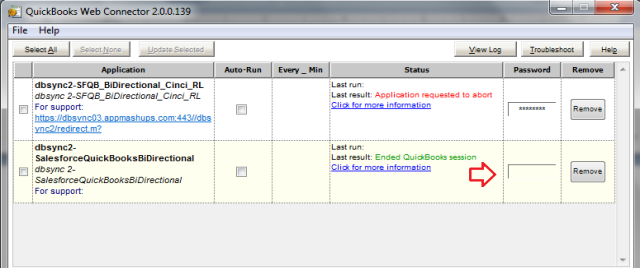
- Enter your DBSync password in the in the text box and hit Enter on your keyboard. One Message Box will be displayed asking you "Do you want to save this password" select Yes button. DBSync Password will be saved in the web connector.
- Check the DBSync2-SalesforceQuickBooksBiDirectional check box and click on Update Selected button and sync will start and complete automatically.
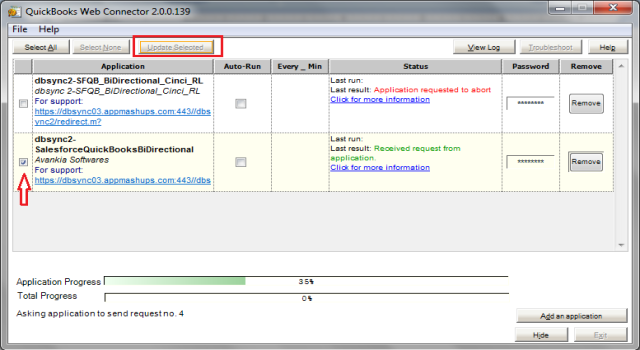
- Data for all the mappings will be updated in Salesforce or QuickBooks according to the state selection by you.
Overview
Content Tools