2022
Installing On-Premise version of DBSync
- Open www.mydbsync.com from your browser and click on Customer Login.
- Login to your DBSync profile by entering your DBSync Username & Password.
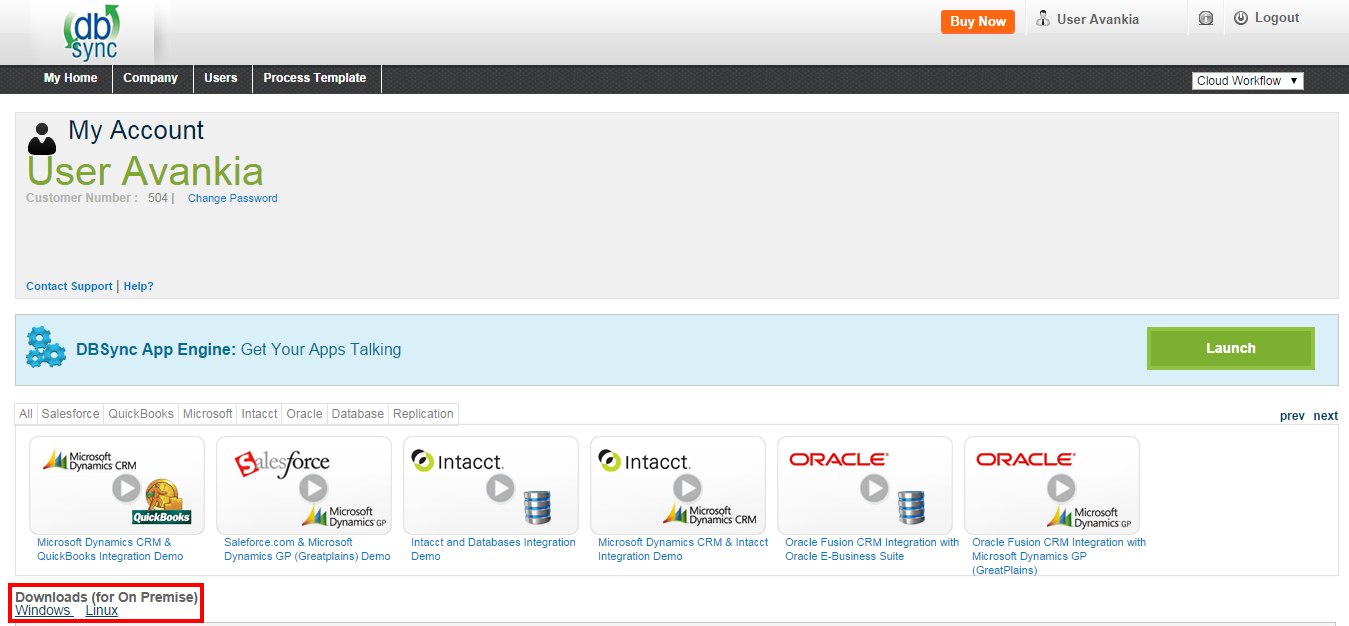
- Once logged in, click on My Home tab on the DBSync menu.
- Download DBSync application by clicking on the Download link as shown.
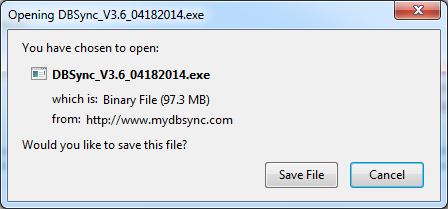
- Click on Save to save it in your system to run the installation at a preferred time.
- Double-click DBSync_V2.92.exe to start the installation. The "Welcome to the DBSync2.0 Integration Suite Setup" Wizard displays
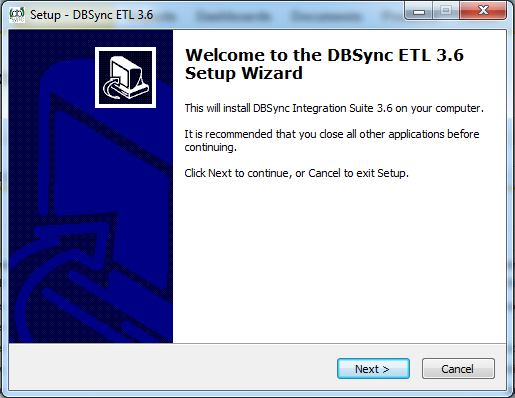
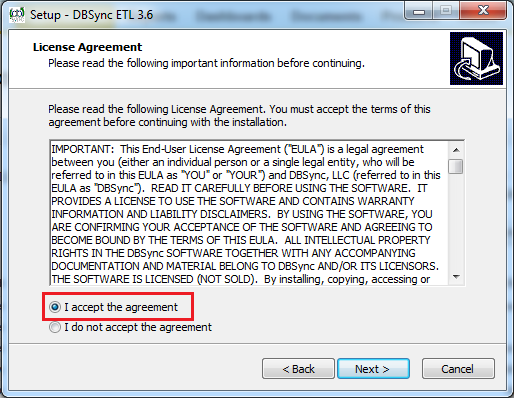
- Select "I accept the terms of the license agreement" and click Next.
- Click Next button, to use the default directory for installation.
- If you want to install DBSync in a different location, then click Browse and specify the location.
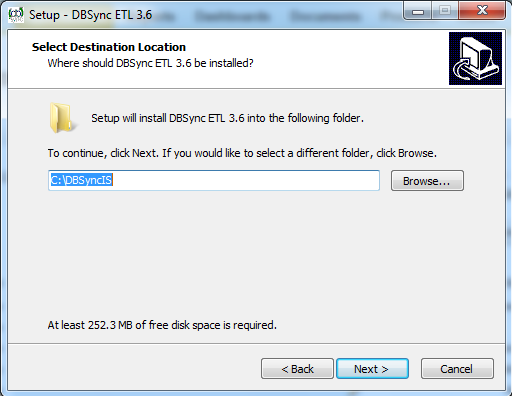
Note: The minimum free disk space required to install the DBSync 2.92 in your system is 132.5 MB
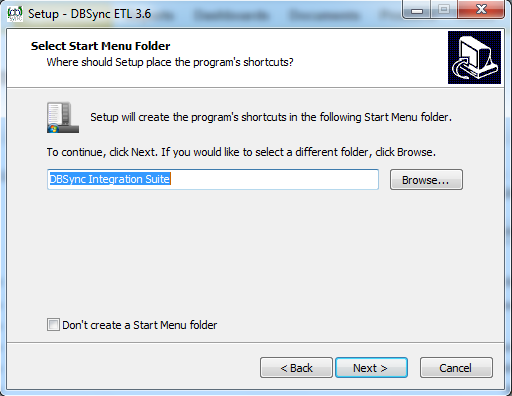
- Click "Next" button*,* to use the default directory for start menu folder.
- If you want to select a different start up DBSync 2.0 folder, then click "Browse" button and specify the folder.
- If you don't want to create a start menu folder, then check the "Don't create a Start Menu folder " checkbox.
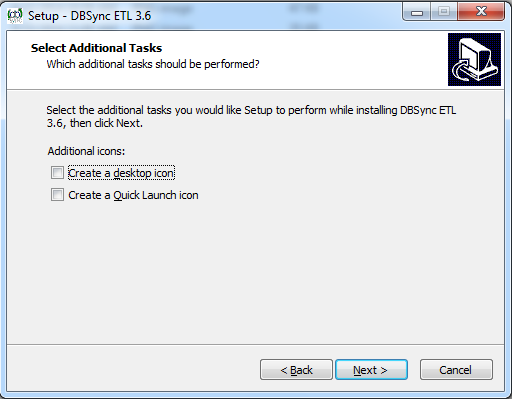
- Select the additional tasks and icons that you like setup to perform while installing DBSync 2.0 integration suite
- Select the additional icons checkbox to create the " Desktop " and " Quick Launch " icons
- Click Next. The Ready to Install Wizard displays. You can view the installation destination location, folder and additional tasks you have selected.
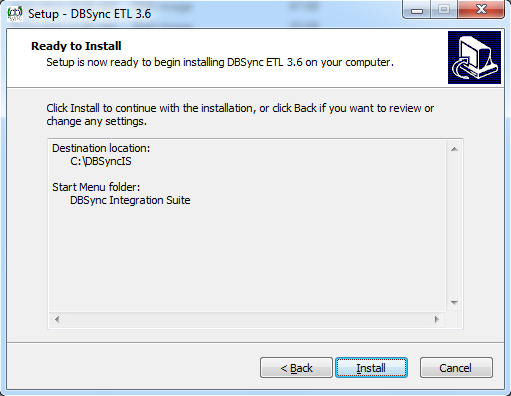
- Click Back to review or to do any changes.
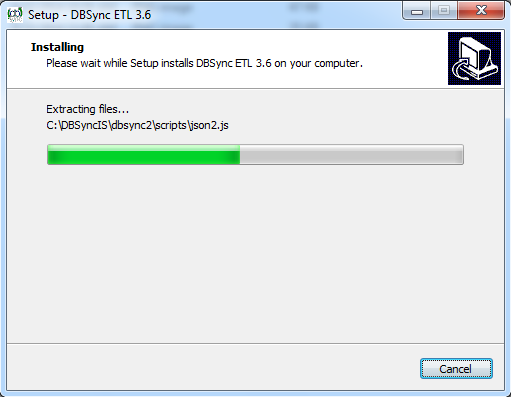
- Click Install to continue with the installation. The Installing Progress wizard displays the progress of installation as the files are being copied.
- Click Cancel to stop the installation, else the installation completes without any interruption.
- The DBSync 2.0 Completing Integration Suite Setup Wizard displays the status of the installation.
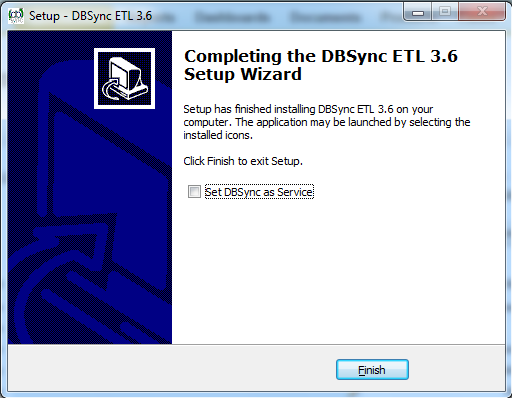
Note: You can also use DBSync as a service by having the check box checked as shown above.
- Click on Finish to complete installation of On-Premise DBSync.
Overview
Content Tools